Binkies and Briefcases

SUBSCRIBE

  • About
    • Work With Me!
      • Blog & Small Business Consulting
    • Disclosures
  • Popular Posts
  • Adoption & Special Needs
  • Saving Money
  • Recipes
    • Breads
    • Breakfasts
    • Sides
    • Soups
    • Entrées
    • Desserts
  • For the Home
    • For the Home
    • Beauty
    • Crafts
      • For Kids
  • My Books

My Mom Got her phD!

November 22, 2013 By: Stephanie1 Comment


walt disney quote

Yesterday I was gone all day. My grandfather and I drove to Maryland to support my mom as she gave the final defense of her dissertation at Loyola University.
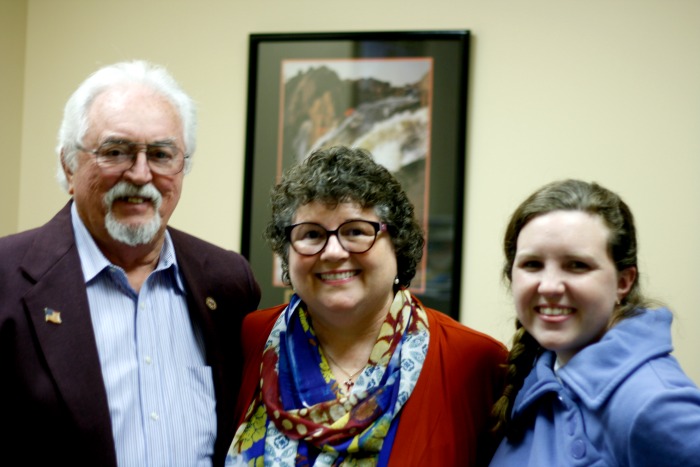
defense

SHE PASSED!

In January Dr. Teresa Wilkins, or, as I call her, mom, will be graduating with her phD.

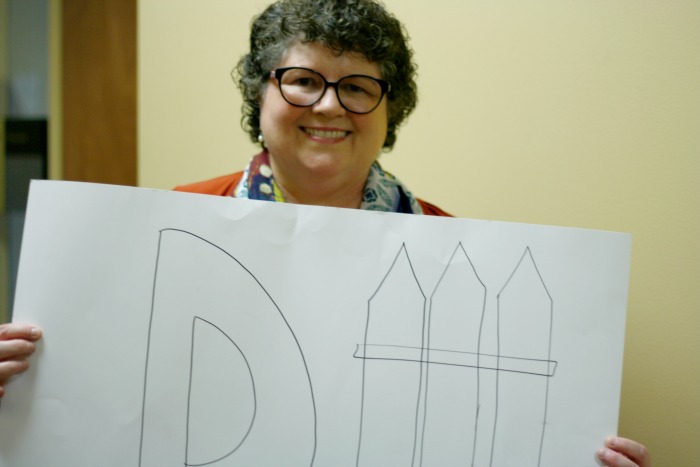
I made a very special sign for the occasion. Defense! Defense!

Mom's defense 1

Apparently family isn’t usually allowed into a defense, but the staff had some confusion about that and they let us into the room, so Poppop and I got to see her presentation.

It was much more casual than I imagined. For some reason I was picturing the panel of professors to be wearing their robes, hats, and gowns and my mom to be standing behind a podium sweating and answering rapid fire questions meant to trip her up.

That’s not how it happened at all.

It was very casual. A lot of people were wearing jeans. The student body was invited and I guess there were about 20 people in the room, which was a regular college classroom. My mom gave a PowerPoint presentation summarizing her findings and conclusion. The professors on the panel (I’m not sure that’s the right thing to call it) were very supportive. They did ask a few questions and encouraged her to add some notes to her final chapter for clarification.

Her dissertation was on measuring levels of spirituality in students at Messiah college through the course of their time in school. She proved (with math and stuff) that an Evangelical Christian school education can actually raise levels of spirituality and religiousness in young adults, although statistics usually say otherwise in this age group. This has practical implications in the field of counseling because it has already been proven that high levels of spirituality and religiousness can act as a shield against negative influences (eating disorders, bad relationships, etc.). -At least that’s what I took away from the presentation. 

Her presentation lasted 30 minutes, then there was about 30 minutes of questioning.

We all left the room for about 15 minutes while the panel/committee/ group of deciding professors/whatever they’re called deliberated whether or not she passed.

Then they came out and said, “Congratulations!” SHE PASSED! She just has to add a few notes to her final chapter.

 Then we all went to Applebee’s.

The good doctor should be graduating with her phD. in January.

Share this:

  • Click to share on Facebook (Opens in new window)
  • Click to share on Pinterest (Opens in new window)
  • Click to share on Twitter (Opens in new window)
  • More
  • Click to share on Pocket (Opens in new window)
  • Click to share on Tumblr (Opens in new window)
  • Click to share on Reddit (Opens in new window)
  • Click to share on LinkedIn (Opens in new window)
  • Click to print (Opens in new window)

Holiday Gift Ideas for Teachers (from a teacher)

November 21, 2013 By: Stephanie62 Comments


This is a helpful list for parents who are looking for practical ideas for ways to show appreciation to their child's teacher by giving a gift.

Before I had children (and for a little while when we only had Nicholas), I was an elementary school teacher. I taught first grade, spent a few years as a gifted specialist teaching math and science to 3rd-5th graders, then I taught second grade. Then a few years later, I briefly went back into the classroom as a middle school teacher. I’ve taught in very affluent and very low-income areas. Teachers usually do not expect gifts from any of their students, but in my experience, families often want to give but sometimes struggle with ideas. 

While I was a gifted specialist, I had about ninety students on my caseload. Because we were in a very well-to-do area, I received many gifts from the generous families of my students around the holidays. 

I was always very grateful to receive any sort of gift, but have you ever tried to find space in your home for 75 new mugs or candles? It can be a little overwhelming. Especially if you got 63 the year before.

I thought it might be helpful if I put together a list of the best and worst gifts to give a teacher. I truly hope I’m not offending anyone. I don’t mean for this to come off as at all ungrateful, but I know parents often struggle with gift ideas for teachers and I hope this list helps a little. These opinions are based on my own experience and observation and might vary from the opinions of other teachers. I’m not here to judge, just offering suggestions. No worries, if you did give your teacher a mug or a candle, I promise she still loves it and feels very appreciated.  

Everybody still on board? Okay, here we go:


Teacher favorites:

1. Books. A nice book with a handwritten note inside the cover is one of the very best gifts. Don’t worry about if your teacher already has that particular book, I know I liked keeping multiple copies in my classroom library. I not-so-humbly suggest the one I wrote. 🙂

2. Stationery or classroom supplies. One of the most useful gifts I ever received was a beautiful set of thank you cards. I spent a lot of time writing thank yous for all those lovely gifts and other things throughout the year. I also used quite a bit of regular stationery sending notes to parents, students, and other faculty members.

3. Gift cards. Whether it is a $5 gift card to Starbucks or a $20 gift card to the office supply store, gift cards are always appreciated. Teachers spend a lot of their own money on classroom supplies. It’s nice to have a little to spend on ourselves or to splurge on the class without taking money away from our own families.

4. A class gift. It is always very special when the room mom collects donations and the entire class pulls together for one larger, personalized gift. It could be an apron with everyone’s hand print, a framed class photo where everyone wrote a note around the matting, or a certificate for a spa where I never would have splurged on myself. These gifts show a lot of thought, make me feel loved, and make everyone feel included-even those students who can’t afford to donate.

5. Just a card. A thoughtful, hand-written note in a card, maybe with a wallet sized photo of your child, is the type of gift I will save for years, long after the mugs are broken and the candles are burned.

6. Store bought food. I once had a parent drop off a breakfast sandwich and hot chocolate from a nearby restaurant about 20 minutes before our school day started, which I thought was very sweet. Girl scout cookies are also pretty sweet.

7. Ornaments. This one is touchy. If a teacher has been teaching for 20 years, she probably has amassed quite a collection and might not be as enthusiastic about them, but ornaments were one of my very favorite gifts. I truly loved my job and my students and I like having the reminders of them on our tree at home every year.

8. A magazine subscription. I would have loved a subscription to Highlights, Time for Kids, Ranger Rick, Zoo Books, etc. for our classroom. The cool thing about this gift is that it is not very expensive and it keeps giving for an entire year.

Please Avoid:

*Before I start this section, I need to say that there is really no such thing as a “worst” gift to give a teacher. Any gift from the heart is a great gift. But in the interest of practicality and being honest, I have included some of the most common least favorites.  

1. Mugs. I literally have hundreds of mugs. I feel bad donating them because each one reminds me of the special student who gave it to me.

2. Candles. Similar to mugs, but while I can use mugs in the classroom, I can only burn candles at home and I already have enough to get me through the next several years worth of power outages.

3. Homemade food. This is hard to say because it hurts people’s feelings. I know you worked hard to make this. I know you are “famous” for these cookies. I’m not allowed to have them in my classroom because I have students with allergies. To be honest, I will probably take them to the faculty room and they might not be eaten there either. Unless I know you personally, I am reluctant to eat your food or take it home to my family. If we have recently “had words” because you disagreed with a grade I gave your child, I *might* be slightly afraid you are trying to poison me.  (That’s a joke.)

4. Jewelry.  There are some very nice, personalized pieces from Etsy stores that I’m sure teachers would love to receive, but for the most part the jewelry we get is holiday themed, costume pieces or dress-up jewelry from Claire’s. Then we feel obligated to wear it to work so that the students see how much we “love” their gifts. I’d rather not sit in a training meeting with my boss’s boss after school or an IEP meeting with other parents with plastic, blinking Santa hats hanging next to my face because a.) it’s unprofessional and b.) It’s January because I did not receive this gift until the last school day of December. But I’m still going to wear it with a smile anyway, for the sake of your child.   

5. Cash. This is very awkward for the receiver. While a $5 gift card to Starbucks with a cute note saying that I should treat myself feels thoughtful, opening a card and finding $5 in cash makes me feel like I’m the third grader in this scenario. Larger amounts of cash can feel like a bribe, and the school board would frown upon me if I accepted it.


Well, there you have it. Do you have anything to add to either list?

P.S.  If you want to see some truly bad gifts, check out this list of the worst possible holiday gifts from Divine Secrets of a Domestic Diva.

UPDATE: A few readers requested that I update this post to gently suggest that before you spend the time, money, and energy to make something you saw on Pinterest, like a tire-sized wreath made out of crayons, please consider the practicality of the gift and whether or not you would use it in your own home.

Share this:

  • Click to share on Facebook (Opens in new window)
  • Click to share on Pinterest (Opens in new window)
  • Click to share on Twitter (Opens in new window)
  • More
  • Click to share on Pocket (Opens in new window)
  • Click to share on Tumblr (Opens in new window)
  • Click to share on Reddit (Opens in new window)
  • Click to share on LinkedIn (Opens in new window)
  • Click to print (Opens in new window)

How to Make Cinnamon Applesauce Ornaments

November 20, 2013 By: Stephanie10 Comments

Disclosure: For your convenience this blog posts contains affiliate links to the products mentioned. 

WARNING: Never consume an entire spoonful of cinnamon or directly inhale the powder, as it could be harmful to your health. Carefully monitor children who are helping with this activity. 

Every year we have a tradition that the kids and I make cinnamon applesauce ornaments for their regular school and Sunday school teachers and bus drivers. We have also given them as neighbor and hostess gifts. It is a really easy and affordable holiday activity and the kids love getting their hands messy and giving their teachers something they made themselves. We like to avoid the stores during Black Friday and stay home to decorate for Christmas the day after Thanksgiving. I think that might be the day we make our applesauce ornaments this year.

how to make applesauce ornaments

You only need two ingredients: Applesauce and cinnamon.

Lots of cinnamon applesauce ornament recipes contain glue and are not safe for toddlers to eat while they are "helping" to roll out the dough. This recipe is all-natural and only contains two ingredients.

Step 1: Mix equal parts cinnamon and applesauce. (I always find it needs extra applesauce.)
Step 2: Roll out dough and cut into shapes with cookie cutters. Use extra cinnamon to “flour” your hands and rolling surface. We like to use wax paper to keep the dough from sticking to the table. 
Step 3: Use a straw to poke a hole so that ribbon can be added later for hanging.
Step 4: Let air dry for several days until hardened or bake in a low oven (175-200 degrees) for a few hours, checking frequently after the first hour. If they are in the oven, turn them every 30 minutes or they will start to curl up. We bake our ornaments on top of parchment paper because this is a very sticky dough. 

Once the ornaments have dried out completely, and cooled if you had them in the oven, thread ribbonthrough the hole for hanging.

I use three 3.37oz containers of cinnamon and 7 single serving cups of unsweetened applesauce and get about 3 dozen ornaments.

rolling out cinnamon applesauce ornaments

Some recipes use glue, but we have never used it just in case the kids eat a little bit of the dough (It won’t taste very good if they do, though. They smell much better than they taste!) We have ornaments from four years ago that are still intact, so I can attest that the glue is not needed. 

They also make very cute gift tags, place cards, and favors at holiday parties.

We use holiday cookie cutters to make the shapes, like the ones you can find on Amazon through my affiliate link below: 

Imagine how great your house would smell if you decorated your entire tree with these ornaments!

You might also like:

snowman keepsake ornaments

Share this:

  • Click to share on Facebook (Opens in new window)
  • Click to share on Pinterest (Opens in new window)
  • Click to share on Twitter (Opens in new window)
  • More
  • Click to share on Pocket (Opens in new window)
  • Click to share on Tumblr (Opens in new window)
  • Click to share on Reddit (Opens in new window)
  • Click to share on LinkedIn (Opens in new window)
  • Click to print (Opens in new window)

Cornbread Casserole

November 19, 2013 By: Stephaniecomment

A few weeks ago, I read Gina’s post about freezer meals and I thought her “Chicken and Dressing” sounded amazing, but I didn’t have any canned soup or sage, so I reinvented it and made my own version of a cornbread casserole, inspired by Gina. And I made fresh cranberry sauce to go with it. (Fresh cranberry sauce is seriously delish and it’s the easiest thing on earth to make.)

Eddie and I thought the casserole turned out pretty good, but the kids went INSANE over this. Nicholas had five (yes five) helpings before I cut him off so he wouldn’t get sick and Penny stayed at the table eating for over 30 minutes. Nick declared it his new favorite food.  So, I’m putting it on my short list of our family favorites.

It’s a very rich and hearty meal and great for colder days. It would also be a good way to use up Thanksgiving left-overs. You could easily substitute with turkey.  It reheated well. (I took this picture when I had left-overs for lunch the next day.) 

cornbread casserole and easy cranberry sauce

Cornbread Casserole

Ingredients:
1 Box of cornbread muffin mix & ingredients to prepare
2 cups of cooked, shredded chicken (seasoned with salt and pepper)
1 stalk of celery
1 tbs diced onion (I used the dried Tastefully Simple Onion Onion)
chicken stock (about 1.5 cups)
2 eggs
1 tbs milk
shredded cheddar cheese (optional)

Recipe:
1. Bake 1 box of cornbread mix in an 8×8 pan and allow to cool. (We removed 1 row for the kids’ after school snack)
2. Crumble cornbread in pan
3. In a small pan, saute onions and celery in butter until soft.
4.. Add cooked, shredded chicken, onions, and celery to 8 x 8 dish with the crumbled cornbread.
5. Add chicken stock until all ingredients are slightly moistened.  
6. Beat 2 eggs very well with 1 tbs of milk and stir into pan to incorporate with other ingredients.
7. Top with shredded cheese, if desired
8. Cover with aluminum foil and bake at 350 for 30 minutes. Uncover and bake an additional 20-30 minutes or until a knife comes out clean.

Serve with gravy and cranberry jelly. This recipe works well for any vegans or vegetarians who might be attending your holiday, because, unlike the canned versions, it doesn’t contain any gelatin.  

Easy Homemade Cranberry Jelly

(I think I first saw this method of making easy fruit jelly on an episode of Rachael Ray.)

1 bag of fresh cranberries
1-2 cups of sugar (add one cup first, then add the second slowly, to taste and to reach desired consistency)
1/2 cup orange juice

Combine all ingredients in a medium pot and stir constantly on high heat until cranberries start to pop open and the sauce thickens to jelly. About 10 minutes. (Be very careful it will splash and can burn you!)

Chill before serving


*I make a very easy gravy by combining 1 tbs of flour with 1 tbs of butter in a small pan and cooking it for about 3 minutes. Whisk in chicken stock, salt and pepper. Whisk constantly until it thickens.


Linking to: 

Tips and Tricks 

Share this:

  • Click to share on Facebook (Opens in new window)
  • Click to share on Pinterest (Opens in new window)
  • Click to share on Twitter (Opens in new window)
  • More
  • Click to share on Pocket (Opens in new window)
  • Click to share on Tumblr (Opens in new window)
  • Click to share on Reddit (Opens in new window)
  • Click to share on LinkedIn (Opens in new window)
  • Click to print (Opens in new window)

Giveaway: Canon Rebel DSLR Camera

November 18, 2013 By: Stephanie5 Comments

I’m SUPER excited to be a part of Busy Mom’s Helper’s Birthday giveaway this week. It’s Danielle’s birthday, but she is teaming up with other bloggers (that’s where I come in) to give a present to you. 

Hence: 

 
We’re giving away a Canon EOS Rebel T3i 18 MP CMOS Digital SLR Camera.  I use a Rebel myself and I love it! (and you would be getting a newer and better model, you stinker) This camera is valued at over $550. 
 
How great would it be to have a new camera to capture all of your holiday memories this year? Enter using the Rafflecopter. This giveaway runs through Nov. 24th. I hope one of my Binkies readers wins! 
 
Here are the other amazingly talented bloggers bringing this perfect prize to you. Be sure to check them all out!!!

Binkies and Briefcases     food storage moms              
***This giveaway is open to U.S. residents only.  All entries for the winner will be checked and verified, so please make sure you are doing what you are claiming in the Rafflecopter or all your entries will be voided.  No funny business, folks. ;). By entering you give the right to use your name and likeness. Number of entries received determines the odds of winning. One winner will be selected. The winner will be notified via the email they provide, and will have 48 hours to reply to the email.  If the winner does not reply back within the 48 hours, they forfeit the prize and a new winner will be chosen via Rafflecopter.  This is a giveaway sponsored as a group buy, which means the bloggers pooled their money together to purchase this product for you.  Amazon is not a sponsor of this giveaway.  The prize will be sent via Amazon Prime from Danielle @ Busy Mom’s Helper.  Entries must come from your MAIN social media accounts, not accounts that have been set up separately just for entering giveaways.  Entries from these types of accounts will be disqualified.  Protected tweets do not count as an entry method for tweeting. Tweets must come from a public account. Bloggers in this group giveaway and their immediate family members in their household cannot enter or win the giveaway. No purchase necessary. Void where prohibited by law.
Please see the Rafflecopter widget below for additional Terms & Conditions.  Good luck, ya’all! 
 
This post may contain affiliate links. 

a Rafflecopter giveaway


Share this:

  • Click to share on Facebook (Opens in new window)
  • Click to share on Pinterest (Opens in new window)
  • Click to share on Twitter (Opens in new window)
  • More
  • Click to share on Pocket (Opens in new window)
  • Click to share on Tumblr (Opens in new window)
  • Click to share on Reddit (Opens in new window)
  • Click to share on LinkedIn (Opens in new window)
  • Click to print (Opens in new window)

How to Build a Floating Fireplace Mantle

November 15, 2013 By: Stephanie23 Comments

Thank you for your patience. I know it has been a long time coming, but we finally figured out how to build a floating fireplace mantle, and we’d love to show you how we did it!

Build your own fire place mantle with 5 boards

We still need to finish filling the nail holes and some touch up paint, but for the most part, it’s show-off-able.

Want to see how you can make one of your own? Watch our video!

http://binkiesandbriefcases.com/wp-content/uploads/2013/11/vidGzgMtg.mp4

It was surprisingly hard to find instructions online to build a floating mantle. We actually didn’t find any that looked like what I wanted, so we got creative and made things up as we went along.

Me: All I want is a chunky mantle that is classic and substantial, but not too simple-looking that fits well with the southern farmhouse feel of our home but isn’t distressed. And I need it to float in mid air and be sturdy enough to hold heavy stuff like Christmas stockings and giant candle sticks and not come crashing down on the kids.

Eddie: Oh is that all?

We went to Home Depot and I started taking out boards and holding them up to each other like a 10 foot long jigsaw puzzle until I figured out what I wanted. Then Eddie got to work with the “float in mid air” part. 

First we used lag bolts to hang a 4×4 securely on the wall, into three studs. This is what we attached all of the painted pieces to. If you are going to use pressure treated wood for this step, make sure you use galvanized or stainless steel screws, bolts, and nails for the whole project.We left a 3/4″ gap on each side of the 4×4, so that our mantle would be flush with the wall when we covered it up. 

HomeRight fireplace mantle

Then we used our handy dandy HomeRight paint sprayer and painted the pieces we were using to build the mantle. Besides the 4×4, we only used four boards from the hardware store to build our mantle. However, we still need to go back for one additional board to cover the bottom.

HomeRight sprayer

We used:

a 1×10″ board (for the top)

a 1 x 6″ board (for the “skirt”) 

a piece of decorative edge trim (for the top)

a piece of crown molding

Since our fireplace is an unusual size and yours is probably different, I’m not going to give you specific measurements, but I’m sure you can figure it out. It was a pretty simple process once the engineer (my husband, who really is an engineer) was confident we had a safe way to build it.  First Eddie attached the 1×10 to the top of the 4×4, making sure it was level. DIY Fireplace designDIY Fireplace mantle with 6 boards

Then we cut the 1×6 and used it to make a “skirt” around the front and sides of the 4×4. DIY fireplace from a few boards

I guess if you were looking for a really  simple mantle, at this point you could be done.
DIY mantle

But we wanted to fancy it up a bit, so we added a decorative edge around the 1×10 on the top. DIY Fireplace mantle 

Then we put crown molding around the “skirt” as well.

DIY crown molding mantle


All that’s left is to fill in the nail holes, caulk, and touch up paint. (We are planning to cut a piece of plywood to cover up the bottom as well.)

We put a baby bumper around the hearth to soften the sharp edges for the kiddos.  

Build your own fire place mantle with 5 boards

If you’re interested in how we did the rest of this fireplace wall, check out these posts. The stone hearth and the AirStone wall are also D-I-Y projects!

If you like this posts, I would so appreciate your shares and pins! And please pop over to my Facebook page so that I can get to know you too!

Installing the flagstone hearth

DIY stone wall

The Mantle, part 1

Also check out 

A list of things to consider when building a new home. Some great suggestions on this list!

Share this:

  • Click to share on Facebook (Opens in new window)
  • Click to share on Pinterest (Opens in new window)
  • Click to share on Twitter (Opens in new window)
  • More
  • Click to share on Pocket (Opens in new window)
  • Click to share on Tumblr (Opens in new window)
  • Click to share on Reddit (Opens in new window)
  • Click to share on LinkedIn (Opens in new window)
  • Click to print (Opens in new window)

Frugal Friday

November 8, 2013 By: Stephanie2 Comments

Now that we are starting to settle in -and loving it!- hopefully I will be able to get back on track with this whole blogging thing. I miss you guys.

Truth be told, we got a new-to-us  (refurbished from eBay) computer a few weeks ago when our old laptop died and I am slow to adjust to the switch over to a Mac. I still have the kind of cell phone where you have to buy minutes from the drug store, so I guess you could say I take longer than most to adapt to technology. Ironic, for a blogger, I guess. Although it’s lovely, I still have no idea how to do anything on this MacBook Pro my husband surprised me with for my birthday. It’s bad, my slowness on this thing, I tell you. I can’t even figure out how to open my son’s online report card right now, let alone figure out how to upload all our camera and photo editing software. I’ll learn, I promise. But please bear with me in the meantime. 

Anyway, we LOVE our new house. We are tucked back just off a main road, but in the semi-country and our lot backs up to some farmland. This was the view from our bedroom window yesterday morning when we woke up. (Picture copied directly  from my husband’s Facebook page.)

sunrise 

It’s pretty amazing. I love it. However, being in the new house also comes with gigantic mortgage payments and property taxes and settlement costs all that not-so-fun stuff that means we are going to need to stretch our budget for a little while.

I’ve been really loving following along with Rebecca and her Finances on Friday series, sharing how she pinched pennies throughout the week.  (Side note: I am in serious hard core love with Rebecca’s blog. She was the very first blogger I started to follow years and years ago and I still check her blog every day to see if she has posted anything new.) I know some other bloggers do a similar post on Fridays too, so I thought I’d play along for a while.   

Here are a few things I’ve been doing to save and/or make money: 

-I made almost every meal at home. (We cheated when I got sick and Eddie picked up dinner. I also went out to lunch with Meredith, but it was legetimately for work, so I get to save my receipt and count it as a business expense.) 

-I have not gotten meat on the past 3 grocery shopping trips. We had meat (chicken, fish, ground beef, sausage) in the freezer, so I’ve been using that instead. 

-I did not buy much produce at the store. I went to our local orchard, which is closer to us than the grocery store anyway, and bought apple seconds and milk. I was going to make apple sauce, but the seconds were in such good shape that we’ve just been using them for eating. Meredith also brought us some Asian pears as a housewarming gift, which was very thoughtful. We have vegetables in the freezer. So, the only thing I bought at the grocery store was bananas, and a bunch of bananas only cost around $1. 

-Sadly, I stopped having our milk delivered. The orchard is now only little over a mile away and they sell local eggs, milk that does not contain growth hormones, and pastured beef. It’s cheaper than the other dairy we were using and there is no delivery fee, so it is no longer worth it for us to use a milk man. 🙁

-I applied for two paid writing opportunities, one through the blog and one in-print locally.     

-I’ve started taking the girls to the library more regularly while Nick is at school. Abby loves checking out books for herself (Would you believe I have never allowed that before because when Nick was younger he was too rough with them and they got destroyed) and the library has a bunch of puzzles that the girls like to do.  Don’t worry about Nick, he gets to check out books from the school library. 

-I bought bread flour. I have a vision that I am going to start making our bread. I have a rarely used bread machine and I also have a new wheat grinder from my mom. I haven’t crossed the wheat grinding bridge yet. I need to learn how to actually make halfway decent bread before I start grinding wheat too. Baby steps. I can’t jump into the deep end of Hippieville headfirst.

-Abby has been going to a free (yes FREE!) ballet class. It’s an awesome mission that was started by some young women in our area. They are only allowed to dance to Christian music and wear modest costumes for their performances. That’s more than okay by me.

-Nicholas will also start going to a karate class at our church that has a similar mission this coming week.

-When we DID get take-out, the kids all shared one meal. (The taco kit from Chipotle plus whatever I don’t eat from my burrito bowl is more than enough food for all of them. They’re still small. Don’t worry, they aren’t starving.)  

-I didn’t buy anything for the house. Not one thing. Not even though our guest bath and master bedroom currently have no curtains which makes certain situations ahem a little awkward.  We hung up curtains we already had in the kids’ bedrooms even though they don’t match the new decor at all. But my AMAZING blog friends sent us a housewarming card with a very generous Home Depot gift card inside of it, so the curtain situation will be cleared up very soon.   

-Instead of buying cereal and instant oatmeal at the store last week, I bought rolled oats from the dry goods section. I got a huge bag for less than $1. My plan was to make granola or, you know, regular old oatmeal for breakfasts. They wound up going into oatmeal cookies instead. Ooops. (I’m not sorry.)

-We have been using our steam mop to clean our floors. We’ve had it for years, but rarely used it. I’m loving it now. It cleans and sanitizes our floors and only uses water, so I don’t have the cost or the worry of using chemicals around the kids. 

-I only showered twice this week. Mostly because I was sick in bed, but it still counts as water conservation, right? 

-I did not buy sandwich bags, even though I am out of them. I sent lunches to school/work in reusable containers or wrapped in saran wrap. 

-I actually packed Eddie’s lunch once. I don’t usually do this because he’s a big boy and he can do it himself and I have three other children to take care of, but he leaves super early in the morning and often gets home late, so he doesn’t usually do it out of fear of waking the kids banging around in the kitchen. Or just because he forgets. And that leads to a lot of unhealthy and expensive lunches at the drive thru. So maybe (MAYBE) I’ll start packing it more. I said maybe. 

-Since I was sick, Eddie stayed home on Wednesday and worked a little bit from home, which saved us gas money. 

-When we couldn’t use our regular detergent in our new high efficiency washing machine, we used the other stuff we had on hand (OxyClean and Woolite) instead of buying more right away. I don’t make my own laundry detergent because, well, I don’t feel like it. 

Wow, that list is a lot longer than I expected it to be. Do you have any relatively painless ways to save money? My wallet and I could use a few more ideas. 

Share this:

  • Click to share on Facebook (Opens in new window)
  • Click to share on Pinterest (Opens in new window)
  • Click to share on Twitter (Opens in new window)
  • More
  • Click to share on Pocket (Opens in new window)
  • Click to share on Tumblr (Opens in new window)
  • Click to share on Reddit (Opens in new window)
  • Click to share on LinkedIn (Opens in new window)
  • Click to print (Opens in new window)

So…I wrote a children’s book. Introducing “The Cookie Jar Parable”

November 1, 2013 By: Stephanie9 Comments

illustration from the cover of The Cookie Jar Parable

About a year ago I wrote a manuscript for a children’s book.

My friend Mary Joy and her family had recently been in a very tragic car accident. They lost her husband/their father, Will,  and she and her two young sons were all in critical condition, separated in different hospitals-all going through difficult medical procedures completely alone.

It was one of the saddest things I have ever watched a friend experience and my heart was indescribably heavy for her.

My children were too young to understand, but they wanted to know why I was so upset.

What do you tell a child to help them know that we can get through times like this?

I had no human answer, so I started to write. 

I believe my writing is a spiritual gift, so I said a prayer that God would give me a story that could help me explain it to them in a way that was similar to the way Jesus would have.

He gave me a parable.

Parables are short stories that are a type of analogy. Jesus used them often.

I wrote the Cookie Jar Parable in about 15 minutes.

I sent it to a few Christian publishers and then, to be completely honest, I forgot about it.

I have sent queries before and received rejection letters. I didn’t think this one would be much different.

But it was.

Because this time it isn’t just my story. This is a story written in prayer and out of love for a family in suffering. 

This story is important.

Then, a few weeks later, in mid-December, tragedy struck the entire country when Sandy Hook Elementary was attacked. 

Three days later I was contacted by Tate Publishing.

They thought my story was important too.

I had several personal phone calls with the founder of the company and, in an uncharacteristic move for a business man, he generously waived over 80% of the fee that authors are normally required to contribute in accordance with their business model.

I got a very warm, genuine feeling that this was the right place for my story to be. We talked about how The Cookie Jar Parable might be able to help children who are grieving, whether that grief is for a family member, a tragedy in the news, or a pet. Grief is an emotion we can’t avoid, but we don’t talk about it with our children very often. The Cookie Jar Parable can help with that.  The story is easy to relate to and not at all scary and I think it also translates well to other faiths. The illustrations are colorful and fun.  

This is the description on the back of the book:

Elliot’s grandpa is in Heaven now, and Elliot is sad. He is a little nervous to visit Grandma’s house since Grandpa won’t be there anymore. Will she be upset? Is she lonely?

During their visit Grandma shares a special story with Elliot. Her story is about a jar full of cookies that have been created to be part of a great celebration. Through “The Cookie Jar Parable” Grandma is able to help Elliot understand that it is all right to be scared of death and loss, but on the other side there is a wonderful celebration waiting for us.

illustration from The Cookie Jar Parable

So, for the past 11 months, I have been working with Tate Publishing on developing my original one-page Microsoft Word document into an entire book. 

Everyone at Tate was very friendly and they have been honest and delivered on every promise that was made initially. 

I loved seeing my words come to life in the illustrations. (I requested the main character be the same age as my son, the grandma be reminiscent of Paula Deen and that there be a lemon beagle that looks a little like our dog, Lucy, even though there is no dog mentioned in the text. It was so fun to see how the artist, Dindo Contento, worked with my requests!) 

I think this one is my favorite.

illustration

The book officially went on sale through Tate’s website yesterday, but won’t be “officially released” and available on Amazon or through bookstores until early 2014.   

If you are interested, you can buy an early edition here. The paperback version retails for $8.99 and is 6″x7.” It’s a small book, which I think is a good size for children’s little hands. 

Every copy purchased also comes with a code for a free audio download, which I think is one of the coolest parts. We are still working with the actors to complete the audio version. So if you do purchase the book, please be patient. Your download will be available in about 8 more weeks.

Thank you so much to everyone who supported me throughout this process.  It has been a lot of work and there is still more work to be done, but I am so grateful to have reached the point that I can finally share this story with all of you!

Share this:

  • Click to share on Facebook (Opens in new window)
  • Click to share on Pinterest (Opens in new window)
  • Click to share on Twitter (Opens in new window)
  • More
  • Click to share on Pocket (Opens in new window)
  • Click to share on Tumblr (Opens in new window)
  • Click to share on Reddit (Opens in new window)
  • Click to share on LinkedIn (Opens in new window)
  • Click to print (Opens in new window)

How To Build Your Own Fireplace Mantle Part 1

October 30, 2013 By: Stephanie7 Comments

Although we are officially moved in to our new house, we still have projects-a-plenty to complete around here.

Our first project is the mantle for our DIY fireplace.

I am excited to partner with HomeRight for this one. They are my newest sponsor and they sent me their Finish Max Fine Finish Sprayerso that we could get a professional looking paint finish.

This project is too big for me to tackle by myself. (Read: Eddie is doing most of the work.)

The first thing my handy hubby did was attach a 4×4 over the fireplace with lag bolts. We could only find pressure treated wood in this size. Because this piece will be completely hidden, I’m not worried about it.

HomeRight fireplace mantle

NOTE: It is important to use galvanized nails and screws when working with pressure treated wood. Eddie counter sunk these so that everything can be flush when we attach the painted pieces.

HomeRight fireplace mantle DIY

The gashes are from the mutli-tool he used to cut space around the bolts when we forgot that we needed to countersink them in the first place. Such is the life of a DIYer. Learn from our mistake and countersink them from the start.

Then came the fun part, playing with my new toy.

HomeRight Finish max

We went to the big box store and bought our lumber and trim. (I will have a full tutorial for the mantle coming soon. I’m still in the process of making some design changes.)

We took an extra piece of painted trim from the builder and had the store color match our paint so that the mantle will be the same color as the trim throughout the house.  We got paint and primer in one so that we wouldn’t have to deal with taking the sprayer apart to clean it in the middle of our project. 

HomeRight paint sprayerHomeRight sprayer

Even Eddie had to admit that the Finish Max was easier to use than our previous paint sprayer (which is still a mess because we couldn’t get it clean after he used it to stain a fence at our first house).

We liked the vertical and horizontal options, and there wasn’t much over-spray at all.  See how clean the cardboard under the painted section on the right is?

It was still a little bit of a pain to clean, but you just can’t avoid that with a paint sprayer. It did clan up very well with just soap and water and we liked that the package included a detail brush for cleaning all the nooks and crannies.

I can’t wait to show you the finished project soon!

UPDATE: It’s finished and you can see it here with step-by-step directions. 

or watch our video

http://binkiesandbriefcases.com/wp-content/uploads/2013/11/vidGzgMtg.mp4

Thank you to HomeRight for sponsoring our fireplace mantle. I was provided with product and compensation for this review. All opinions are my own.

Thank you so much for visiting the blog! I really appreciate all of your pins and shares. 

If you liked this post, you might also like: 

Share this:

  • Click to share on Facebook (Opens in new window)
  • Click to share on Pinterest (Opens in new window)
  • Click to share on Twitter (Opens in new window)
  • More
  • Click to share on Pocket (Opens in new window)
  • Click to share on Tumblr (Opens in new window)
  • Click to share on Reddit (Opens in new window)
  • Click to share on LinkedIn (Opens in new window)
  • Click to print (Opens in new window)

Pumpkin Nutella Pancakes

October 25, 2013 By: Stephanie4 Comments

Fun fact about our family: My kids call their grandma Pumpkin. So, in the fall every time I hear my kids pointing out a pumpkin on someone’s front porch, my head is turning to look for my mom.

Pumpkin is  also fun to cook with. (Am I talking about the vegetable or my mom? ) ; ) That’s why we made these yummy pumpkin Nutella pancakes. 

I know I’m not the first person to ever combine pumpkin and Nutella into the perfect pancakes for fall. You can see Victoria’s from-scratch recipe here. But when I make pancakes I do it the way my grandmother always did, with good ol’ Bisquick. (Although, that might change very soon because my mom got me a wheat grinder for my birthday and I’m excited to try it.)

Pumpkin and Nutella Pancakes for fall

To make these pancakes, I doubled the recipe on the back of the Bisquick box, but instead of using 4 eggs, I used 3 eggs and 1/2 cup of pumpkin puree. Just the canned Libby’s stuff in the baking aisle works for me. Or you can see how I have used the microwave to make homemade pumpkin puree out of real pumpkins.  They are kid and husband approved and I liked that, because of the pumpkin, they weren’t just empty carbs (granted, there were plenty of those too) and they kept the kids full until lunch time.

They also froze and reheated well.

Let me know if you try them!

Pumpkin and Nutella Pancakes from boxed mix

PumpkinNutella pancakes


Pumpkin Nutella Paancakes

Pumpkin Nutella Pancakes
2014-06-14 12:22:56
The prefect Fall breakfast
Write a review
Save Recipe
Print
Ingredients
  1. 4 cups Bisquick
  2. 2 cups milk
  3. 3 eggs
  4. 1/2 cup pumpkin puree
  5. Nutella
Instructions
  1. 1. Mix Bisquick, milk, beaten eggs, and pumpkin puree until it resembles traditional pancake batter.
  2. 2. Ladle pancakes onto hot, butter skillet. Use a spoon to drizzle a Nutella swirl into each pancake as it cooks.
  3. 3. Fry until golden brown, flip when bubbling in the middle.
Notes
  1. Nutella inside pancakes will be HOT. Allow to cool slightly, especially when serving to children.
By Stephanie {Binkies and Briefcases}
Adapted from Bisquick Pancakes
Binkies and Briefcases http://binkiesandbriefcases.com/
 You might also want to check out: 

Learn how to use your microwave to make homemade pumpkin puree out of fresh pumpkins. Just like the kind you buy in a can, but with no preservatives and only one ingredient- pumpkin!

pumpkin dip

Share this:

  • Click to share on Facebook (Opens in new window)
  • Click to share on Pinterest (Opens in new window)
  • Click to share on Twitter (Opens in new window)
  • More
  • Click to share on Pocket (Opens in new window)
  • Click to share on Tumblr (Opens in new window)
  • Click to share on Reddit (Opens in new window)
  • Click to share on LinkedIn (Opens in new window)
  • Click to print (Opens in new window)
  • « Previous Page
  • 1
  • …
  • 32
  • 33
  • 34
  • 35
  • 36
  • …
  • 80
  • Next Page »
  • Facebook
  • Instagram
  • Pinterest
  • RSS
  • Twitter

Welcome! I’m Steph.

This is a little corner of the internet we like to fill with honesty, heart, and humor. Read More…

Cover for Binkies and Briefcases with Stephanie Giese
19,226
Binkies and Briefcases with Stephanie Giese

Binkies and Briefcases with Stephanie Giese

Stephanie Giese is an indie author based in Florida. She writes stories about realistic problems with humor, heart, and sass. Her work has a strong focus on mental health and consent. Her North Bay small-town romance series is set for release in 2025.

Binkies and Briefcases with Stephanie Giese

3 months ago

Binkies and Briefcases with Stephanie Giese
I know it’s a small thing, but I believe small things can add up to big changes. my entire North Bay series, including Out of Left Field, Right as Rain, and Way Off Base, is free on Kindle from Jan. 30-Feb. 3. Please take the funds you might have spent on my books this week and reallocate them toward the areas in our country that need them the most. Follow creators like Dad Chats who can direct you toward practical needs local to them. I hope my quirky romcoms can bring you some comfort and joy during difficult times, and I hope together we can take small, practical steps toward big changes. ... See MoreSee Less

Photo

View on Facebook
· Share

Share on Facebook Share on Twitter Share on Linked In Share by Email

Binkies and Briefcases with Stephanie Giese

3 months ago

Binkies and Briefcases with Stephanie Giese
I know there is an overall feeling of helplessness in our country right now. So many of us are at a loss for what to do beyond making phone calls and social media posts (which are still important, but can feel like not enough). I believe strongly in the power of small things adding up to big ones. As one person, I might not be able to do much, but what I CAN do is use my voice and my books to work toward the change I’d like to see. That’s why, for the next five days, from Jan. 30-Feb 3, I’m making the Kindle versions of my entire North Bay series (Out of Left Field, Right as Rain, and Way Off Base) completely free. Art has power, and I do hope these comedies can bring you some comfort and joy in difficult times, but most importantly, I also hope you’ll consider redirecting the funds you might’ve spent on my books and donating instead to one of the many charities working tirelessly in our cities right now. If you are located in an area like Minnesota or Portland, please use the space below to make people aware of the organizations in your area that need help. ... See MoreSee Less
View on Facebook
· Share

Share on Facebook Share on Twitter Share on Linked In Share by Email

Reader’s Choice

Image HTML map generator

Follow Me on Pinterest

featured-on

What You’re Saying

  • 28 Best Stone Fireplace Ideas And Designs - Perfect Decor Place on DIY Stone Fireplace with AirStone
  • Kevin Hicks on How to Budget for Building Your Own Home
  • Amy on DIY Stone Fireplace with AirStone
  • Gendered clothing - GenderEd on A Target Intervention on Behalf of My Daughters
  • Wellshop Store on Dressing Our Daughters: How Target Responded to My Last Blog Post

Latest Posts

ALL I Never Knowed: The Book Is Here!

If you’re new here, you may want to subscribe to my Email Newsletter. Thanks for visiting!Welcome back! Be sure to check out my Email Newsletter. Thanks for visiting!It’s finally here, in my hands. It has been a loooong time in the making, but our book, All I Never Knowed: Mental Illness, a Mother’s Love, and […]

Share this:

  • Click to share on Facebook (Opens in new window)
  • Click to share on Pinterest (Opens in new window)
  • Click to share on Twitter (Opens in new window)
  • More
  • Click to share on Pocket (Opens in new window)
  • Click to share on Tumblr (Opens in new window)
  • Click to share on Reddit (Opens in new window)
  • Click to share on LinkedIn (Opens in new window)
  • Click to print (Opens in new window)

Save Money with Fetch

Hey everyone! This is Chelsea, Steph’s asistant, back with the simplest app for getting cash back on things you’re already buying! We’ve covered Ibotta, Shopkick, Coupons.com, Swagbucks and we’re all saving hundreds of dollars by now, right? RIGHT!? I’m really hoping you guys have jumped on the rebate app savings train because it’s just so […]

Share this:

  • Click to share on Facebook (Opens in new window)
  • Click to share on Pinterest (Opens in new window)
  • Click to share on Twitter (Opens in new window)
  • More
  • Click to share on Pocket (Opens in new window)
  • Click to share on Tumblr (Opens in new window)
  • Click to share on Reddit (Opens in new window)
  • Click to share on LinkedIn (Opens in new window)
  • Click to print (Opens in new window)

Splendid Spoon Review

I was excited to receive a box of products to try from Splendid Spoon this summer! They invited me to try their line of plant-based, ready-to-eat foods and delivered them right to my door. Check one in the pro column for convenience. I did receive these products free of charge in order to rate them […]

Share this:

  • Click to share on Facebook (Opens in new window)
  • Click to share on Pinterest (Opens in new window)
  • Click to share on Twitter (Opens in new window)
  • More
  • Click to share on Pocket (Opens in new window)
  • Click to share on Tumblr (Opens in new window)
  • Click to share on Reddit (Opens in new window)
  • Click to share on LinkedIn (Opens in new window)
  • Click to print (Opens in new window)

My Networks

#BlogHer15: Experts Among Us Voices of the Year Honoree