Binkies and Briefcases

SUBSCRIBE

  • About
    • Work With Me!
      • Blog & Small Business Consulting
    • Disclosures
  • Popular Posts
  • Adoption & Special Needs
  • Saving Money
  • Recipes
    • Breads
    • Breakfasts
    • Sides
    • Soups
    • Entrées
    • Desserts
  • For the Home
    • For the Home
    • Beauty
    • Crafts
      • For Kids
  • My Books

Pumpkin Sweater Hats

October 17, 2012 By: Stephanie1 Comment

How to make a pumpkin sweater hat for fall. Super cute and can be a great start to a DIY Halloween costume

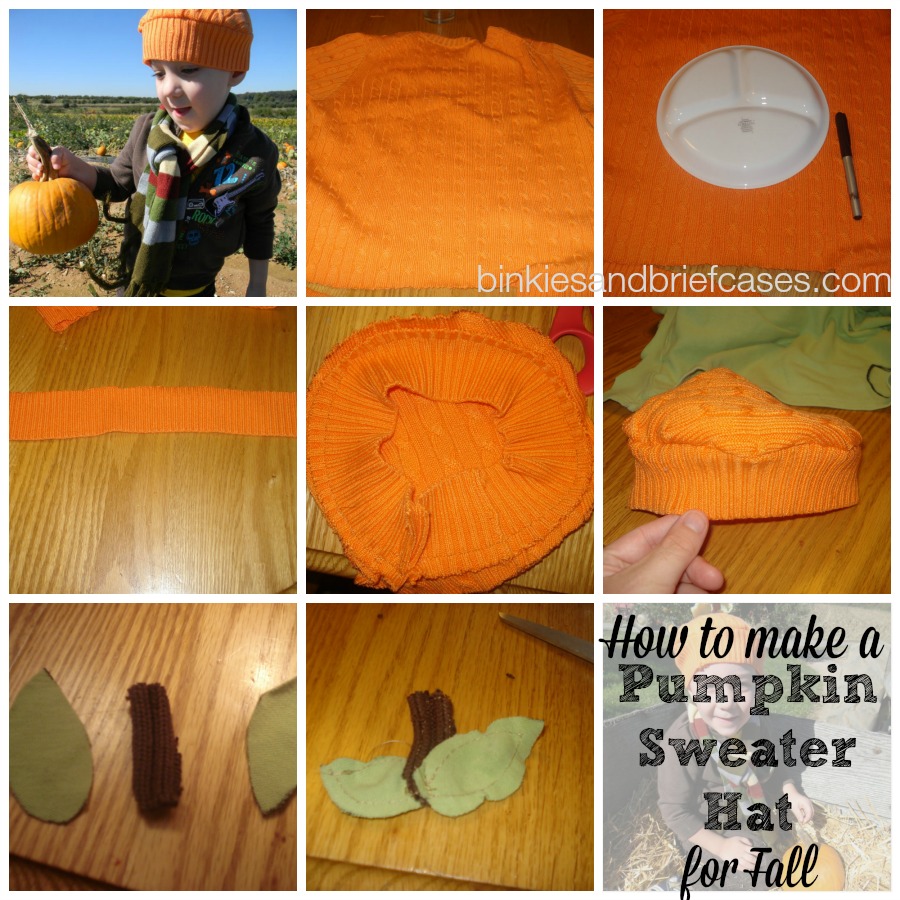
I can’t believe it’s been years since I made the original pumpkin sweater hats! They are really easy & fun. Here is the original tutorial from 2010:

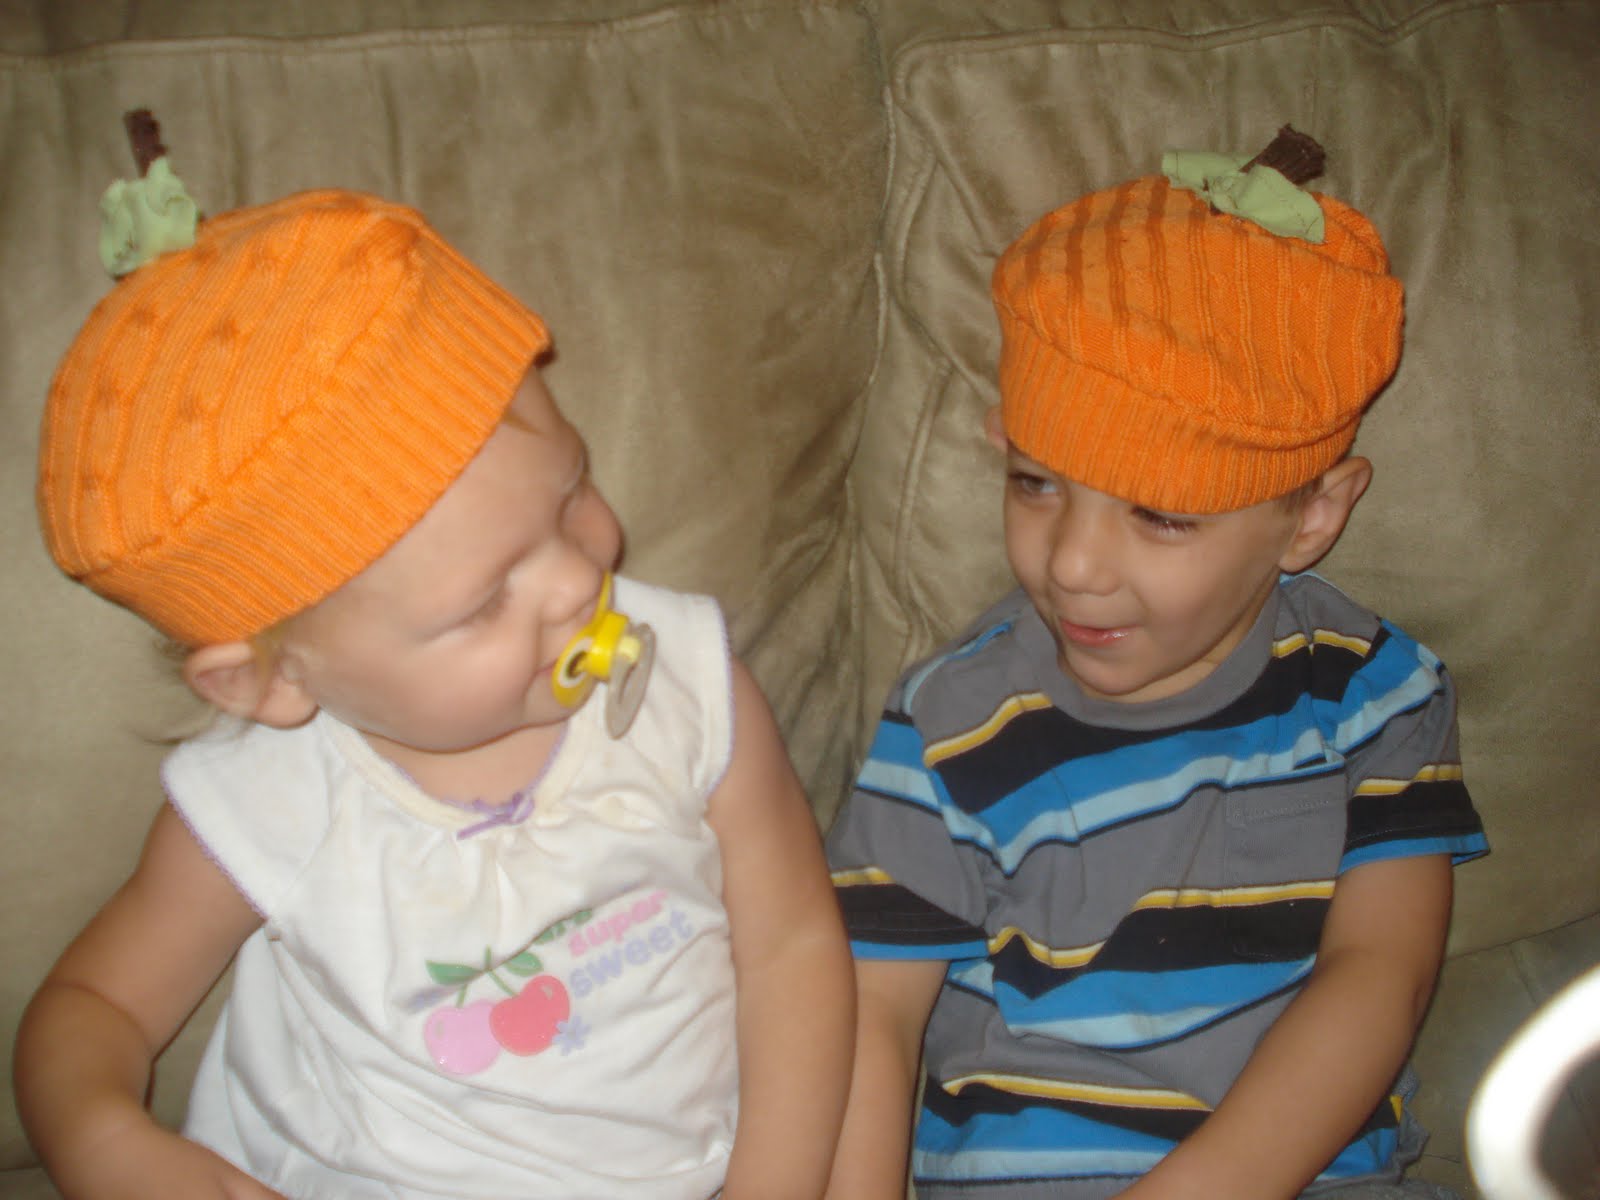
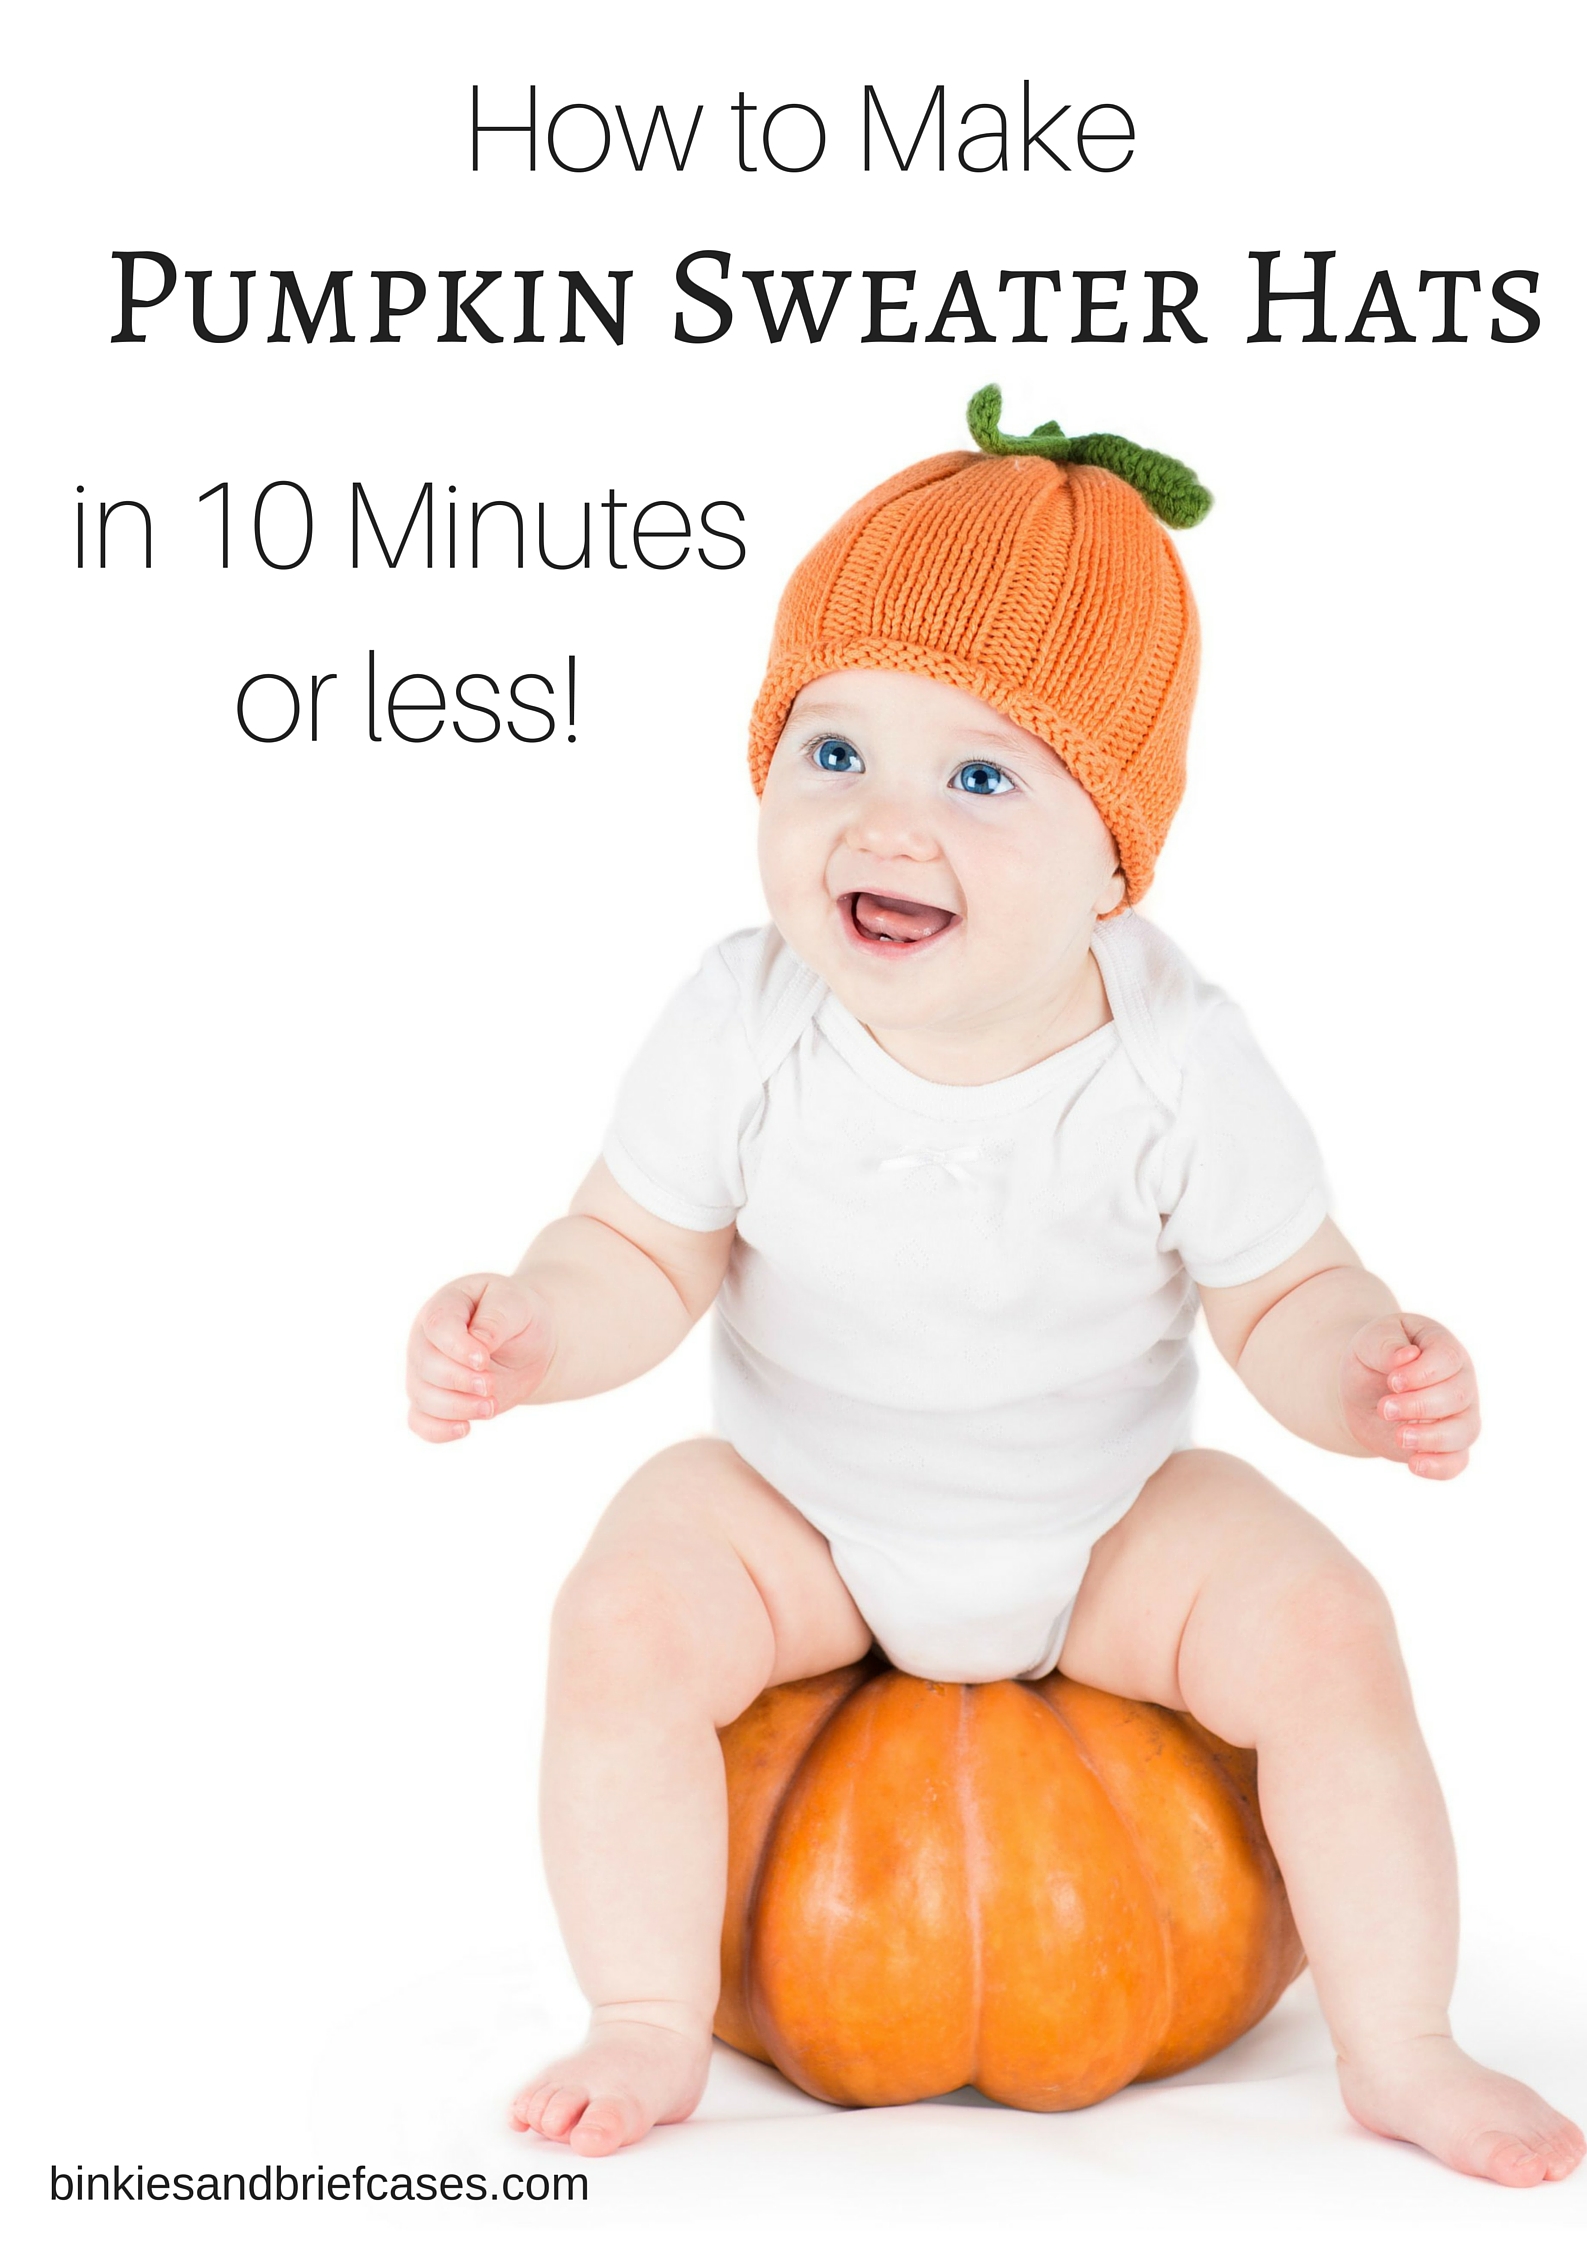
I made pumpkin sweater hats for the kids and I am in love with them! I can’t wait for them to wear these hats to pick pumpkins later this fall. It’s  so adorable I can’t stand it.

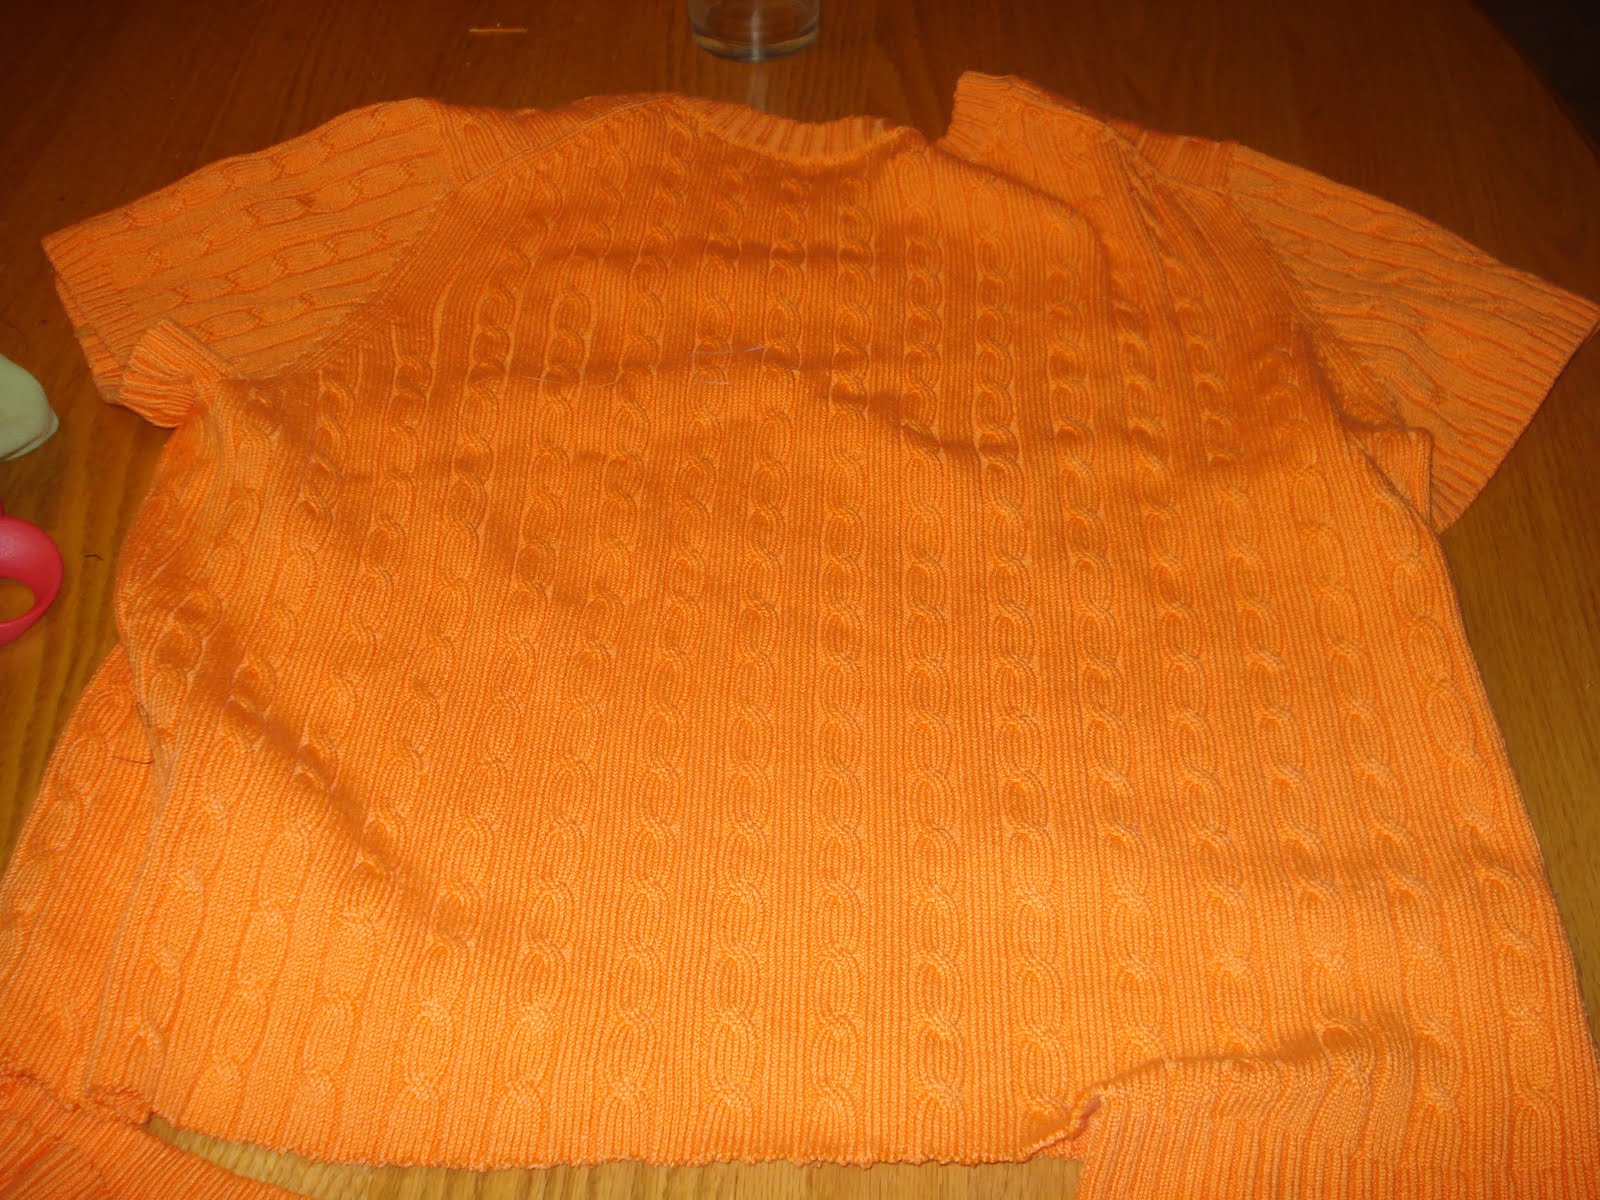
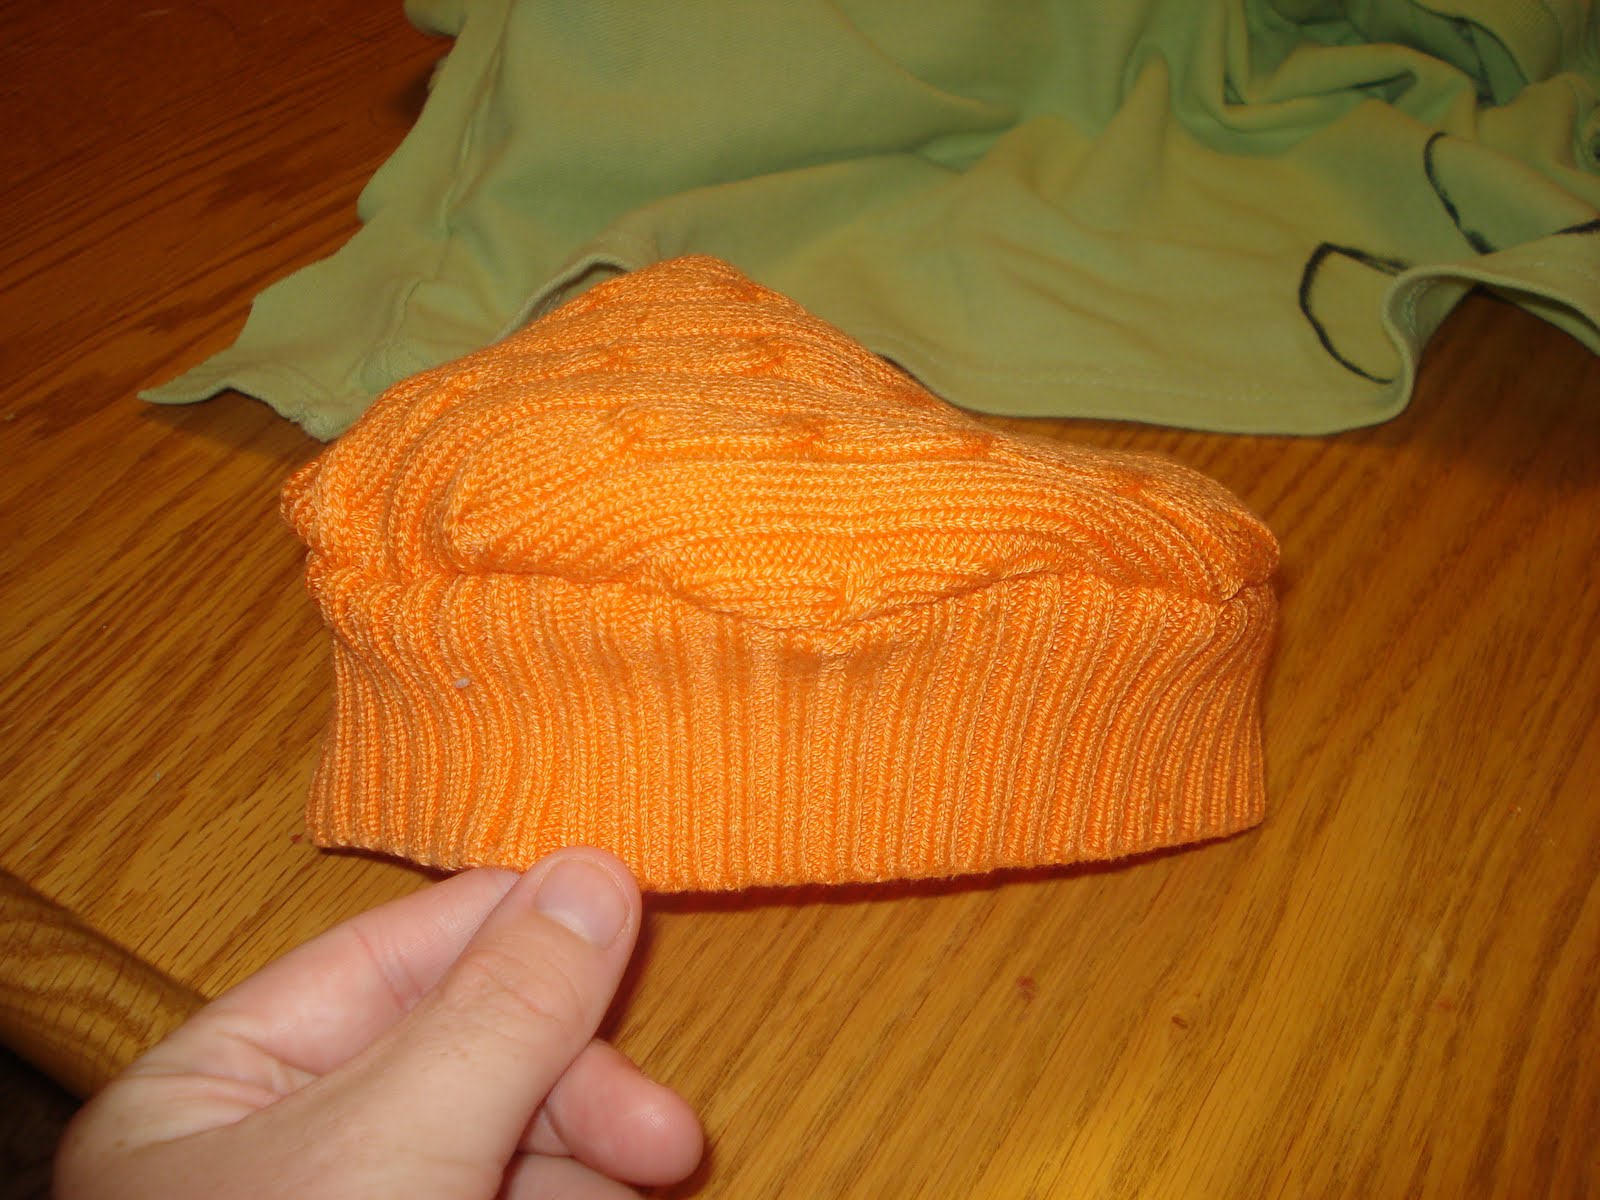
Start with an orange sweater

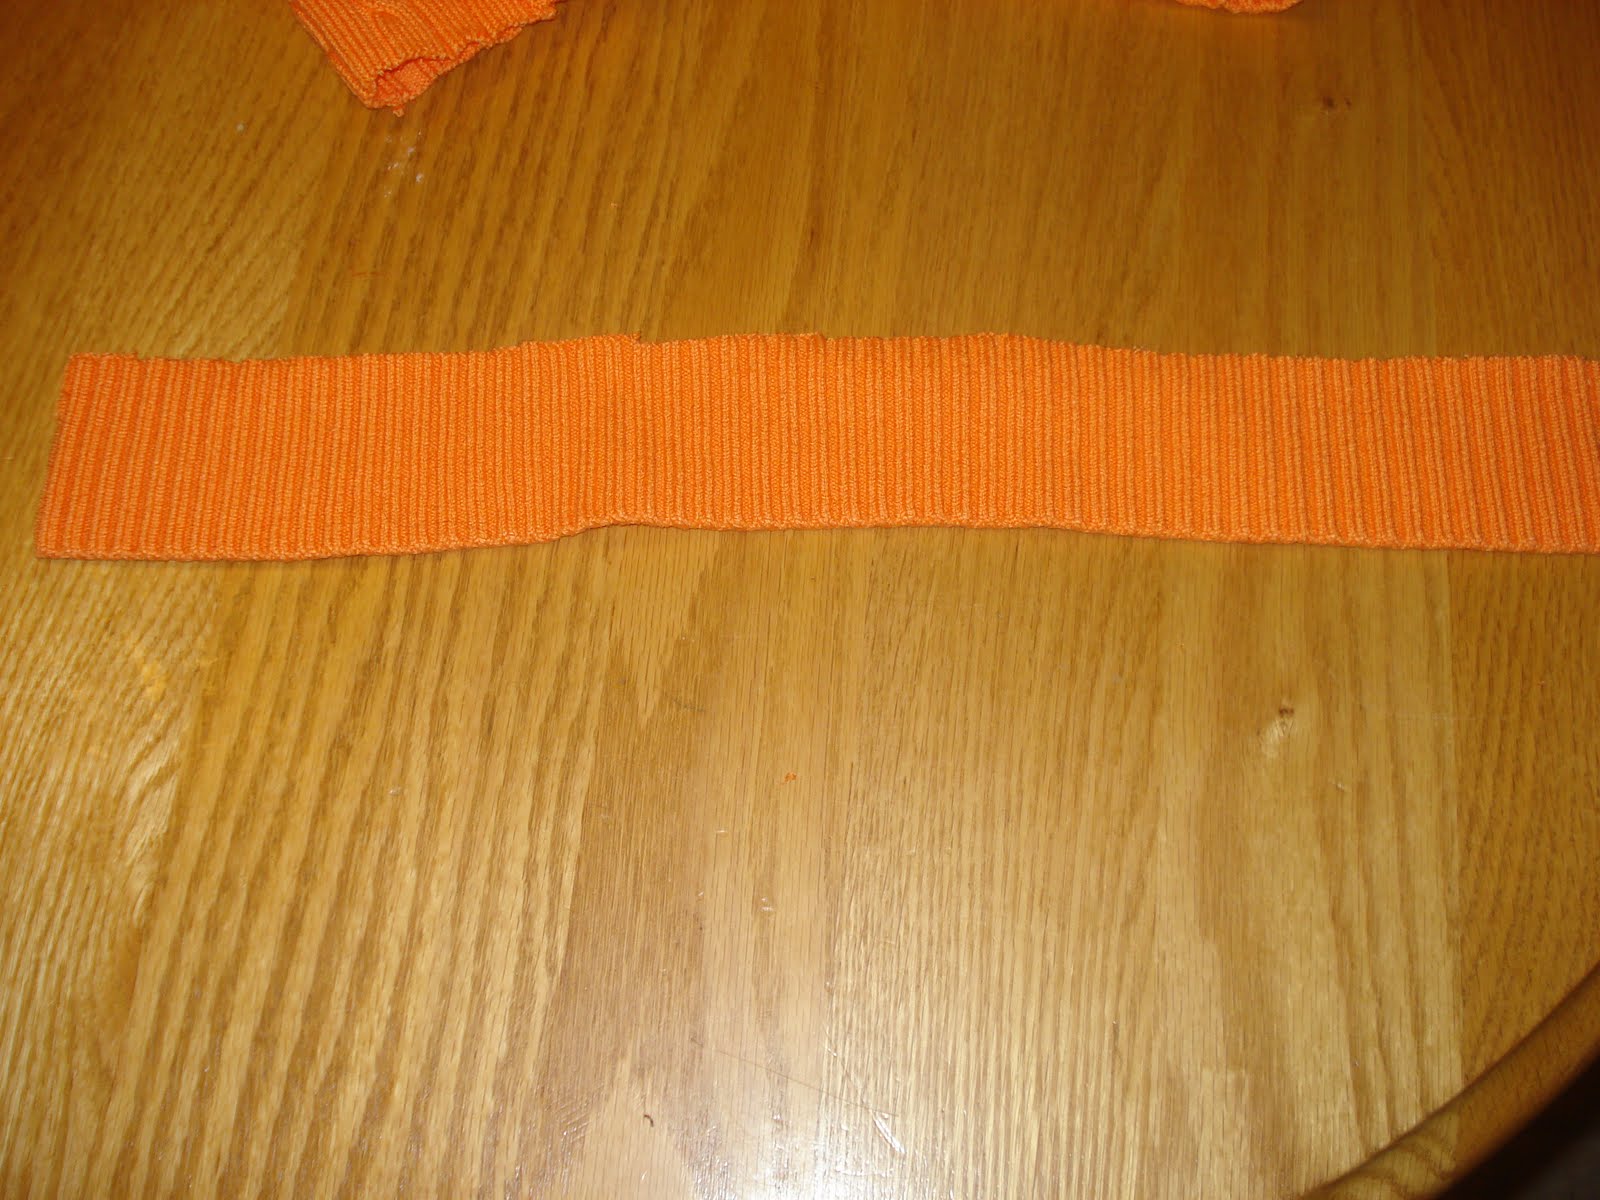
Cut the band off the bottom. This will be the band of the hat. Cut it to match the circumference of the head of the person for whom you are making the hat. (Wrap it around his/her head and cut it to length)

Next, trace a plate to get a perfect circle. Use a dessert plate for small kids and a regular plate for bigger kids or adults.

Cut out the circle. Next, pin the strip to the circle, right sides together with the edge you cut toward the outside. (This will keep you from having to hem the bottom of the hat once it’s together.)

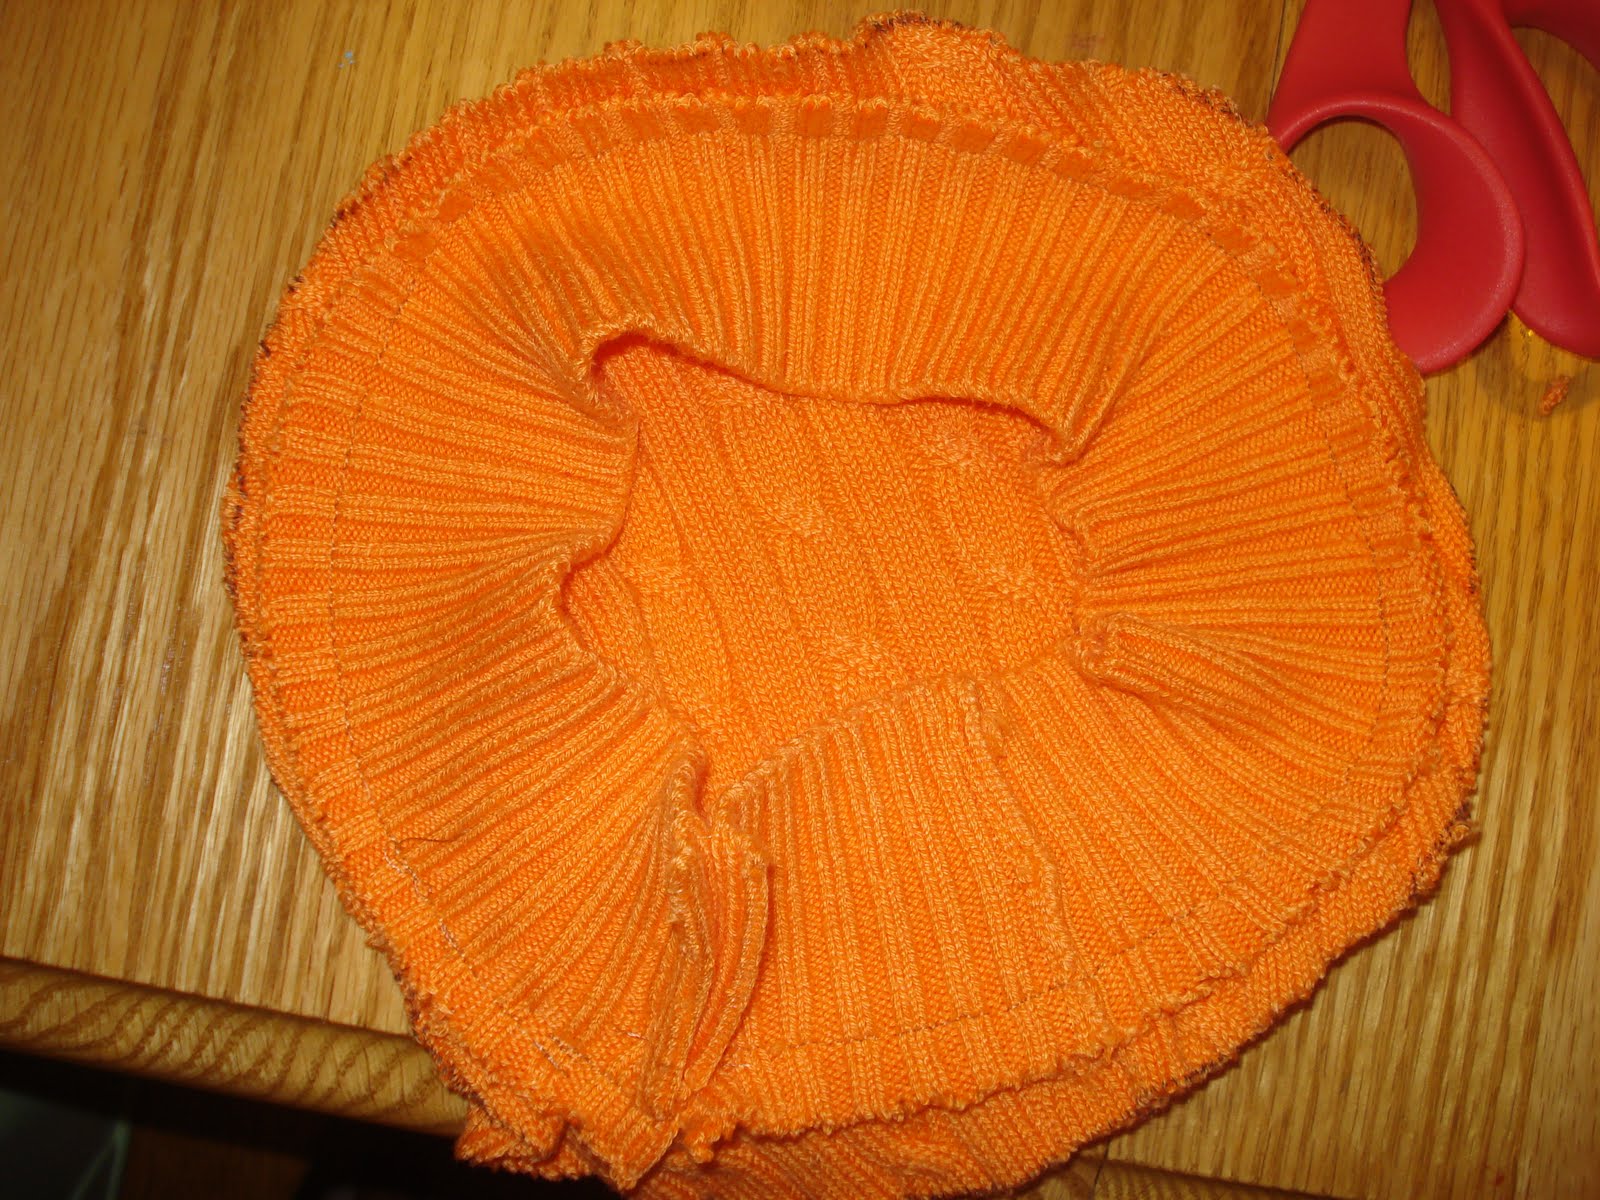
Sew along the outside edge.
There will be a small opening where the two ends of the band come together, sew that shut as well.

Now turn the hat right-side-out. There you have your basic sweater hat (the same one from my earlier tutorial), but we want to turn this one into a pumpkin.

Cut two pieces of green fabric (I used an old tee shirt) into the shape of leaves and a piece of brown fabric (I used a sweater) into a small rectangle.

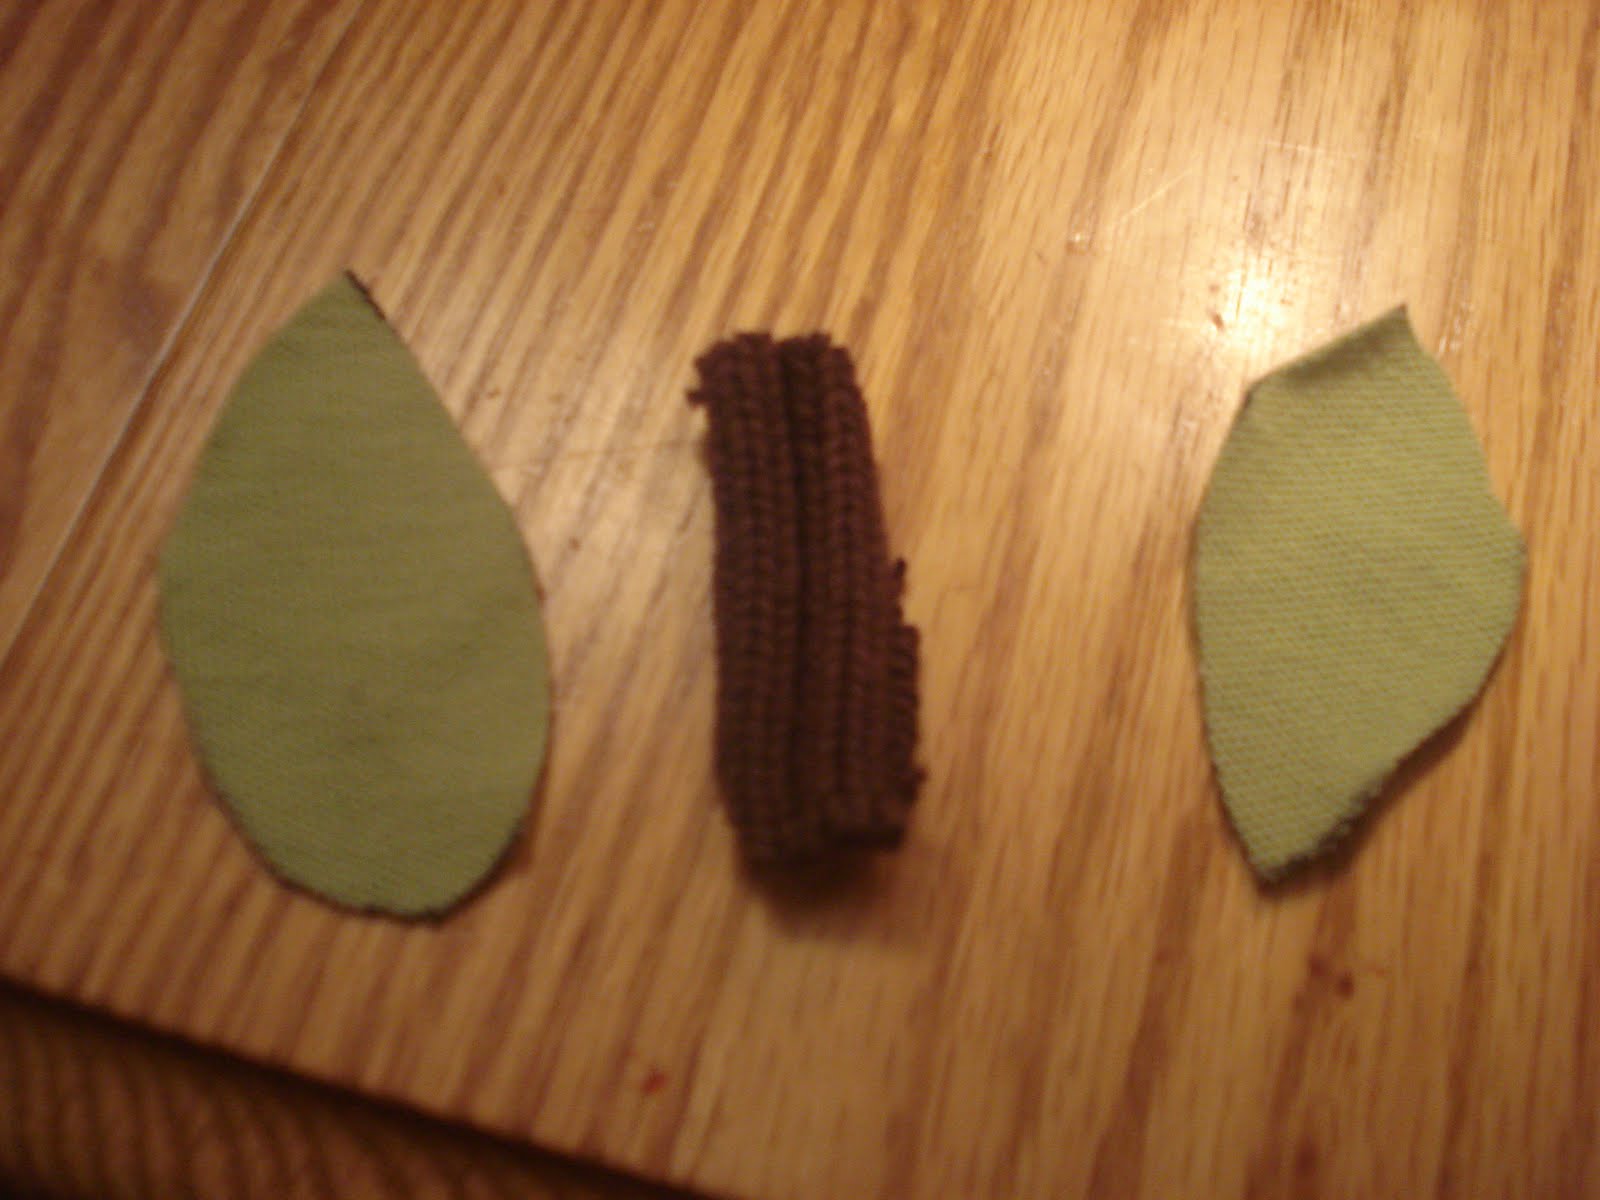
Stitch around the edges to prevent unraveling and then sew these three pieces together.

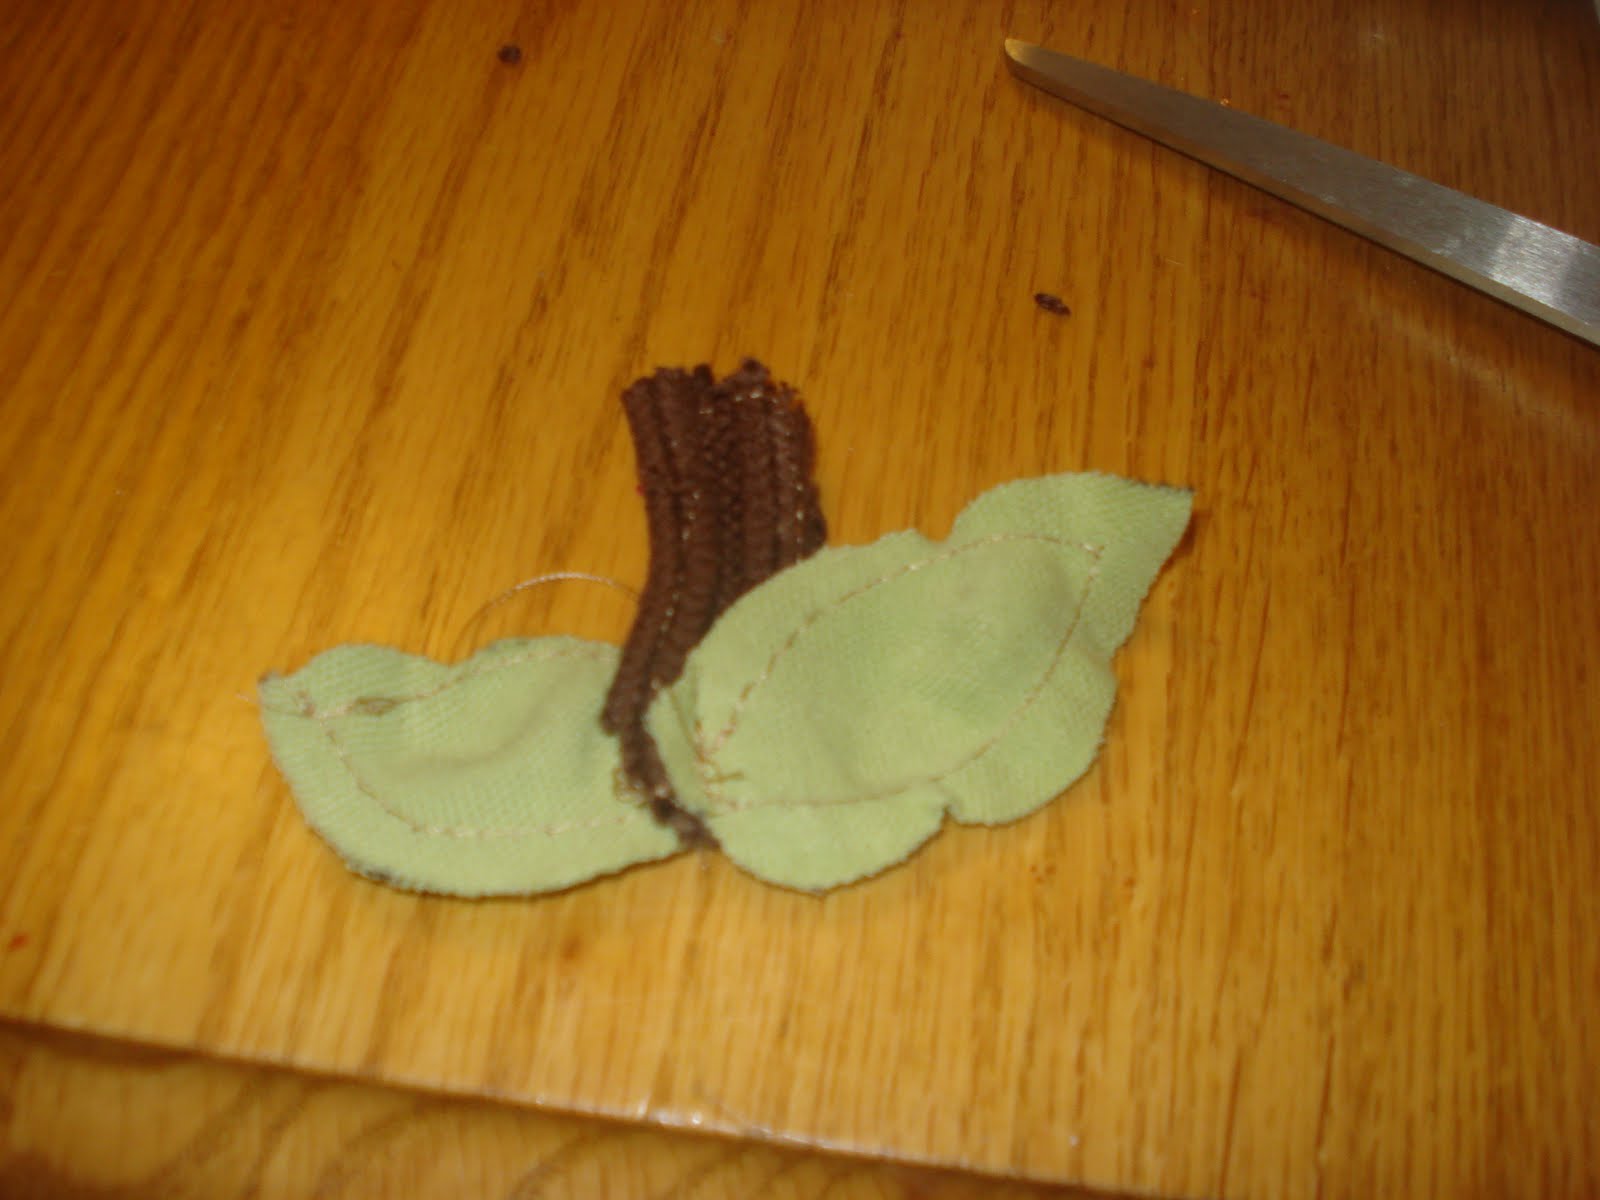
Sew the stem and leaves onto the top of the hat and you have yourself a brand new pumpkin sweater hat.

You could pair it with an orange t-shirt for an easy DIY Halloween costume.

Hide your sweaters. These sweater hats are addictive. I’ve made 4 of them tonight.

And, as always, I like to see how much money I saved by making stuff myself. These pumpkin sweater hats retail at Gymboree for $15. (although they were on sale this weekend.) I just made 2 for free in less than half an hour. That’s $30 in my pocket. I’ll take it. 🙂

Pumpkin Sweater Hat How to turn an old sweater into an adorable fall hat for your toddler. This is a great beginner sewing project!


How to make adorable pumpkin sweater hats in less than ten minutes out of upcycled sweaters


Baby photo credit: Deposit Photo

Share this:

  • Click to share on Facebook (Opens in new window)
  • Click to share on Pinterest (Opens in new window)
  • Click to share on Twitter (Opens in new window)
  • More
  • Click to share on Pocket (Opens in new window)
  • Click to share on Tumblr (Opens in new window)
  • Click to share on Reddit (Opens in new window)
  • Click to share on LinkedIn (Opens in new window)
  • Click to print (Opens in new window)

Cold Weather Craft: Bleach Paintings

October 9, 2012 By: Stephanie2 Comments

It’s chilly here in PA this week!

Between the extra cool fall weather and getting into the trenches with our homeschooling, it makes me miss being in the classroom.

I wanted to share a super easy 5 minute craft with you. It also doubles as a science project. (Chemical reactions, anyone?)

I learned about this in a college art class for elementary school teachers. This craft is better for older kids, ages 8+, I would say.  (P.S. When I did this in the classroom the kids had to wear safety glasses and gloves. It’s always best to be overly cautious when it comes to kids and chemicals.)

You only need 3 supplies:

  • a very small amount of bleach
  • a q-tip
  • dark construction paper

Dip the Q-tip in bleach. (It’s probably best to let an adult do this part, just in case)

Draw a winter scene on the paper.

Wait 30 seconds or so and ta-da. Magic.

It’s more even more fun if you don’t tell them about the bleach and make them try to guess what you are using, or if you use a disposable “magic paint brush” and do it as a demonstration for little ones. 🙂

Save your paintings and use them as fun homemade holiday gift wrap!

I’ve seen Cheri from I Am Momma Hear Me Roar design t-shirts using a bleach pen. It might be fun to have your kids make their own.

Let me know if you try it.

Linking to Somewhat Simple 
Serenity Now
A to Z

Share this:

  • Click to share on Facebook (Opens in new window)
  • Click to share on Pinterest (Opens in new window)
  • Click to share on Twitter (Opens in new window)
  • More
  • Click to share on Pocket (Opens in new window)
  • Click to share on Tumblr (Opens in new window)
  • Click to share on Reddit (Opens in new window)
  • Click to share on LinkedIn (Opens in new window)
  • Click to print (Opens in new window)

Letters From Mommy

September 29, 2012 By: Stephanie3 Comments

Do your kids ever say something outrageous or off the wall that you think you’ll never forget, but by the time you want to tell your husband or your mom about it later that night you already forgot?

I do that all the time!

That’s why earlier this year I started keeping a book of letters for each of my kids and I’m already so glad that I did.

I can already look back and see some funny moments I would have otherwise forgotten.

I want each of my kids to have memories recorded in my handwriting.

When they are old enough, I hope I continue this tradition and they can write letters in their notebooks as well.


It only cost about $1 to start this tradition for each child, but I know they will treasure these memories forever. I think they will like each having their own book of letters from mom. I made sure to buy the books in a “signature color” for each kid, so I wouldn’t mix them up and write a letter in the wrong book. (I can totally see myself doing that!)

Although I take about a million photos every week, I’m not a scrapbooker anymore. I’m glad to have a place to record our memories.

I think it’s so important when you have several kids to recognize each of them individually.  Do you have anything special that you do for each child?


_____________________________________________________________________

Oh! I also have some exciting news. Have you noticed the new button on my sidebar? I’ve been selected as one of the Top 35 Most Pinteresting Moms! I was super excited when I was asked to join. I’m not sure how I managed to land a gig among such talented ladies. They are hilarious and they have a lot of fun ideas. Make sure to check out our group Pinterest board!

Share this:

  • Click to share on Facebook (Opens in new window)
  • Click to share on Pinterest (Opens in new window)
  • Click to share on Twitter (Opens in new window)
  • More
  • Click to share on Pocket (Opens in new window)
  • Click to share on Tumblr (Opens in new window)
  • Click to share on Reddit (Opens in new window)
  • Click to share on LinkedIn (Opens in new window)
  • Click to print (Opens in new window)

How to Paint Paneling

August 27, 2012 By: Stephanie5 Comments


One of the things we are doing to prepare to put our house on the market is to update the very dated wall paneling in our lower level.

This stuff is nasty. It’s not even real wood. It’s a shiny, plasticy, fake version of wood that has seen better days since it was first installed sometime in the late 60’s.

Here is a before picture, mid-remodel and pretty messy. Sorry.

This is that same corner after I painted the paneling and cleaned up a little. (I built that shelf all by myself, aren’t you proud of me?)

I did this section of our basement about a year ago and it has held up very well, despite daily use. There hasn’t been any peeling or chipping.

I will tell you that it is a giant pain in the you-know-where.

There are many ways you can go about painting over paneling, but a lot of them involve pretty nasty chemicals and strippers. I was pregnant and I had two toddlers in the house when I started this project, so those methods were quickly crossed off my list. This is the method I used.


Step 1: Wipe down the walls with a damp rag to remove any dust or residue.

Step 2: Use a high quality zero VOC adhesion primer. I used the Olympic brand from Lowes. Unfortunately, I found that I had to use a paint brush for this entire process because, no matter what kind of roller I tried, it either splattered or wouldn’t get into the spaces in between the panels. Don’t be scared because the first coat looks terrible. The most important thing is to get the cracks between the walls completely covered. Some people caulk the cracks and sand them for the look of a flat wall, but I actually like the texture of the paneled look. (Plus, I’m lazy.)


The Olympic primer worked great but I found that I had to wait at least 24 hours in between coats or else it would start to clump and peel off the wall while I was applying the second coat.

Step 3: After 24 hours, apply the second coat


Step 4: Wait another day and apply the 3rd coat

Step 5: Paint. It took me three coats of primer and 3 coats of paint until I was satisfied.

I’ve been working all weekend on the paneling in the rest of our lower level. I hope whoever buys this house appreciates all of this work. I wish I would have sucked it up and done this 3 years ago so that our own family could have enjoyed a prettier space.

C’est la vie.

I think it’s 100% prettier than it was before.


Share this:

  • Click to share on Facebook (Opens in new window)
  • Click to share on Pinterest (Opens in new window)
  • Click to share on Twitter (Opens in new window)
  • More
  • Click to share on Pocket (Opens in new window)
  • Click to share on Tumblr (Opens in new window)
  • Click to share on Reddit (Opens in new window)
  • Click to share on LinkedIn (Opens in new window)
  • Click to print (Opens in new window)

How to Can Strawberry Jam

May 30, 2012 By: Stephaniecomment

Strawberry jam in a jar with fresh berries on the wooden background

I figured the day after I posted about eating healthier would be a great time to post a recipe that is literally half sugar. ; )

When I first started canning two years ago there was a lot of trial and error on my part because I couldn’t find a tutorial that explained exactly how to do it, but now I know, so I’m going to try my best to write one up to tell you how to turn these:

fresh strawberries

into this

Strawberry jam

I’m sorry for the poorly lit photos below. I usually do our canning late at night because it’s not really a safe activity for little kids to be around. That’s why I had to buy the stock photo above to show you someone else’s jam in better lighting. 🙂 

I’m going to teach you the water bath method, which just means process the cans in boiling water, because it’s really easy and it makes sure to keep the food safe. (Some people might tell you to just put the jars in the freezer or turn them upside down, which will seal them but does not keep out bacteria, but if you are going to go through all the trouble of getting the jars ready to that point it really is just as easy to place them back in boiling water for a few minutes for the peace of mind that they are safe to feed your family.)

It might seem overwhelming, but just read through the steps a few times before you try it. Most of the steps are very easy. It is not hard to can your own food, it’s just time consuming. It took me a little over an hour last night to can this batch.

How To Can Strawberry Jam

You will need:

  • 2 large pots, 1 for water and 1 for actually making the jam
  • Several half pint size canning jars with lids and rings (they usually have these at the grocery store or craft stores)
  • a wide mouth funnel
  • tongs
  • 2 clean kitchen towels
  • a ladle
  • a cooking spoon
  • a potato masher
  • strawberries (4 cups, mashed)
  • sugar (2 cups)
  • lemon juice (1/4 cup)
  • a freezer safe plate
  • labels for your jars

Step 1:

Fill a large pot with water and bring it to a boil on the stove. Also, go ahead and put your empty plate in the freezer.

waterbath

Step 2: 
While you are waiting for the water to boil, wash your strawberries, cut off the stems, and mash them up. (I just use a potato masher)

Step 3:

Once the water has boiled, remove the lids and rings from the empty jars and carefully place all of the separate pieces in the boiling water. Let them boil for 10 minutes to sterilize the jars. Some people like to use the dishwasher to sterilize their jars, but since I’m going to need the boiling water anyway, I think it’s easier to do it this way.
 
Step 4:
While you are sterilizing the jars, combine your ingredients in a separate large pot. The recipe I use is 4 cups mashed strawberries, 2 cups sugar, and 1/4 cup lemon juice, which makes 4 half pints. You can double it for a bigger batch.
 
Strawberry jam.
 
Step 5:
Bring the strawberry mixture to a rolling boil, and stir frequently for at least 10 minutes.
 
Step 6:
Your canning jars are sterilized and ready to remove. Use tongs to remove the pieces of the canning jars and set them on a large clean kitchen towel.
 
Step 7:
To see if the jam is ready, remove the plate from the freezer. Spoon a small amount of jam onto the plate and put it back in the freezer for one minute. After a minute, remove the plate and run your finger through the jam. If it runs back together it’s not quite ready yet. If the space you ran your finger through stays open, you are ready to can.

Step 8:
Place a wide mouth funnel on top of your first jar and ladle in your jam. Leave a small gap (1/2 an inch or so) at the top, that’s called “head space.” Be careful because both the jam and the jar are very hot.

**Wipe the rim of your jar with a clean kitchen towel. **This is a small step that’s easy to forget, but it’s one of the most important.  If there is gunk on the top of the jar it might not seal and it could make a huge mess, plus then it’s not safe to eat

Also, take a clean knife and slide it down inside the jar along one side. this will help remove air bubbles.

Place the lid back on the jar and then put the ring back on and tighten it. You only want it to be finger-tight.

waterbath canning

Step 9:
This is where people have lots of different opinions. I use the method from the Ball canning book, which is the one recommended by most experts. Knock on wood, I have never had a jar that didn’t seal with this method.

Carefully place the jars back into the boiling water and put a lid on the pot.
Once the water is boiling, leave the jars in the boiling water for 10 minutes without removing the lid.

After 10 minutes, turn off the heat and remove the lid. Wait 5 more minutes.

Step 10:

After the additional 5 minutes, use tongs to carefully remove the jars. Be very careful not to tilt them.

Place the jars onto your clean kitchen towel. You will probably hear a small pop come from each jar within the first few hours. (Mine always pop after just a few minutes.)

Step 11:
Leave the jars alone for 24 hours. Try to press the lid in with your finger. If there is no give, then the jar is sealed correctly.

Step 12:
Label the jars with the content and date. They will be safe to eat for a year but if your house is like mine, they won’t last that long. 🙂

waterbath canned jam

Once you finish a the jam you can save and reuse the jars and rings, but not the lids. You can usually purchase lids separately at the grocery store or even places like Target this time of year.

Strawberry jam

Share this:

  • Click to share on Facebook (Opens in new window)
  • Click to share on Pinterest (Opens in new window)
  • Click to share on Twitter (Opens in new window)
  • More
  • Click to share on Pocket (Opens in new window)
  • Click to share on Tumblr (Opens in new window)
  • Click to share on Reddit (Opens in new window)
  • Click to share on LinkedIn (Opens in new window)
  • Click to print (Opens in new window)

Quilted Flat Iron Cover

August 8, 2011 By: Stephaniecomment

How to make an adorable, quilted, and flame resistant flat iron cover,

That’s me and Abby with my dear friend Lauren. She is my oldest friend. We met in elementary school 20 years ago! (We are getting old, y’all.)

Lauren’s birthday was at the end of July and I wanted to make her something that she actually requested a while ago.

When we were in Nashville on our girl’s trip last year she was telling me about a problem she had while traveling. Lauren travels A LOT for business and for pleasure, as in over a dozen foreign countries in a year, and she was telling me about how she was constantly having to get ready in fancy hotel rooms paid for by her company. (Bummer, right? We all feel sooo bad for you, Lar.) But after she showered and did her hair in the morning she kept having to put her still-hot flat iron back into the suitcase so that she could check out of the hotel.

She asked me to make a cover for it.

I was like. “Sure, no problem.”

Then I hit a snag.

I wanted it to be heat/flame resistant for obvious reasons, but have you looked at flame resistant fabrics? They cost hundreds of dollars and are pretty much the ugliest fabric on Earth. The heat resistant sprays are also really pricey. Sorry, Lar, I’m not dropping 100 bucks on fabric for your flat iron cover. I guess I could just buy one, but that’s kind of a cop-out since she asked me to make it.

Hmmmm….

Duh! You know what is really cute, cheap, and flame resistant? Children’s pajamas!

(You can see the federal guidelines for flame resistant sleepwear here)

Now that I’ve done a little more research, I would make sure to buy size 9 months or larger. Kohl’s seems to be the best place to get them because they tell you when the pj’s are flame resistant. Some other companies (ahem, Tar-jay) only seem to label when clothes are not, which I didn’t find very helpful at all. Is a Sleep N Play specifically designed for sleeping? I don’t know. It says it’s also for playing, but it does say it’s for sleeping & it’s not labeled as not flame resistant…annoying.

Anyway, it’s a pretty easy project. I got it done in less than an hour.

Turn children's pjs into a flat iron cover

Just cut out the sides of the pj’s in a shape similar to your flat iron.

Next, unfold each side and insert a piece of quilt batting cut to size.

Then refold it, sew the sides shut, and do a little quilting action. (I’ve never quilted anything & mine turned out fine, so yours will too, promise. Just use a heavy duty needle on the machine because you need to go through a lot of layers.) I just did large random circles because that motif went with the fabric I chose. I wanted it to look Vera Bradley-esque.

You should have two identical quilted pieces. Now sew them together, leaving the top open. Then hem the top. I also used the trim from the pj sleeves to add a little loop that could be used for hanging or carrying.

Basically, it’s like a skinny oven mitt without the part for your thumb, so I guess you could also use this technique for making oven mitts if you could find large enough pj’s. Pretend kid-size oven mitts, anyone?

There you go. Now we can all make cute covers for our flat irons, curling irons, toasters, and whatever else you can think of. Just please be careful. I’m not liable if yours catches on fire.

Share this:

  • Click to share on Facebook (Opens in new window)
  • Click to share on Pinterest (Opens in new window)
  • Click to share on Twitter (Opens in new window)
  • More
  • Click to share on Pocket (Opens in new window)
  • Click to share on Tumblr (Opens in new window)
  • Click to share on Reddit (Opens in new window)
  • Click to share on LinkedIn (Opens in new window)
  • Click to print (Opens in new window)

Making Lip Gloss

July 8, 2011 By: Stephanie4 Comments

DIY Lip Balm. Learn how to make your own dye-free lip gloss from some simple ingredients that you probably already have around the house.

Abby has been very into the idea of trying on my makeup lately and asking for some of her own. I saw a post about making lip gloss for little girls out of Kool Aid here and I thought it was an awesome idea! 

Except I didn’t have any Kool Aid or little pots like the ones used at Mumma Made It. and I have been having a lot of morning sickness with this pregnancy, so I really didn’t feel up for going to the store. Plus I wanted Abby’s pretend make-up to look more like Mommy’s, except I wanted it to have no color so that it wouldn’t look like I was trying to get my daughter in an episode of Toddlers in Tiaras.

I might not have had the “right” stuff, but I did have a breath mint, some Vaseline, and an old lip stick that I never wore…

First I cleaned out the lipstick tube. I found that the best way to do this is by using a q-tip to work a baby wipe around in there. It doesn’t have to be completely clean because when you are finished, any extra old lipstick hiding in there will come up on the outside edge of the new one and you can wipe it away really easily.

Next, I crushed the breath mint in a plastic bag.

Then I microwaved about a teaspoon of Vaseline, stirring every 30 seconds or so until it melted.

I added the crushed mint and stirred it around for a little while.


(Try to ignore the clutter on my counters, k? Thanks.)

Then I needed a way to pour the liquid into the tube without making a huge mess, so I made a tiny funnel out of a post-it note and poured it into the tube. Make sure the lipstick tube is rolled all the way down before you add the liquid. I had a lot left over, I think this recipe might be enough to do 2 tubes.

It sounds even more complicated than it is. It really only took about 3 or 4 minutes, start to finish.

I put it in the refrigerator for a few minutes and it set up really fast! I was worried about how the lipstick tube would work because every other lip gloss tutorial I found said to use little pots. It works fine. I had to roll it to the top , then roll it down again and wipe away a tiny bit of excess, but it works like a charm. In the picture it is still a little wobbly because it hadn’t completely set in the frig yet.

If I was going to do this again, I would use mint extract instead of a crushed breath mint. But, hey, we work with what we’ve got. 😉 

If you use Kool Aid or hot chocolate mix, or any other kind of drink mix instead of the crushed mint, it will tint the gloss. I think it would be fun to make lots of different flavors at a sleep over party or to give as a gift for a tween girl. I also wish I would have known how to do this when I was teaching science, because I think it would have been a fun demonstration about states of matter that we could have used as a Mother’s day gift.

Let me know if you make one. 🙂

Linking to:

Sawdust and Paper Scraps

Share this:

  • Click to share on Facebook (Opens in new window)
  • Click to share on Pinterest (Opens in new window)
  • Click to share on Twitter (Opens in new window)
  • More
  • Click to share on Pocket (Opens in new window)
  • Click to share on Tumblr (Opens in new window)
  • Click to share on Reddit (Opens in new window)
  • Click to share on LinkedIn (Opens in new window)
  • Click to print (Opens in new window)

Faux Barnwood Tutorial

July 7, 2011 By: Stephanie7 Comments

faux barn wood

 Today I’m sharing my latest build with you.

It’s free and it’s pretty and I made it myself, 3 of my favorite things. 🙂

If you don’t happen to have a gigantic pile of scrap wood in your garage (actually, this is one of three piles) you might need to spend $20 or so.

I’m super excited about this project for several reasons:
1. It was free
2. I made it from scratch, as in this time I cut the wood this time and everything. All. by. myself.
3. I figured out how to get it to look like aged barn wood, which I happen to think is beautiful and also sort of hides my mistakes (of which there are plenty, mostly because I cut everything with the jigsaw, a.k.a the only saw I’m not scared of.)

I used this plan from Ana White, but I added an extra divider and turned it upside down.

Now on to how to get cheap pine to look like aged barn wood…

Step 1: Torch it. I used a charcoal grill lighter because I needed to be able to get into some tight spots. I guess you could just add streaks of black paint, but where’s the fun in that?

Step 2: Paint it. I made a wash of 3 parts gray acrylic paint, 1 part baby blue, and 4 parts water. Then I brushed it over the entire piece.

Step 3: Unpaint it. I used wet paper towels and rubbed off as much of the blue/gray as I could just as the paint was almost dry.

Step 4: Paint it again. I made another wash out of 1 part soft black (almost purple) and 1 part water. I rubbed that into the piece with more paper towels.

Just keep adding and taking off paint until you get the look you want. Here’s a close-up.

I wasn’t sure Hubby was going to be a big fan. He sort of hates when I take new stuff and try to make it look old and beat up. I happen to love it. But, actually, he came home and said, “Wow. That’s a really cool finish.” Winning.

Linking to:

Stories A to Z

Weekend Bloggy Reading

Furniture Feature Fridays

Share this:

  • Click to share on Facebook (Opens in new window)
  • Click to share on Pinterest (Opens in new window)
  • Click to share on Twitter (Opens in new window)
  • More
  • Click to share on Pocket (Opens in new window)
  • Click to share on Tumblr (Opens in new window)
  • Click to share on Reddit (Opens in new window)
  • Click to share on LinkedIn (Opens in new window)
  • Click to print (Opens in new window)

Easy Easter Crafts for Kids: Resurrection Eggs

April 18, 2011 By: Stephanie1 Comment

Resurrection Eggs

These are not an original idea of mine, but they are really cool, so I thought I’d share.

We made these Resurrection Eggs as a craft in our mom’s group at church this year. It is an easy Easter craft for kids.

I love that instead of being filled with candy (which there will still be plenty of, I’m sure) they give the Easter egg hunt a much greater purpose and they can be reused every year.

Make some Resurrection Eggs with your child to reuse year after year

There are 1 dozen plastic eggs placed in a carton. Each egg is filled with a small item that represents a part of the Easter story and each egg has a corresponding verse. Hide the eggs and have a regular Easter egg hunt, then put them back in order and read the verses as you open them.

Resurrection Eggs are a great Easter tradition

There are several different versions available, but this is the one we used:

1: Palm branch to represent Jesus’ entry to Jerusalem (Matthew 21:1-9)
2. Silver coins to represent Judas accepting 30 coins (Matthew 26:14-16)
3. Cup to represent the Last Supper (Matthew 26:26-28)
4. Praying hands to represent Jesus in the garden (Mark 14)
5. Whip to represent the soldiers whipping Jesus (John 19)
6. Crown of thorns (we used a brown pipe cleaner) (Matthew 27)
7. Cross (we hot glued two small sticks together) (John 19: 16-18)
8. Dice to represent the guards casting lots for Jesus’ robes (John 19:26)
9. Soldier’s spear (John 19: 31-37)
10. A piece of linen to represent Jesus’ body being wrapped (Matthew 27:57)
11. A stone to represent the stone placed in front of the tomb (Matthew 28)
12. The last egg is left empty to represent the empty tomb (Matthew 28:5-8)

You can get creative & use household items to fill the eggs, like a shoestring to represent the whip, or you could just print out clip art images and laminate them.

Resurrection Easter Eggs

We try to stress that Easter is not all about bunnies and chocolate. How to do keep the true meaning of Easter the focus for your family? Do you have any other ideas for easy Easter crafts for kids?


You may also like: 

Nana’s Apple Cake Recipe

Nana's Apple Cake Recipe

Share this:

  • Click to share on Facebook (Opens in new window)
  • Click to share on Pinterest (Opens in new window)
  • Click to share on Twitter (Opens in new window)
  • More
  • Click to share on Pocket (Opens in new window)
  • Click to share on Tumblr (Opens in new window)
  • Click to share on Reddit (Opens in new window)
  • Click to share on LinkedIn (Opens in new window)
  • Click to print (Opens in new window)

You Built That?! This Is Why Blogging is Awesome!

April 13, 2011 By: Stephaniecomment

I was tickled pink today (I guess I should say tickled turquoise) when I got a Facebook message from Alana, a woman I’ve never met, with this picture and a nice message. Can you believe she was inspired by my barn door tutorial enough to build that?! She saw the tutorial posted on the Facebook page for Knock Off Wood and she decided to give it a try. Boy did it ever work out for her! I’m still struggling a bit (a lot) with getting my own doors square, but hers turned out amazing!!!

Another reason that blogging is awesome is that it allows us to create a community of women doing all kinds of amazing things. One of those things is supporting each other in prayer. Please keep my real life friend Karin and her family in your prayers today. Their 10-day-old son underwent emergency heart surgery this afternoon.

Share this:

  • Click to share on Facebook (Opens in new window)
  • Click to share on Pinterest (Opens in new window)
  • Click to share on Twitter (Opens in new window)
  • More
  • Click to share on Pocket (Opens in new window)
  • Click to share on Tumblr (Opens in new window)
  • Click to share on Reddit (Opens in new window)
  • Click to share on LinkedIn (Opens in new window)
  • Click to print (Opens in new window)
  • « Previous Page
  • 1
  • 2
  • 3
  • Next Page »
  • Facebook
  • Instagram
  • Pinterest
  • RSS
  • Twitter

Welcome! I’m Steph.

This is a little corner of the internet we like to fill with honesty, heart, and humor. Read More…

Cover for Binkies and Briefcases with Stephanie Giese
19,205
Binkies and Briefcases with Stephanie Giese

Binkies and Briefcases with Stephanie Giese

Stephanie Giese is an indie author based in Florida. She writes stories about realistic problems with humor, heart, and sass. Her work has a strong focus on mental health and consent. Her North Bay small-town romance series is set for release in 2025.

Binkies and Briefcases with Stephanie Giese

4 months ago

Binkies and Briefcases with Stephanie Giese
I know it’s a small thing, but I believe small things can add up to big changes. my entire North Bay series, including Out of Left Field, Right as Rain, and Way Off Base, is free on Kindle from Jan. 30-Feb. 3. Please take the funds you might have spent on my books this week and reallocate them toward the areas in our country that need them the most. Follow creators like Dad Chats who can direct you toward practical needs local to them. I hope my quirky romcoms can bring you some comfort and joy during difficult times, and I hope together we can take small, practical steps toward big changes. ... See MoreSee Less

Photo

View on Facebook
· Share

Share on Facebook Share on Twitter Share on Linked In Share by Email

Binkies and Briefcases with Stephanie Giese

4 months ago

Binkies and Briefcases with Stephanie Giese
I know there is an overall feeling of helplessness in our country right now. So many of us are at a loss for what to do beyond making phone calls and social media posts (which are still important, but can feel like not enough). I believe strongly in the power of small things adding up to big ones. As one person, I might not be able to do much, but what I CAN do is use my voice and my books to work toward the change I’d like to see. That’s why, for the next five days, from Jan. 30-Feb 3, I’m making the Kindle versions of my entire North Bay series (Out of Left Field, Right as Rain, and Way Off Base) completely free. Art has power, and I do hope these comedies can bring you some comfort and joy in difficult times, but most importantly, I also hope you’ll consider redirecting the funds you might’ve spent on my books and donating instead to one of the many charities working tirelessly in our cities right now. If you are located in an area like Minnesota or Portland, please use the space below to make people aware of the organizations in your area that need help. ... See MoreSee Less
View on Facebook
· Share

Share on Facebook Share on Twitter Share on Linked In Share by Email

Reader’s Choice

Image HTML map generator

Follow Me on Pinterest

featured-on

What You’re Saying

  • 28 Best Stone Fireplace Ideas And Designs - Perfect Decor Place on DIY Stone Fireplace with AirStone
  • Kevin Hicks on How to Budget for Building Your Own Home
  • Amy on DIY Stone Fireplace with AirStone
  • Gendered clothing - GenderEd on A Target Intervention on Behalf of My Daughters
  • Wellshop Store on Dressing Our Daughters: How Target Responded to My Last Blog Post

Latest Posts

ALL I Never Knowed: The Book Is Here!

If you’re new here, you may want to subscribe to my Email Newsletter. Thanks for visiting!Welcome back! Be sure to check out my Email Newsletter. Thanks for visiting!It’s finally here, in my hands. It has been a loooong time in the making, but our book, All I Never Knowed: Mental Illness, a Mother’s Love, and […]

Share this:

  • Click to share on Facebook (Opens in new window)
  • Click to share on Pinterest (Opens in new window)
  • Click to share on Twitter (Opens in new window)
  • More
  • Click to share on Pocket (Opens in new window)
  • Click to share on Tumblr (Opens in new window)
  • Click to share on Reddit (Opens in new window)
  • Click to share on LinkedIn (Opens in new window)
  • Click to print (Opens in new window)

Save Money with Fetch

Hey everyone! This is Chelsea, Steph’s asistant, back with the simplest app for getting cash back on things you’re already buying! We’ve covered Ibotta, Shopkick, Coupons.com, Swagbucks and we’re all saving hundreds of dollars by now, right? RIGHT!? I’m really hoping you guys have jumped on the rebate app savings train because it’s just so […]

Share this:

  • Click to share on Facebook (Opens in new window)
  • Click to share on Pinterest (Opens in new window)
  • Click to share on Twitter (Opens in new window)
  • More
  • Click to share on Pocket (Opens in new window)
  • Click to share on Tumblr (Opens in new window)
  • Click to share on Reddit (Opens in new window)
  • Click to share on LinkedIn (Opens in new window)
  • Click to print (Opens in new window)

Splendid Spoon Review

I was excited to receive a box of products to try from Splendid Spoon this summer! They invited me to try their line of plant-based, ready-to-eat foods and delivered them right to my door. Check one in the pro column for convenience. I did receive these products free of charge in order to rate them […]

Share this:

  • Click to share on Facebook (Opens in new window)
  • Click to share on Pinterest (Opens in new window)
  • Click to share on Twitter (Opens in new window)
  • More
  • Click to share on Pocket (Opens in new window)
  • Click to share on Tumblr (Opens in new window)
  • Click to share on Reddit (Opens in new window)
  • Click to share on LinkedIn (Opens in new window)
  • Click to print (Opens in new window)

My Networks

#BlogHer15: Experts Among Us Voices of the Year Honoree