Binkies and Briefcases

SUBSCRIBE

  • About
    • Work With Me!
      • Blog & Small Business Consulting
    • Disclosures
  • Popular Posts
  • Adoption & Special Needs
  • Saving Money
  • Recipes
    • Breads
    • Breakfasts
    • Sides
    • Soups
    • Entrées
    • Desserts
  • For the Home
    • For the Home
    • Beauty
    • Crafts
      • For Kids
  • My Books

EASY Fall Beanie

September 7, 2010 By: Stephaniecomment

If you're new here, you may want to subscribe to my Email Newsletter. Thanks for visiting!

Welcome back! Be sure to check out my Email Newsletter. Thanks for visiting!

Remember how I told you I was on a sweater re-purposing kick? Still on it.

My mom dropped off two huge bags of sweaters she no longer wears. Score! After I raided them and took a few to add to my wardrobe I started using the rest to make stuff. I made another sweater puppet and a teddy bear. Sadly the teddy bear came out, well, just plain sad. He is not destined to be blogged about, but my newest creation is.

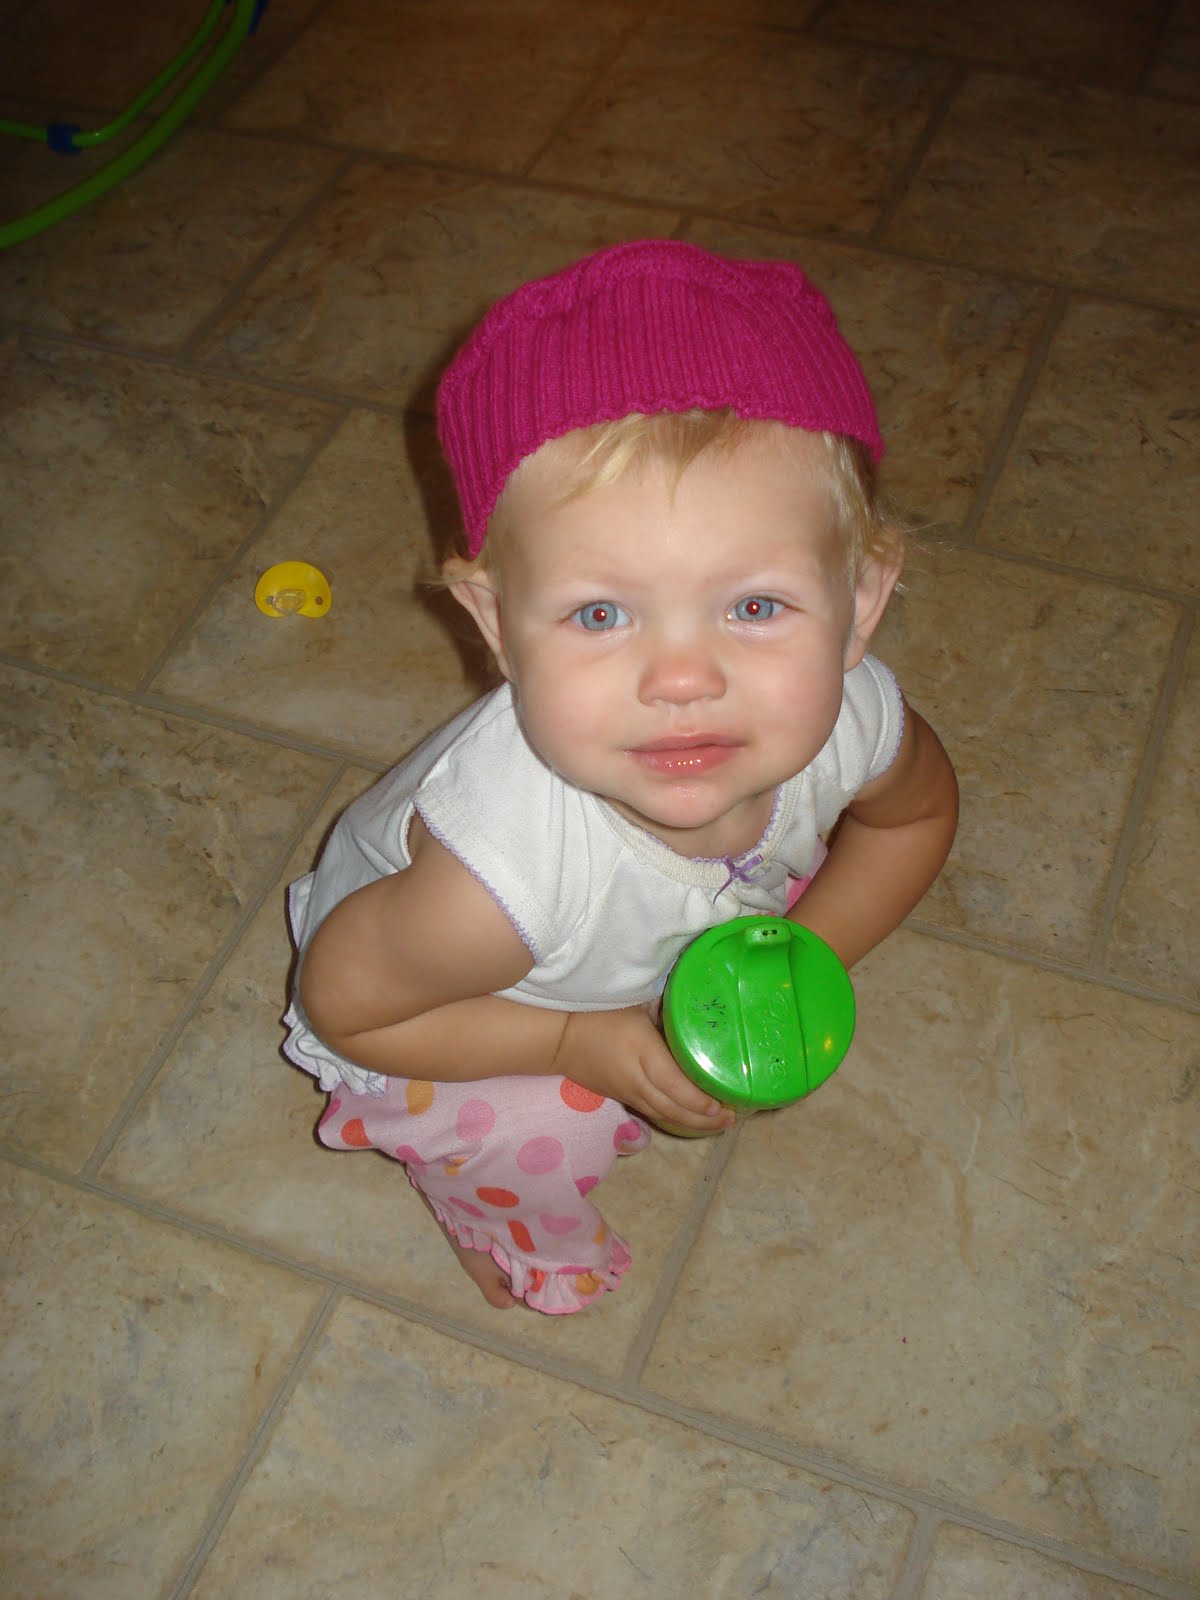
I made the easiest toddler sweater hat ever. Seriously. Gymboree has several sweater hats in their fall line that are super cute, but why buy one for Little Diva when I can make one for free in 5 minutes?

Yes, 5 minutes. It would be just as easy to make one for an adult.

First you need a sweater.

I traced a bowl to get a perfect circle, then I cut it out. If you are making this adult sized, use a dinner plate.

Then I cut a strip of the band from the bottom of the sweater the same size as the circumference around my daughter’s head. (You can measure if you want to, but I just cut a long strip, wrapped it around her head, and cut it off to size)

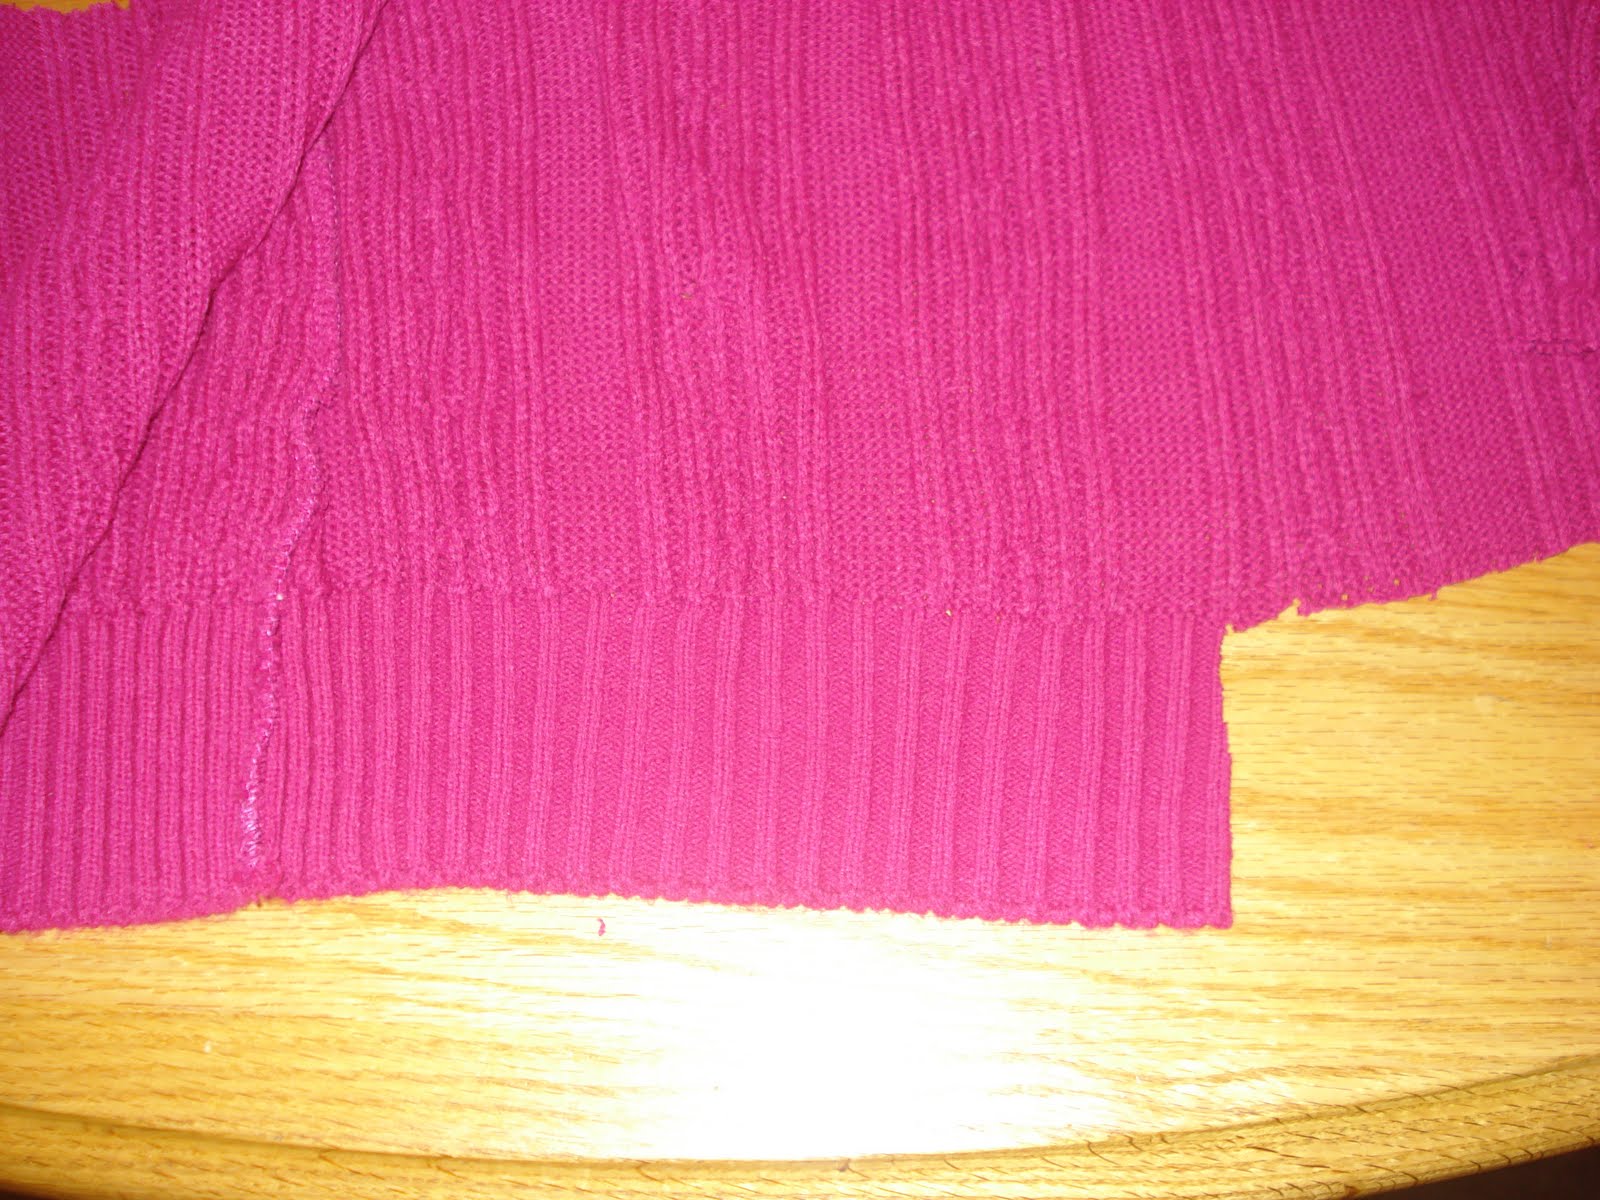
(See the band at the bottom of the sweater? Cut that off for the band of the hat.)

Ok, now you should have a circle and a long strip.

Pin them, right sides together. (put the side you cut toward the outside, that way when you sew the finished edge from the sweater will be left alone and there is no need to re-finish the bottom of the band.)

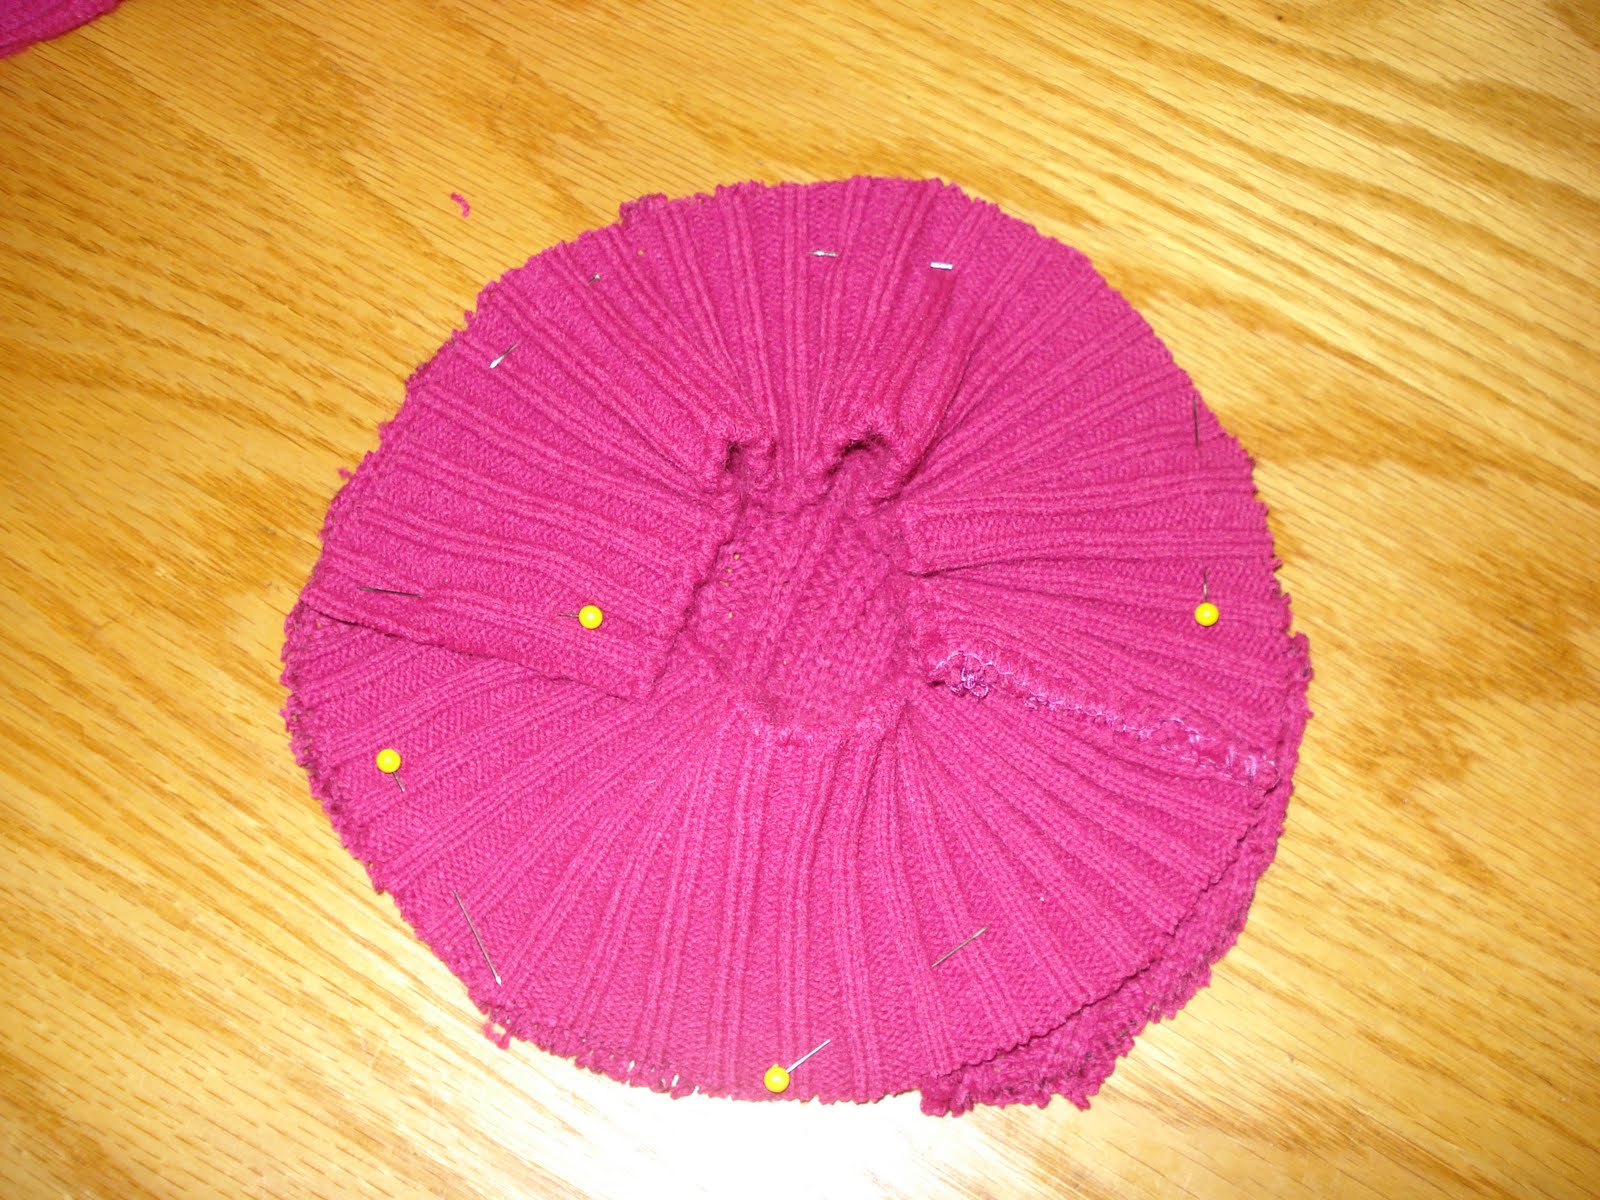
Sew along the outside edge and sew the band closed.

Turn it right-side-out.
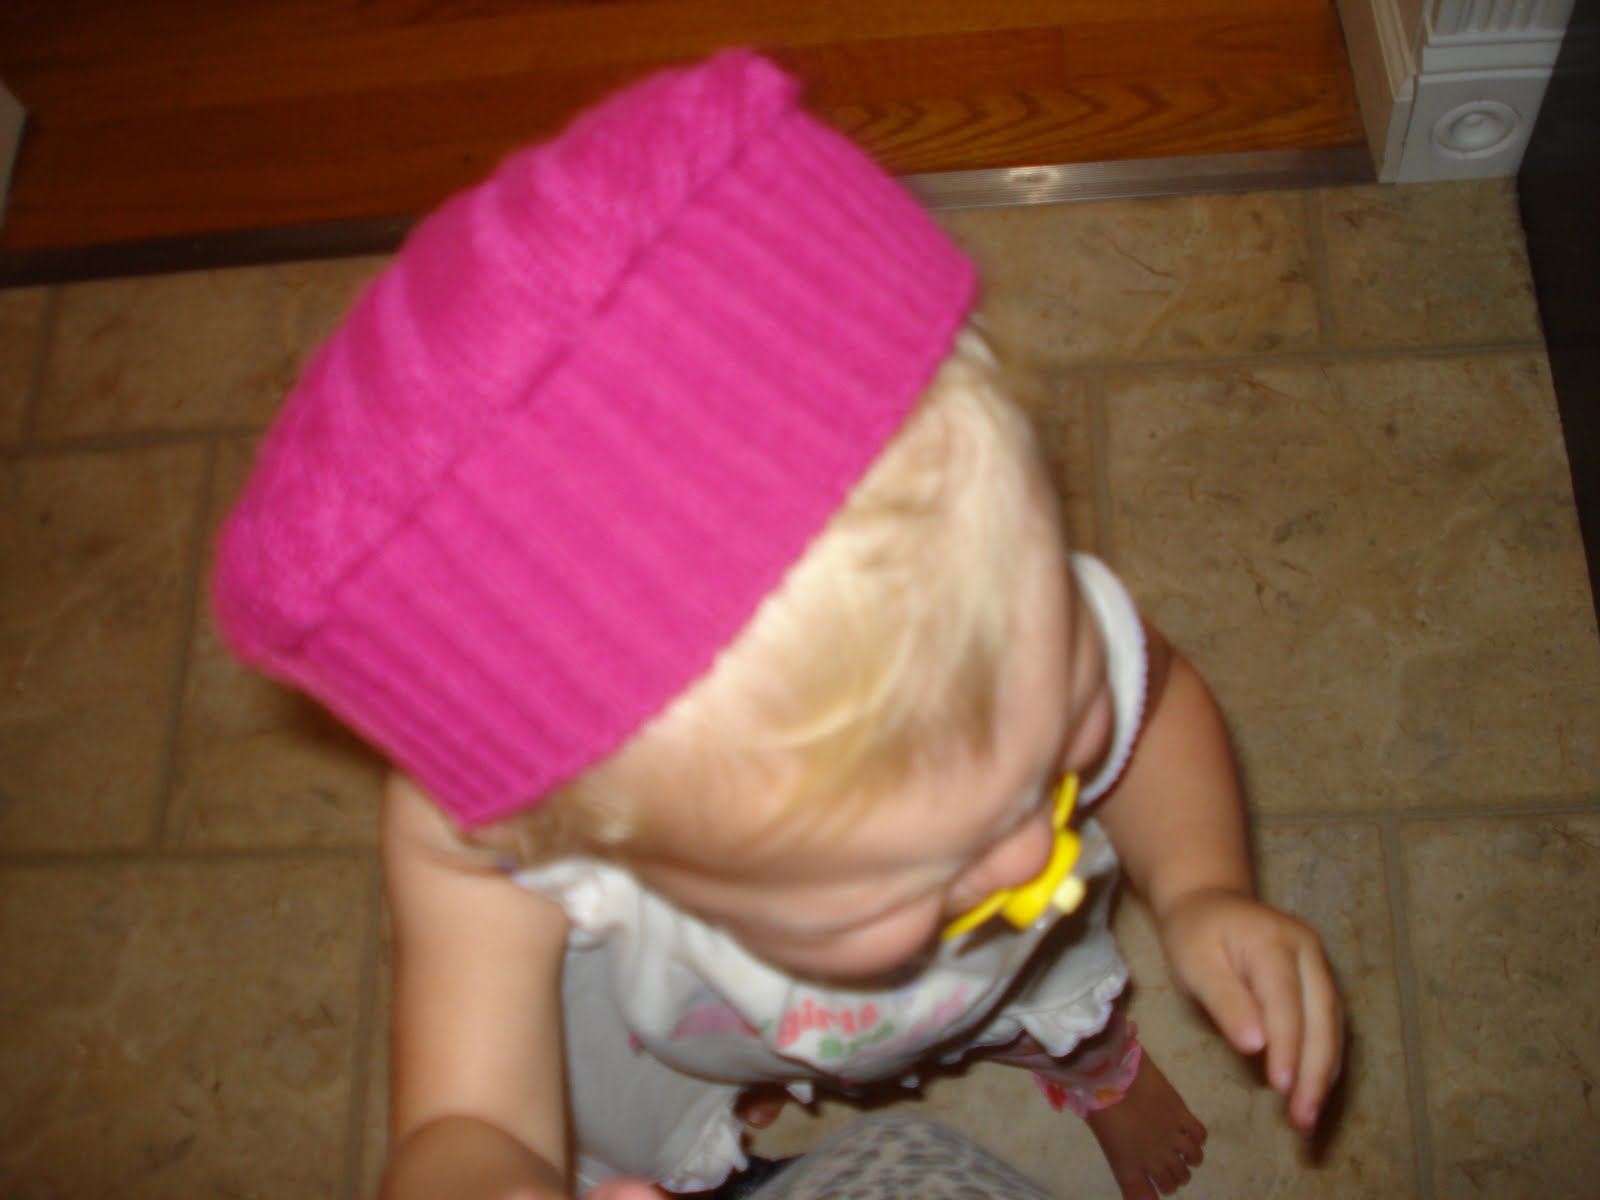
Done!

When I do this again (and I’m so doing this again) I think I’ll use a bigger plate or bowl to get a bigger circle.

I’m totally going to use this technique to make a chef hat (just use a really big circle) and a pumpkin hat out of an orange sweater with a green felt leaf on the top.

UPDATE:
Mr. Ham Bone got jealous and wanted his own hat, so we made a boy version:

To add a little flower detail to the girl’s version, just take a thin strip of the sweater material, roll it into a circle, and hand stitch it in place.


Share this:

  • Click to share on Facebook (Opens in new window)
  • Click to share on Pinterest (Opens in new window)
  • Click to share on Twitter (Opens in new window)
  • More
  • Click to share on Pocket (Opens in new window)
  • Click to share on Tumblr (Opens in new window)
  • Click to share on Reddit (Opens in new window)
  • Click to share on LinkedIn (Opens in new window)
  • Click to print (Opens in new window)

Kitchen Island: Part 1

September 6, 2010 By: Stephaniecomment

There is no such thing as a new idea, but there is such a thing as blatantly copying other people’s awesome ideas and using them to create even more awesome stuff for yourself.

That’s what we’re doing.

I’ve seen several other bloggers create kitchen islands out of dressers and I wanted to do it too.

My inspiration came from House of Johns. I L.O.V.E. their island, but when I showed Eddie the picture and raved about the brilliance of this idea he was not quite so inspired. He thought it still looked like a dresser in the middle of the kitchen. (Sorry House of Johns!!)

I knew I was going to have to find the perfect dresser in order for him to buy into my idea and we were going to have to complicate things a bit to make it look more “island” than “dresser.”

The good news is that I found the dresser at ReSource while Eddie was away on his business trip. The bad news is that I had to pay more than I wanted to AND shell out for the delivery fee since I was sans husband at the time.

Here she is:

“Why is this so perfect?” you might ask. First of all, it’s taller than your average dresser so it will be the perfect counter height. Second, it has that door on the right that makes it look more like a piece of kitchen cabinetry than a dresser. And finally, I am in love with all of the drawer space. It has four small drawers and 3 long drawers, perfect for storing all of my Pampered Chef gadgets and table linens. What I did not love so much was that I had to pay $50 for it plus a $25 delivery charge. Yes (gulp) I paid $75 for this thing. Actually, that’s a pretty fair price because it’s a nice solid piece of furniture, but my extremely frugal self was not happy about that price knowing that we were going to be investing a lot more money in this project.

Here’s the plan a.k.a. Eddie’s “honey do this as my birthday present” list:
1. Liquid nails 2 wood panels from Lowes together to get a thickness similar to butcher block for the top (The panels are $35 a piece, whereas a real butcher block this size was quoted to us at $300)
2. Attach the top
3. Attach bead board to the back of the dresser because the back was unfinished
4. Attach decorative legs to the back
5. Trim out the corners and the bottom of the back.
7. Stain the top
6. Prime and paint the dresser
7. Install trim around the top
8. Touch up everything
9. Install new hardware
10. Move one awesome kitchen island from the garage into the kitchen

All-in-all we are estimating that it is going to cost us $300 to do this island. That just about gave me a heart attack, but I guess when you consider that just the top was quoted to us for that much it’s still a pretty good deal.

For comparison, JCPenny’s sells this kitchen island for $900. Ours will actually have more storage space and be a better scale for our space once it’s finished. Not bad for 1/3 of the price.

So far we have all of the materials except for the new hardware. I’m debating getting stainless steel to match what we currently have in the kitchen or getting decorative glass hardware. The island is not going to match the cabinets. Our cabinets are cherry and the island is going to be painted a very dark charcoal gray with a cherry stained top. Thoughts?

Share this:

  • Click to share on Facebook (Opens in new window)
  • Click to share on Pinterest (Opens in new window)
  • Click to share on Twitter (Opens in new window)
  • More
  • Click to share on Pocket (Opens in new window)
  • Click to share on Tumblr (Opens in new window)
  • Click to share on Reddit (Opens in new window)
  • Click to share on LinkedIn (Opens in new window)
  • Click to print (Opens in new window)

Dinosaurs

September 4, 2010 By: Stephanie3 Comments

I’m on a sweater re-purposing kick lately. Today I made dinosaurs so that I would have a boy-friendly gift to add to my no-spend Christmas gifts collection.I started by drawing some simple patterns for myself.

Then I traced them onto some old sweaters.
(I used two different sweaters in contrasting colors)

I followed basically the same procedure as I did with the crabs.

Ta-Da!

Super easy and cute. 🙂

Best of all, FREE.

Or I could have paid $26 each for this dinosaur at Restoration Hardware. (except he’s not in stock anymore) I do like the different fabrics they used though, maybe I’ll copy that idea next time.

But by not paying $52 for two toy dinosaurs, I brought my no-spend Christmas total saved to $246.


Weekend Bloggy Reading

Share this:

  • Click to share on Facebook (Opens in new window)
  • Click to share on Pinterest (Opens in new window)
  • Click to share on Twitter (Opens in new window)
  • More
  • Click to share on Pocket (Opens in new window)
  • Click to share on Tumblr (Opens in new window)
  • Click to share on Reddit (Opens in new window)
  • Click to share on LinkedIn (Opens in new window)
  • Click to print (Opens in new window)
  • « Previous Page
  • 1
  • …
  • 243
  • 244
  • 245
  • 246
  • 247
  • …
  • 268
  • Next Page »
  • Facebook
  • Instagram
  • Pinterest
  • RSS
  • Twitter

Welcome! I’m Steph.

This is a little corner of the internet we like to fill with honesty, heart, and humor. Read More…

Cover for Binkies and Briefcases with Stephanie Giese
19,232
Binkies and Briefcases with Stephanie Giese

Binkies and Briefcases with Stephanie Giese

Stephanie Giese is an indie author based in Florida. She writes stories about realistic problems with humor, heart, and sass. Her work has a strong focus on mental health and consent. Her North Bay small-town romance series is set for release in 2025.

Binkies and Briefcases with Stephanie Giese

3 months ago

Binkies and Briefcases with Stephanie Giese
I know it’s a small thing, but I believe small things can add up to big changes. my entire North Bay series, including Out of Left Field, Right as Rain, and Way Off Base, is free on Kindle from Jan. 30-Feb. 3. Please take the funds you might have spent on my books this week and reallocate them toward the areas in our country that need them the most. Follow creators like Dad Chats who can direct you toward practical needs local to them. I hope my quirky romcoms can bring you some comfort and joy during difficult times, and I hope together we can take small, practical steps toward big changes. ... See MoreSee Less

Photo

View on Facebook
· Share

Share on Facebook Share on Twitter Share on Linked In Share by Email

Binkies and Briefcases with Stephanie Giese

3 months ago

Binkies and Briefcases with Stephanie Giese
I know there is an overall feeling of helplessness in our country right now. So many of us are at a loss for what to do beyond making phone calls and social media posts (which are still important, but can feel like not enough). I believe strongly in the power of small things adding up to big ones. As one person, I might not be able to do much, but what I CAN do is use my voice and my books to work toward the change I’d like to see. That’s why, for the next five days, from Jan. 30-Feb 3, I’m making the Kindle versions of my entire North Bay series (Out of Left Field, Right as Rain, and Way Off Base) completely free. Art has power, and I do hope these comedies can bring you some comfort and joy in difficult times, but most importantly, I also hope you’ll consider redirecting the funds you might’ve spent on my books and donating instead to one of the many charities working tirelessly in our cities right now. If you are located in an area like Minnesota or Portland, please use the space below to make people aware of the organizations in your area that need help. ... See MoreSee Less
View on Facebook
· Share

Share on Facebook Share on Twitter Share on Linked In Share by Email

Reader’s Choice

Image HTML map generator

Follow Me on Pinterest

featured-on

What You’re Saying

  • 28 Best Stone Fireplace Ideas And Designs - Perfect Decor Place on DIY Stone Fireplace with AirStone
  • Kevin Hicks on How to Budget for Building Your Own Home
  • Amy on DIY Stone Fireplace with AirStone
  • Gendered clothing - GenderEd on A Target Intervention on Behalf of My Daughters
  • Wellshop Store on Dressing Our Daughters: How Target Responded to My Last Blog Post

Latest Posts

ALL I Never Knowed: The Book Is Here!

It’s finally here, in my hands. It has been a loooong time in the making, but our book, All I Never Knowed: Mental Illness, a Mother’s Love, and a Broken System, is available now. The official launch date is next Tuesday, Oct. 5th. But starting now, you can order from all major retailers. Here’s where […]

Share this:

  • Click to share on Facebook (Opens in new window)
  • Click to share on Pinterest (Opens in new window)
  • Click to share on Twitter (Opens in new window)
  • More
  • Click to share on Pocket (Opens in new window)
  • Click to share on Tumblr (Opens in new window)
  • Click to share on Reddit (Opens in new window)
  • Click to share on LinkedIn (Opens in new window)
  • Click to print (Opens in new window)

Save Money with Fetch

Hey everyone! This is Chelsea, Steph’s asistant, back with the simplest app for getting cash back on things you’re already buying! We’ve covered Ibotta, Shopkick, Coupons.com, Swagbucks and we’re all saving hundreds of dollars by now, right? RIGHT!? I’m really hoping you guys have jumped on the rebate app savings train because it’s just so […]

Share this:

  • Click to share on Facebook (Opens in new window)
  • Click to share on Pinterest (Opens in new window)
  • Click to share on Twitter (Opens in new window)
  • More
  • Click to share on Pocket (Opens in new window)
  • Click to share on Tumblr (Opens in new window)
  • Click to share on Reddit (Opens in new window)
  • Click to share on LinkedIn (Opens in new window)
  • Click to print (Opens in new window)

Splendid Spoon Review

I was excited to receive a box of products to try from Splendid Spoon this summer! They invited me to try their line of plant-based, ready-to-eat foods and delivered them right to my door. Check one in the pro column for convenience. I did receive these products free of charge in order to rate them […]

Share this:

  • Click to share on Facebook (Opens in new window)
  • Click to share on Pinterest (Opens in new window)
  • Click to share on Twitter (Opens in new window)
  • More
  • Click to share on Pocket (Opens in new window)
  • Click to share on Tumblr (Opens in new window)
  • Click to share on Reddit (Opens in new window)
  • Click to share on LinkedIn (Opens in new window)
  • Click to print (Opens in new window)

My Networks

#BlogHer15: Experts Among Us Voices of the Year Honoree