There is no such thing as a new idea, but there is such a thing as blatantly copying other people’s awesome ideas and using them to create even more awesome stuff for yourself.
That’s what we’re doing.
I’ve seen several other bloggers create kitchen islands out of dressers and I wanted to do it too.
My inspiration came from House of Johns. I L.O.V.E. their island, but when I showed Eddie the picture and raved about the brilliance of this idea he was not quite so inspired. He thought it still looked like a dresser in the middle of the kitchen. (Sorry House of Johns!!)
I knew I was going to have to find the perfect dresser in order for him to buy into my idea and we were going to have to complicate things a bit to make it look more “island” than “dresser.”
The good news is that I found the dresser at ReSource while Eddie was away on his business trip. The bad news is that I had to pay more than I wanted to AND shell out for the delivery fee since I was sans husband at the time.
Here she is:
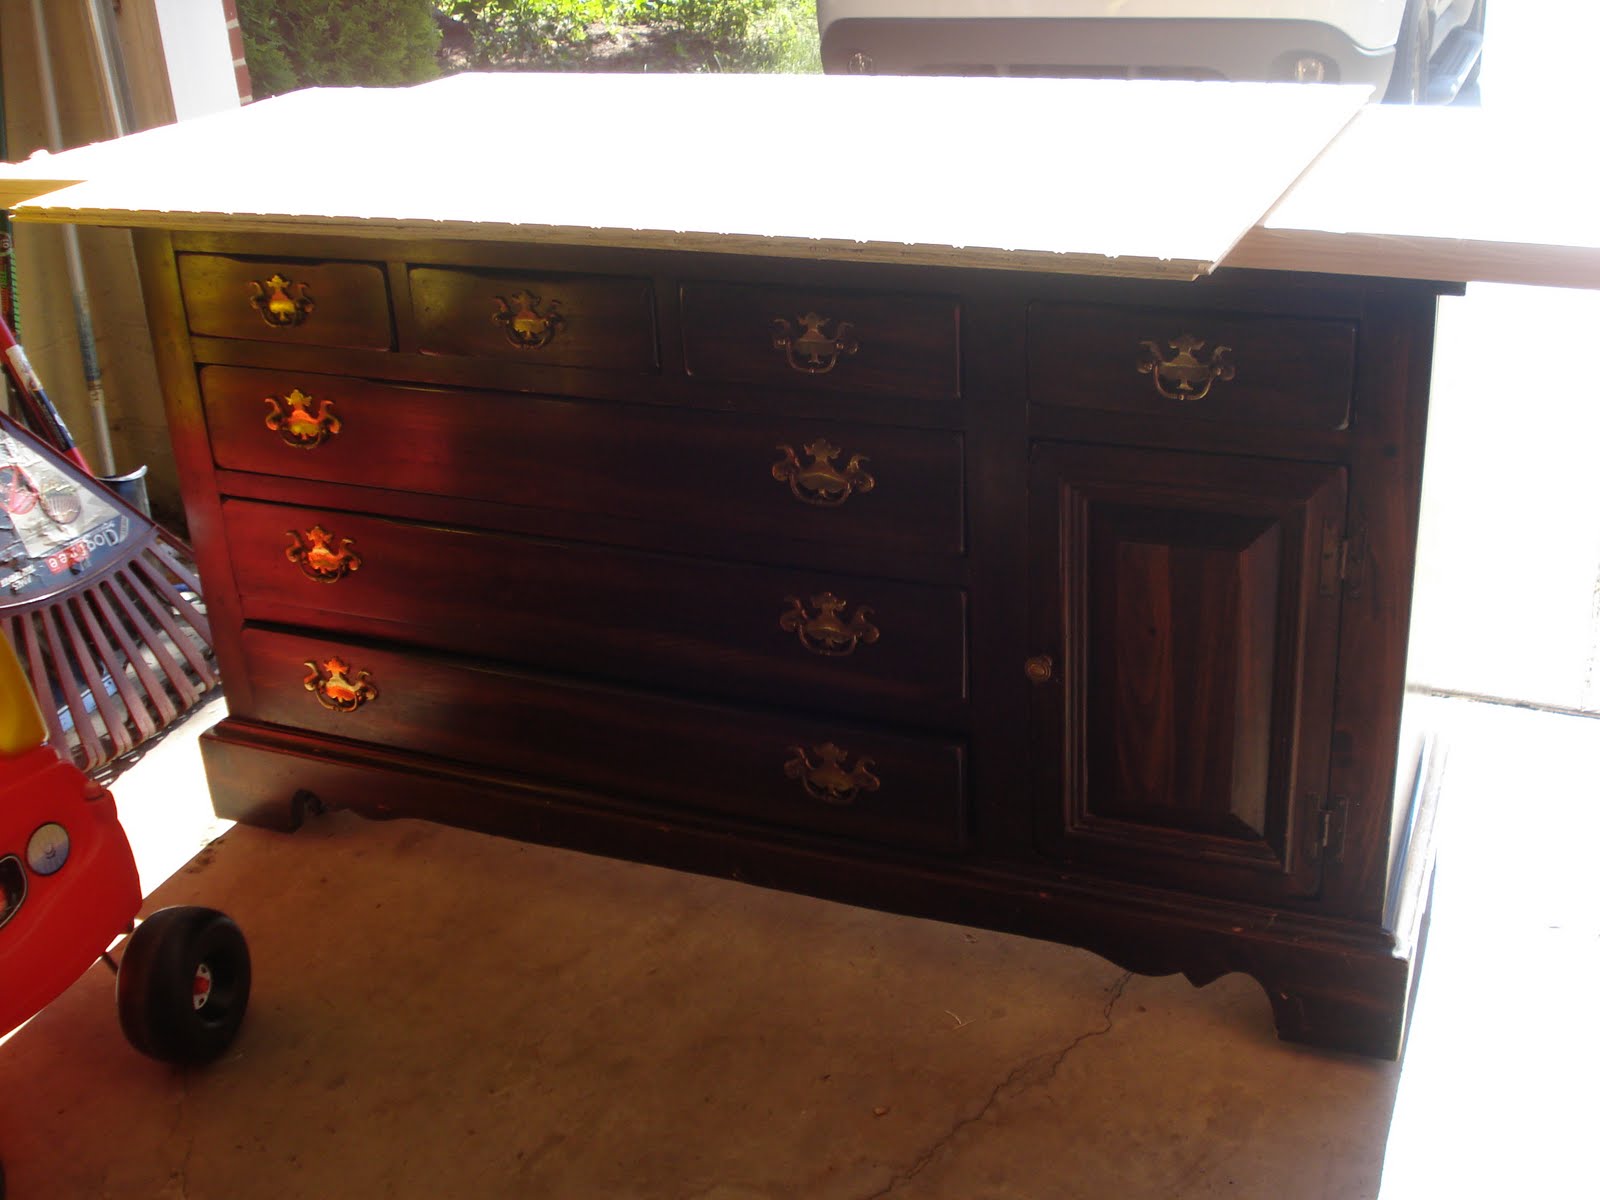
“Why is this so perfect?” you might ask. First of all, it’s taller than your average dresser so it will be the perfect counter height. Second, it has that door on the right that makes it look more like a piece of kitchen cabinetry than a dresser. And finally, I am in love with all of the drawer space. It has four small drawers and 3 long drawers, perfect for storing all of my Pampered Chef gadgets and table linens. What I did not love so much was that I had to pay $50 for it plus a $25 delivery charge. Yes (gulp) I paid $75 for this thing. Actually, that’s a pretty fair price because it’s a nice solid piece of furniture, but my extremely frugal self was not happy about that price knowing that we were going to be investing a lot more money in this project.
Here’s the plan a.k.a. Eddie’s “honey do this as my birthday present” list:
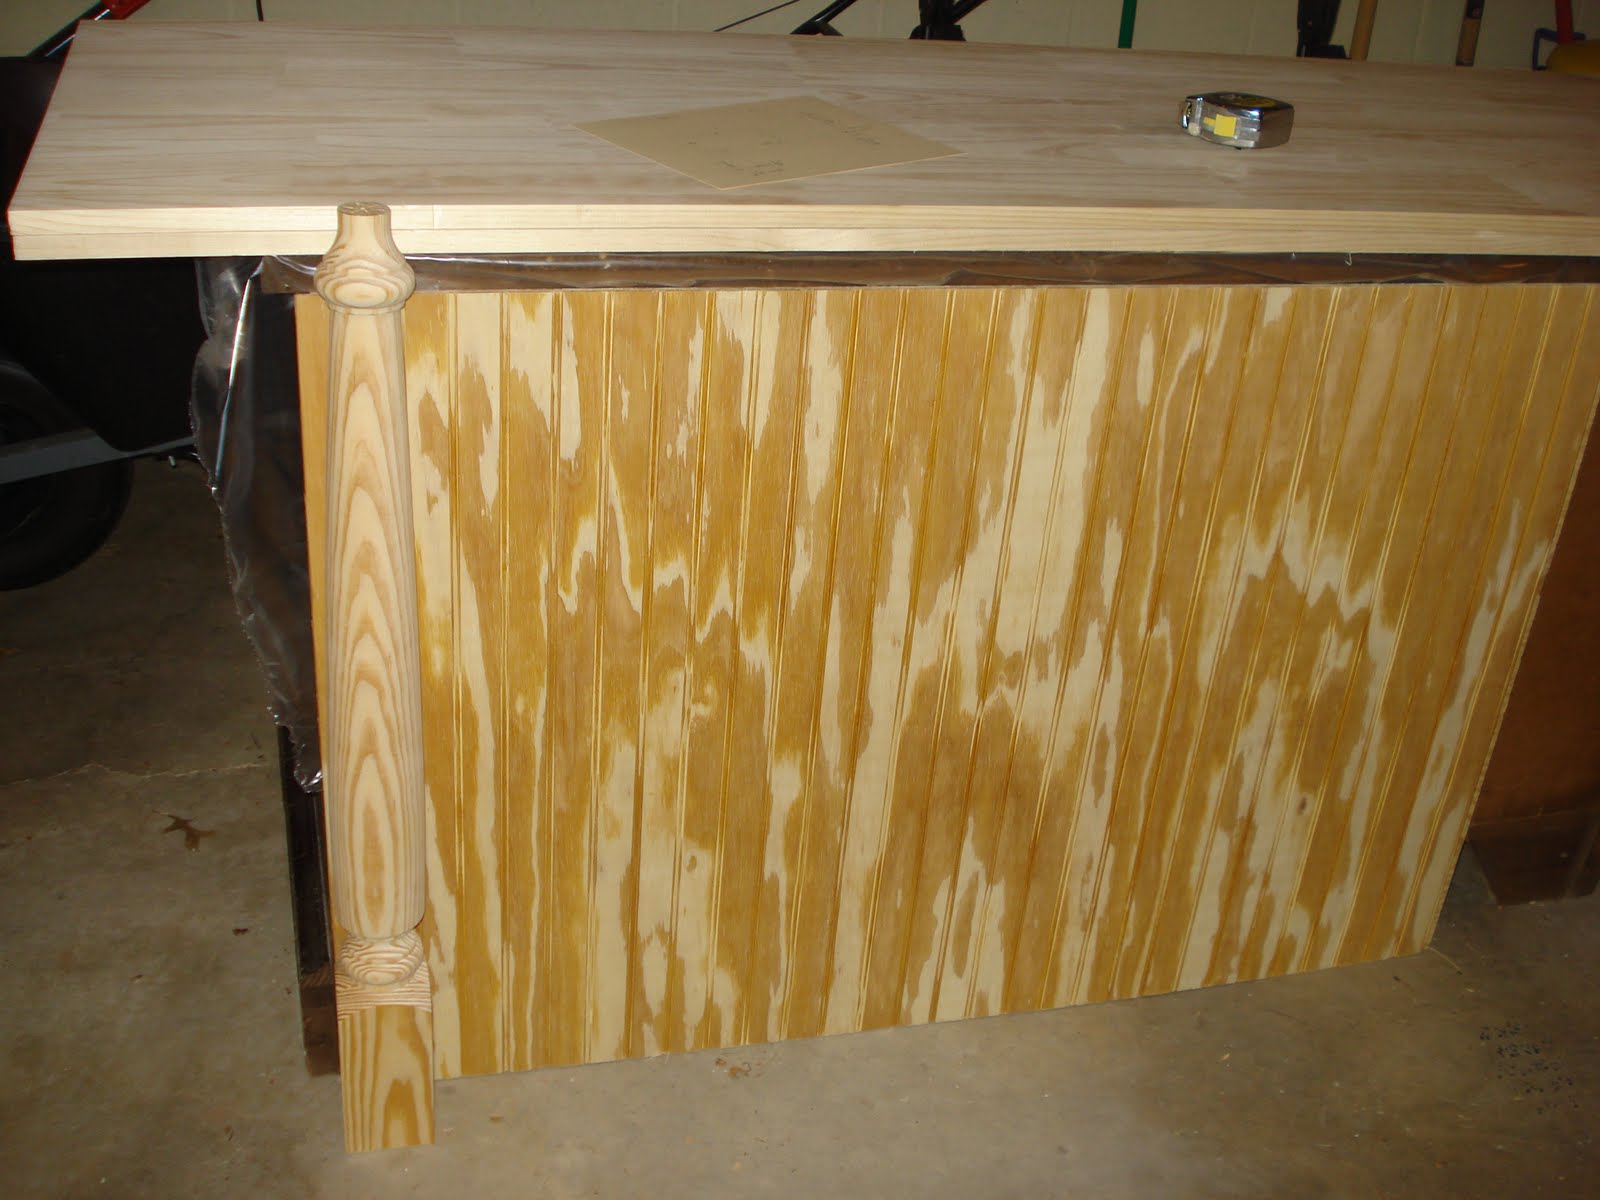
1. Liquid nails 2 wood panels from Lowes together to get a thickness similar to butcher block for the top (The panels are $35 a piece, whereas a real butcher block this size was quoted to us at $300)
2. Attach the top
3. Attach bead board to the back of the dresser because the back was unfinished
4. Attach decorative legs to the back
5. Trim out the corners and the bottom of the back.
7. Stain the top
6. Prime and paint the dresser
7. Install trim around the top
8. Touch up everything
9. Install new hardware
10. Move one awesome kitchen island from the garage into the kitchen
For comparison, JCPenny’s sells this kitchen island for $900. Ours will actually have more storage space and be a better scale for our space once it’s finished. Not bad for 1/3 of the price.


Leave a Reply