A few weeks ago I reached out to AirStone to see if they would be willing to partner with me on our fireplace design. I was SO excited when they said yes!

I knew it would be the perfect product for us because I had been told by our builder and my engineer of a husband that the structure of our house wouldn’t support the weight of an entire wall of real stone, like I originally wanted. The living room is in the middle of the house, so this fireplace is on an interior wall sitting over the middle of our open basement. It just doesn’t have enough structural support for that much weight in one spot, not to mention that there was no way real stone was going to fit in the budget.
AirStone weighs 75% less than real stone, but you honestly can’t tell the difference just by looking at it. The texture is rough and it is cool to the touch, just like real stone, it just weighs a lot less. Plus, it is made out of 80% recycled materials and it is super easy to install, as you will see in a minute. AND it’s very reasonably priced.
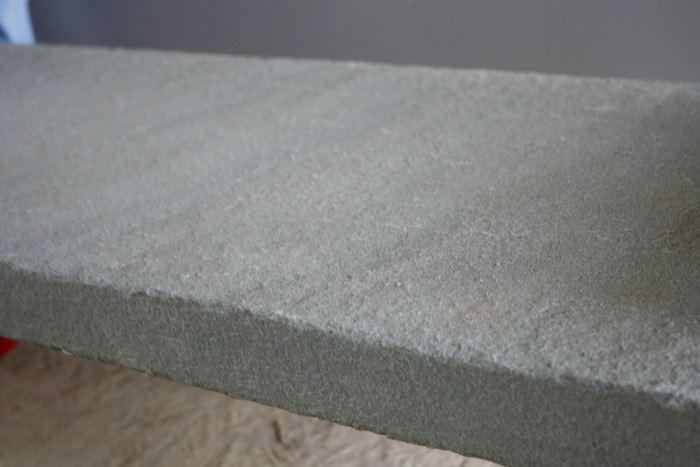
 The first thing we did was install the flagstone hearth.
I also painted the walls behind the AirStone a dark color at the recommendation of one of our contractors, who had worked with this product before.
We used the online calculator to figure out how much we would need. There are flat edge, natural edge (for edges that will show in the finished product, like the sides of our fireplace wall), and corner pieces available. We needed some of each for this project. We also needed two buckets of the adhesive. We placed our order online for pickup at our local Lowes and I picked up our supplies the next day.


One of the hardest parts was getting started. We were a little overwhelmed because it seemed like a giant jigsaw puzzle.
Our contractor was there and he gave us a few tips and told us how he would usually install a product like this.
Once we got up the courage to get started, it wasn’t hard at all.
Just use a putty knife to spread the adhesive on the stone like you are frosting a cupcake or buttering a piece of toast, then stick the stone on the wall.

It’s really important to clean the front of the stone right away if you accidentally get some adhesive on it! That is some strong stuff and it dries pretty quickly, but I really appreciated that the smell wasn’t noticeable. We were doing this project with our kids in the house and no one complained at all, not even Nicholas, who has some sensory issues and is very sensitive to smells.
We started working up each side, using a pocket level to make sure we were keeping our lines as straight as possible. We used painters tape and cardboard to protect the fireplace insert.


If we needed to cut a piece we would take it outside and cut it with a hacksaw. This worked fine, but Eddie said it would have been much faster if we could have used his angle grinder. Unfortunately, a lot of our tools are still in storage. It does make a lot of dust, so I recommend doing it outside if you can.

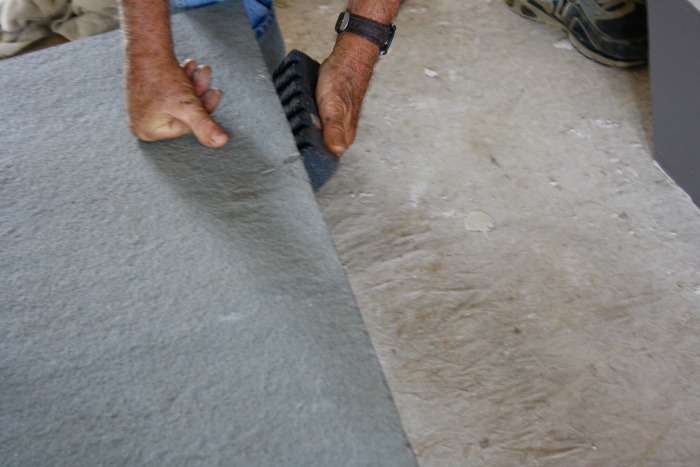
Under the hearthstone we used the corner pieces. We had to buy a whole box just for six pieces. I wish they sold these pieces individually.
We used 1/2″ strips of plywood to keep the stones on the hearth slightly up off the floor so that there is a gap for the carpet, which will be installed in about two weeks.

When we got to the top of the fireplace insert, we had to cut vertical supports so that the stones wouldn’t side down before the adhesive set, due to gravity.

One quick tip: We used small pieces ripped right from the AirStone box as spacers to keep our stones level. It saved us a lot of frustration.

We had been warned by someone who had used this product before that it was difficult to keep level, especially once you get to the top. We found this to be true as well.
The last three stones were definitely the hardest!
We still have some caulking to do around the gas fireplace insert and scrape off the drywall mud that accidentally was spread onto it. (I have to admit I’m more than a little irritated about that because there are also two large scratches on it from where someone tried to scape off the mud.)
Overall, I’m really happy with the finished product!

We will be making a nice big, chunky mantle within the next few weeks and the painter is starting TODAY.
Only about three weeks until our projected finish date!
UPDATE: See our finished fireplace and how to build a floating fireplace mantle:

Thanks to AirStone for sponsoring this project! I was provided with the materials to complete this project. All opinions are my own.


What You’re Saying