
I’m honored to have made the top 10 for this month’s Iron Crafter competition! The secret ingredient was sweaters. You can vote for my sweater puppets (or any of the other cute projects) at Fireflies and Jellybeans.
I’m honored to have made the top 10 for this month’s Iron Crafter competition! The secret ingredient was sweaters. You can vote for my sweater puppets (or any of the other cute projects) at Fireflies and Jellybeans.
We still have a couple of days left in October, but I’m already looking forward to Thanksgiving. This will be the first year we go through the holidays without my grandmother, but I am so glad that I have a lot of her recipes to keep her memory alive. Today I’m sharing an entire American Thanksgiving meal with you. 🙂
I’m linking to Share a Meal Monday
Appetizers:
Put out a few pickles, some cheese cubes, crackers, nuts, and grapes
Entree:
Turkey (duh)
Click here if for good directions
Sides:
Mommom’s Sausage Stuffing
From the kitchen of Ruth Wilkins (that was my Mommom)
1 onion
3 celery stalks
Bread cubes
Italian sausage
1 Egg
Sauté 1 small onion and 2 or 3 chopped celery sticks in butter. In a large bowl, mix 1 large bag of bread cubes, 1 egg, onion and celery, and 1 lb of spicy Italian sausage. Bake at 350 for 1 hour, covered. For a crispy top uncover for the last 15 minutes.
For moist stuffing, add 1 cup of chicken stock prior to baking.
Mashed Potatoes:
Peal and chop 1 pound of potatoes per person. (to ensure left-overs ;p)
Boil potatoes until fork tender
Add milk and butter and smash with a potato masher or hand blender
Sweet Potato Casserole
Peel and chop about 5 pounds of sweet potatoes
Boil until fork tender
Add milk and butter whip with hand mixer until smooth
Transfer to large casserole dish.
Add 1/2 a bag of fresh cranberries, 2 tbsp brown sugar, 1 tsp cinamon, and fold
Cover top with mini marshmallows
Bake at 350 until marshmallows brown lightly
Help from the store:
frozen or refrigerated rolls or croissants
Canned corn
Canned green beans (add cream of mushroom soup and top with fried onions to make a casserole)
Dessert:
Apple or pumpkin pie & vanilla ice cream
Click here for Paula Dean’s Pumpkin Pie recipe
or take help from the store 🙂
I wanted to enter Homebody Holly’s Knock-Off Party this week.
So here goes!
This is the piece I chose from Restoration Hardware. It retails for $995!
(It is also huge at 5 feet long. I don’t have that kind of wall space.)
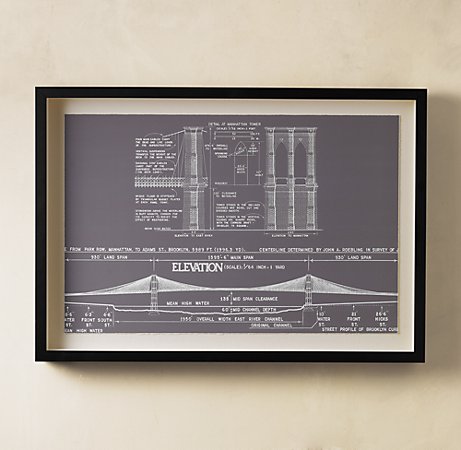
I searched Google Images and found this blueprint

I played with it in Picnik until I got the effect of the original. I used the “invert” and “pencil sketch” options under Create and then I played with the contrast a little bit in the Edit section. Then I cropped it and enlarged it. (To enlarge go to edit, resize, and type 1800 in the first box.)

This was the best match I could get to the RH piece.
(If you use it please let me know. I’d love to see your project!)
Then I uploaded my picture to Snapfish and ordered an 8×10 for pick up at our local Walmart. Did you know that if you order online during business hours you can pick up your picture the same day? You can also do this at Target, but I found that Target was 3 times more expensive so I had to swallow my pride and go to Walmart. (Gulp. I HATE going to Walmart. Especially on a Saturday!!)
It was $2.84 to get an 8×10 printed. (vs. $7.48 at Target) They also had a 20×30 size available for under $20 in the “poster sizes” section, but I figured that would be expensive to frame.
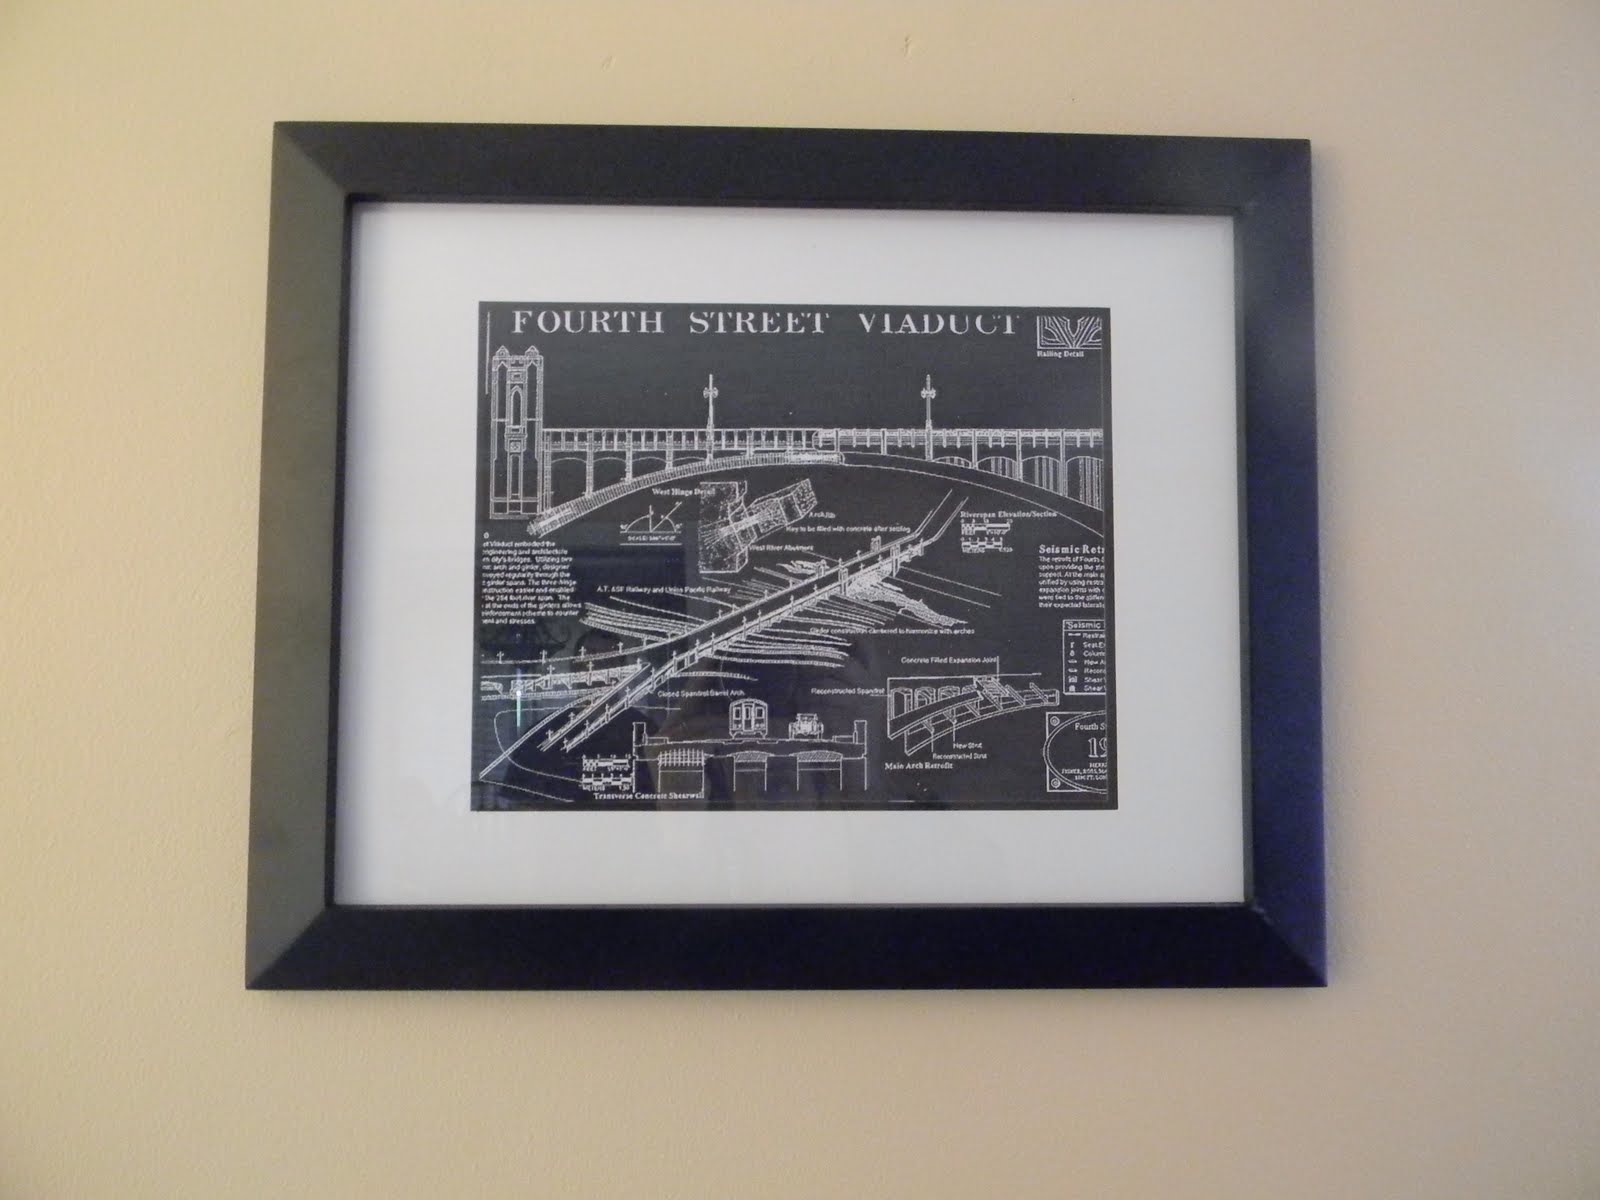
Here’s the final product. The frame & mat cost $12
So the total came out to be $14.84 plus tax
Bonus: Hubby actually likes it!! He’s taking it to hang in his office. (He’s a civil engineer)
Here’s the original one more time for comparison:
If you want something the scale of the original piece you could make 6 of these and hang them in a group with 3 on top & 3 on the bottom. That would cost about $90, still saving more than 90% off the price of the original.
and I’m also linking to…


 “/>
“/>

I don’t know if you know this about me, but I am obsessed with children’s books. OBSESSED! I started collecting them with serious purpose when I was in high school and thinking I might want to eventually be a teacher. Then I did become a teacher and a mom and now the collection is pretty much out of control and possibly on the verge of hoarding. In all seriousness the collection in boxes in our basement and garage (the ones that my kids aren’t old enough to be interested in just yet) probably rivals some of the children’s sections in public libraries.
And speaking of libraries…
Every year our local library hosts a used book sale fundraiser. People from the community donate books they no longer use or need and the library sets up tables in the mall, sells the books, and gets to keep the proceeds.
Today we met a friend for lunch at the mall and strolled (literally since we were both pushing double strollers) down to check out the book sale.
Awesome!!
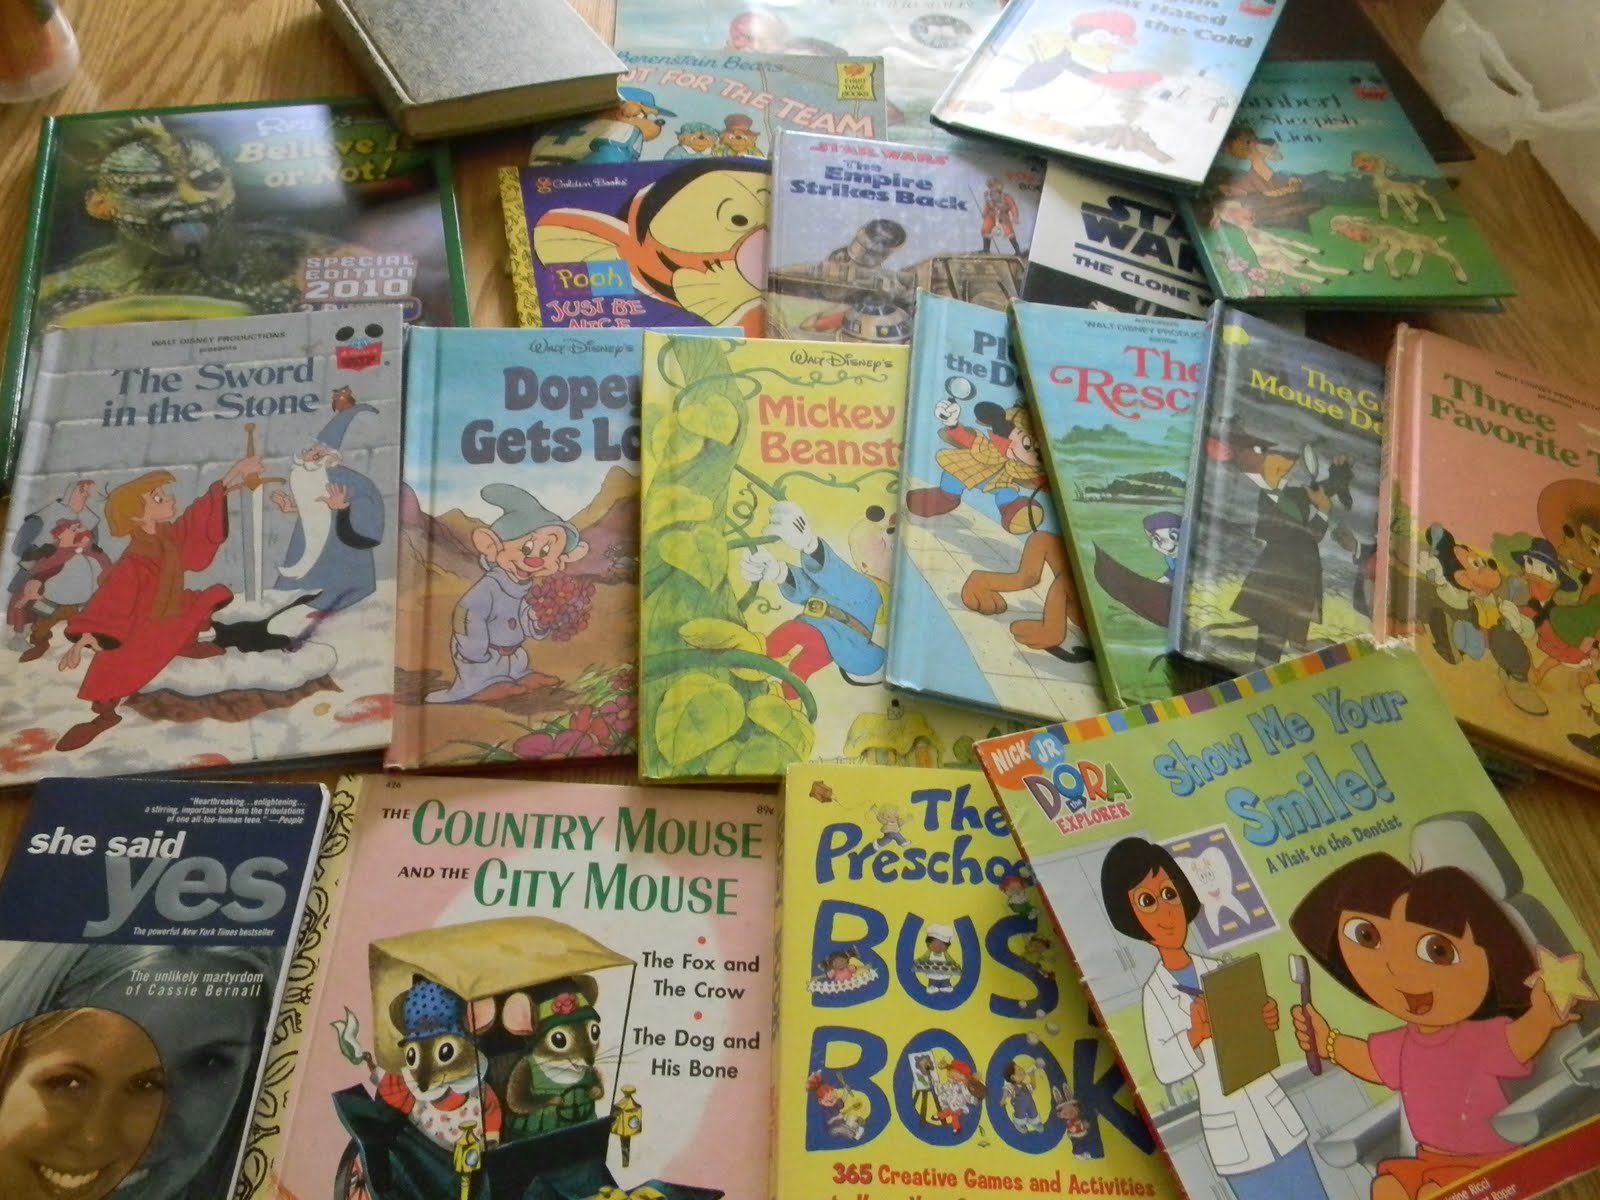
I got 21 books for $8! That’s like $0.38 each.
A few of my treasures…

Christmas gifts for my little Star Wars loving cousins (They are 3 and 5 and last year they were Yoda and Luke Skywalker for Halloween. The older one even has a Star Wars bedroom.) The book on the right is a pop-up book.
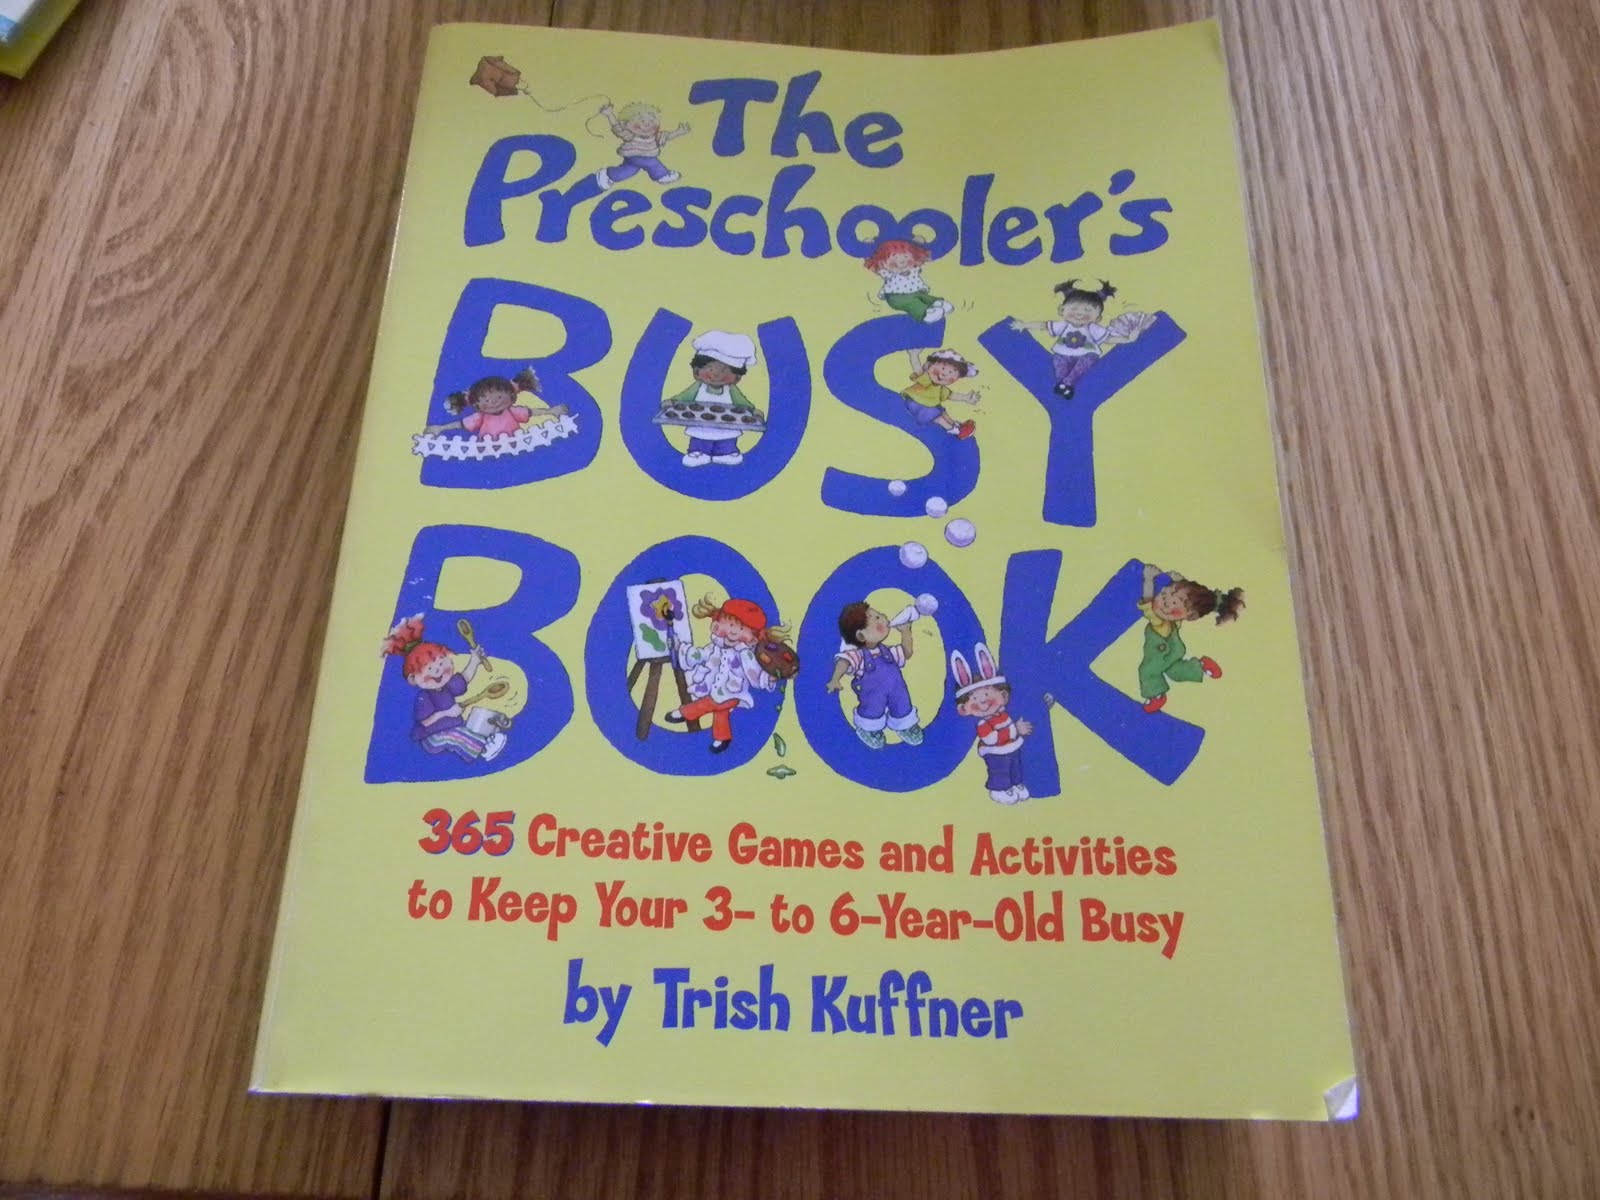
365 ways to keep a three-year-old busy? Yes please!
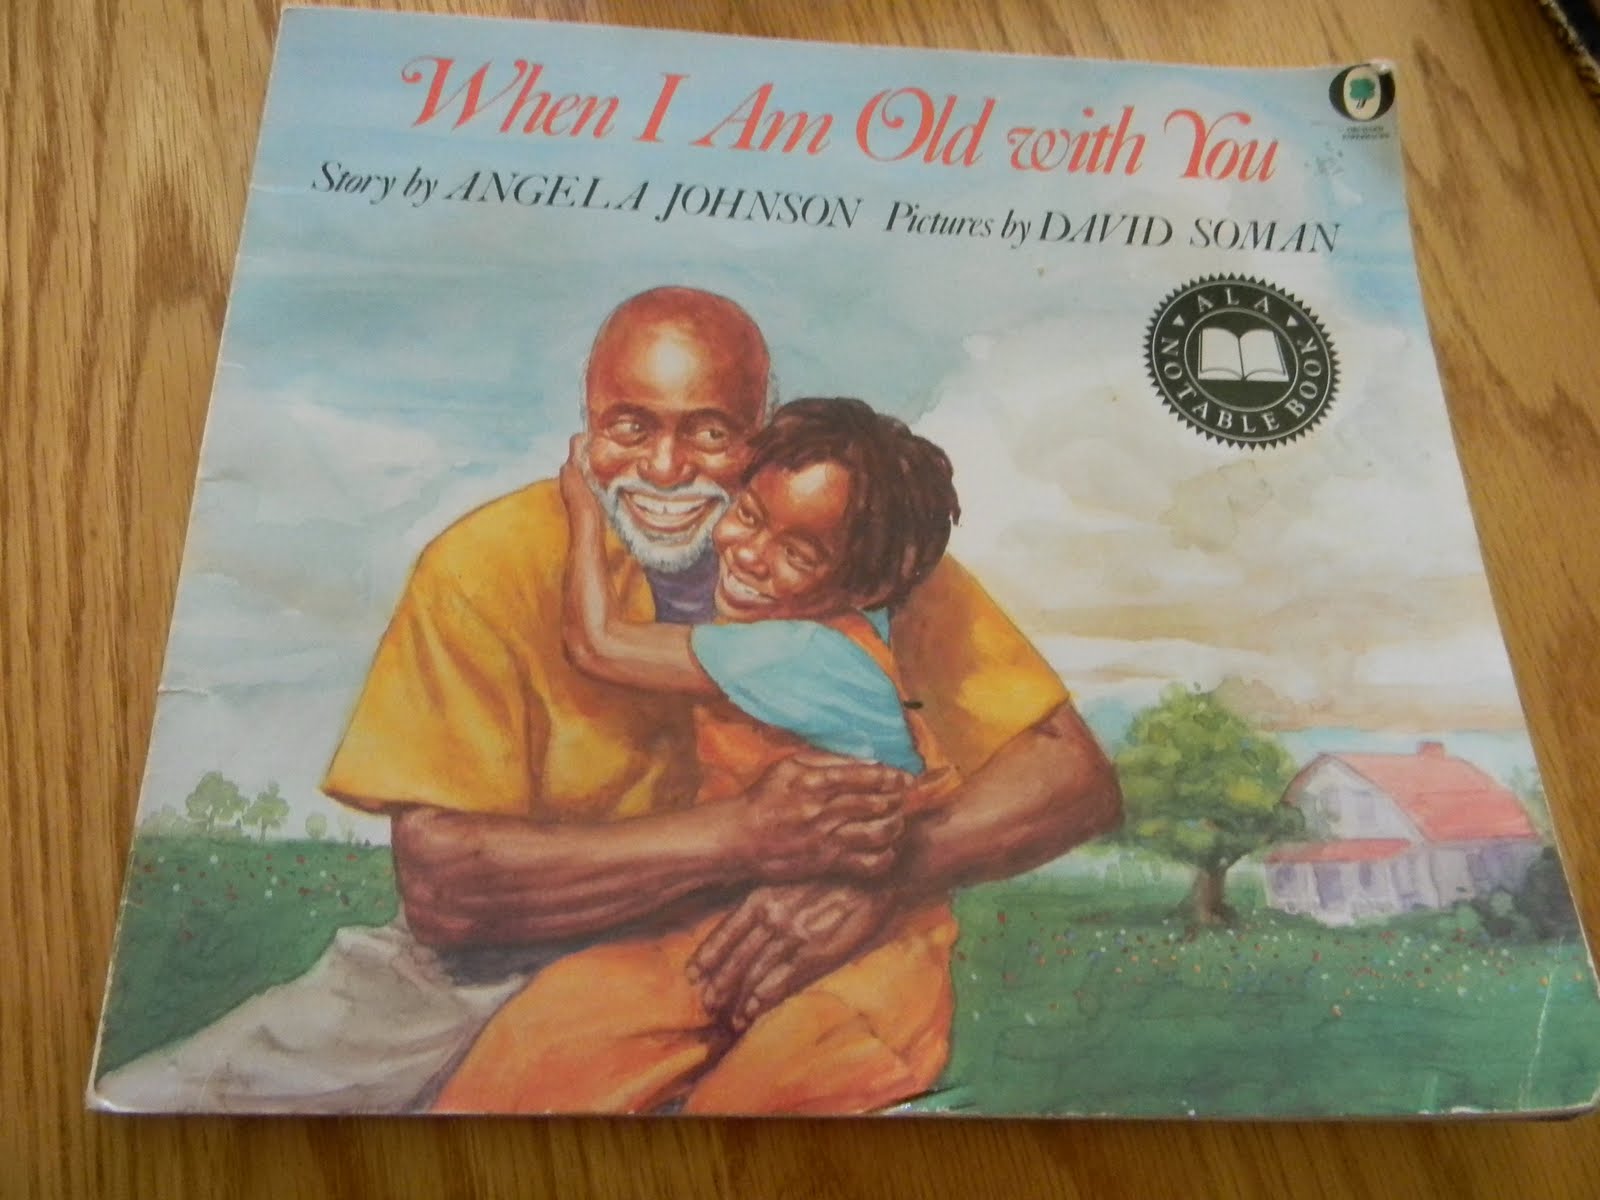
I am familiar with this book. LOVE it. I did a lot of graduate research on African American children’s literature. This book is one of my favorites.
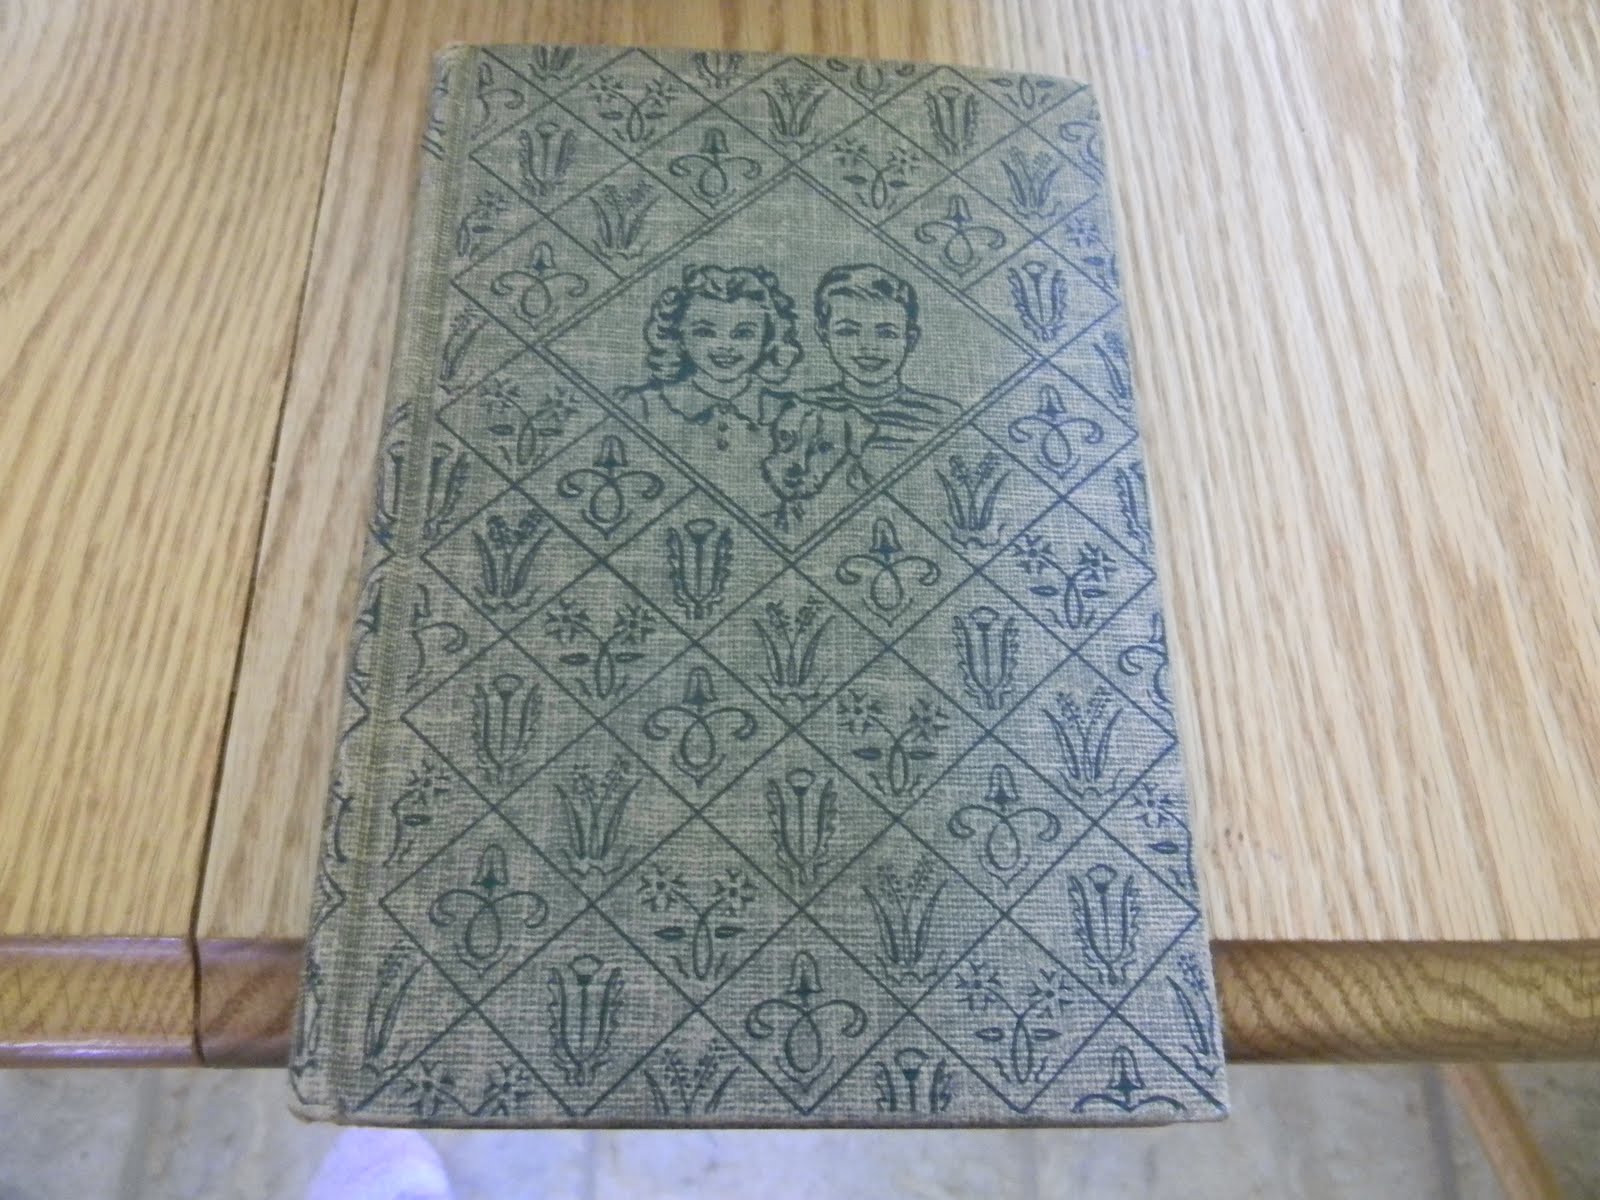
First edition Bobbsey Twins

Two based on Eddie’s favorite childhood movies

Two stories our Mommom used to read to me and my sister. I’m giving these to my sister for Christmas. Amazon has the one on the right priced as high as $54!

A gift for my 14-year-old brother.
Plus tons more including a bunch of other Disney classics, Dora the Explorer, a Country Inn cookbook that will be a hostess gift for my aunt (she collects cookbooks) when we go to visit her next month, and one that was actually for me.
Have you found any second-hand treasures this week?
My blog got a new makeover courtesy of The Background Fairy. Check our her website for free girly templates. She also runs The Graphics Fairy where you can find beautiful free vintage clip art. Thanks Karen!
I’m soooo excited about this deal I just had to share it with you. I’m not being compensated by this company, I just think it’s awesome.
Canvas People are giving away a FREE 8×10 canvas print of your photos. If you’ve ever priced these things you know they can easily run $100.
I ordered 4. That kind of feels like cheating, but there is no limit posted on their website and they let me do it, so I’m assuming it’s cool with them. Just close the browser and go back to the website each time to place a new order. You will have to pay a separate $15 each time for shipping, and even though that’s a little pricey for shipping it’s way cheaper than any other deal you’ll find on these.
I upgraded the first one to an 11×14 for $9.99. The second time around I realized that if you tell them you want an 8×10 and then continue with the order a little pop-up screen will offer you the upgrade at an even cheaper price. So the second one I upgraded for $6.99. (After that the pop-up screen didn’t come up any more)
They also charge for black and white and sepia, but I was able to do that myself in Picnik. Is that cheating too? I don’t know, but what I do know is that I was able to steal this picture from our friend’s Facebook page

and enlarge it in Picnik (You have to enlarge it because the regular resolution if a facebook photo isn’t good enough to be transferred to the canvas. In Picnik go to edit, resize, then type 1200 in the first box, then it will be large enough for the 8×10 and 11×11 sizes. Just be careful not to enlarge it too much or it will start to get distorted.) and turn it into this

which I think is going to make a great housewarming gift as a canvas now that their house is finished and they’re moving in next week. (I don’t think they read my blog, but if they do…SURPRISE!)
I also turned this picture of my sister with Nicholas
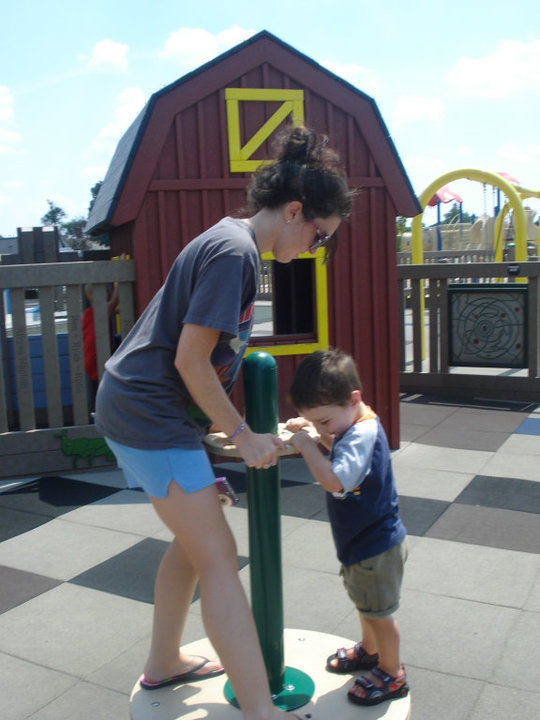
Into this, which I think is going to make some awesome personalized artwork that’s (I hope) hip enough for my trendy little sis once it’s on canvas. Her birthday is in a few weeks and I think she will LOVE this. (and I know she doesn’t read my blog, so no worries there)

You simply must get in on this!
**You do need to make sure that the faces aren’t too close to the edge because the sides will wrap around the canvas. It will show you exactly how much will be cut off once you upload your photo to the website. **


The pumpkins had to go.
I was on my way to the trash to throw them out, but that just seemed so wasteful.
So I did some Googling and learned how to puree a pumpkin. Once it’s pureed you can use it in any recipe that calls for pumpkin.
The first thing I learned was that the pumpkins are supposed to be small if you are going to use them for cooking. Apparently large pumpkins are just for decoration and don’t taste that great.
That was fine by me, our pumpkins were little anyway. The other thing I learned is that all pumpkins are edible. That was a big relief, because I didn’t know what kind of pumpkins these were and I was kind of worried about inadvertently poisoning my family.

First cut the top off the pumpkin and then cut the rest into sections using a serrated bread knife.

Scoop out the seeds and stringy pulp stuff.
Rinse off the seeds and set those aside.

Put the pumpkin pieces in a microwavable bowl. Add about a cup of water.

Dry the seeds on paper towels, then put them on a cookie sheet lined with aluminum foil. If you want to roast the seeds, salt them and then bake at 375 for about 12 minutes.

Microwave the pumpkin for about 20 minutes. Check it after 15 minutes and rotate the pieces to make sure they are cooking evenly. When it is soft like a cooked sweet potato it’s finished.
Scrape the cooked flesh away from the skin. (There’s a gross Halloween visual)
The tutorials I read said to put it in the food processor or blender to puree it, but I found it worked just fine to smash it really well with a fork. (Who needs all those extra dirty dishes?)
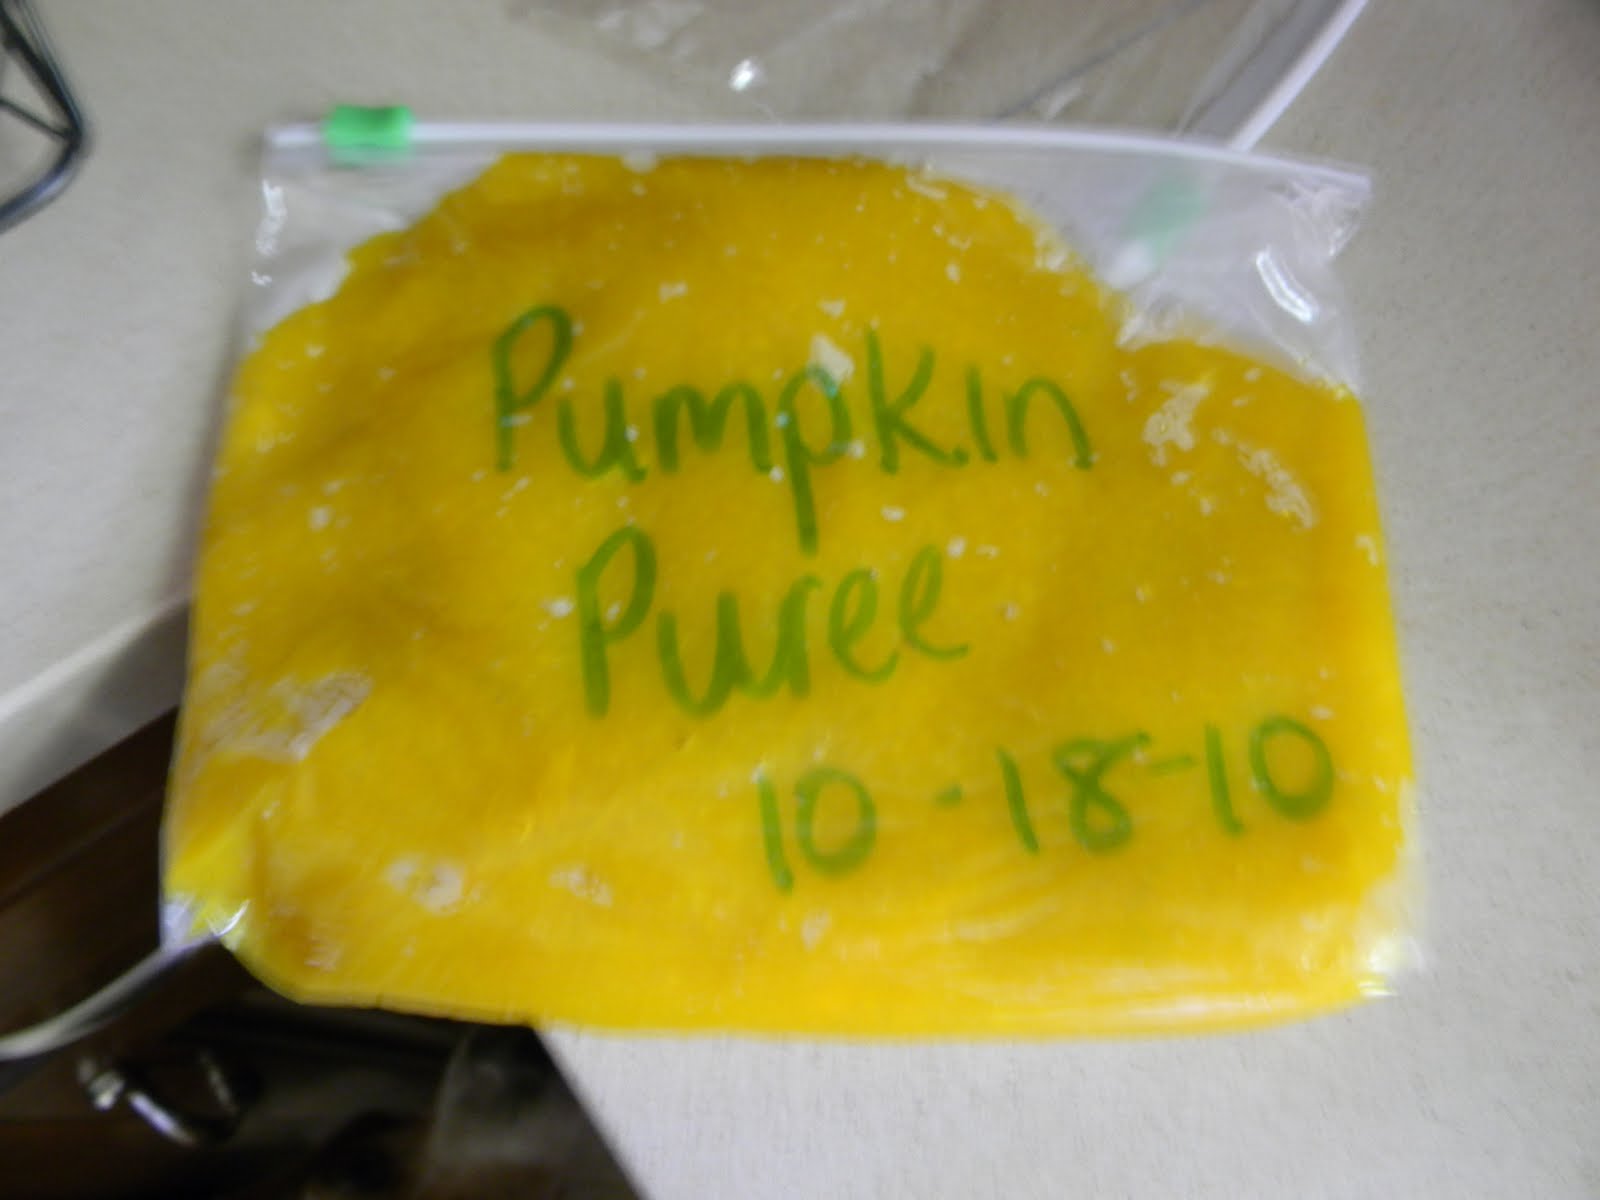
If you’re not going to use it right away store it in a freezer bag & then freeze it. You might want to double bag it for extra security against freezer burn.
Google says you cannot can homemade pumpkin.
I always listen to Google.
It will be pretty cool to make a pumpkin pie for Thanksgiving out of a pumpkin we actually picked straight from the field, though.
Want to see how I made the hat Nick is wearing on our trip to the orchard? You might also want to check out:

Before & After

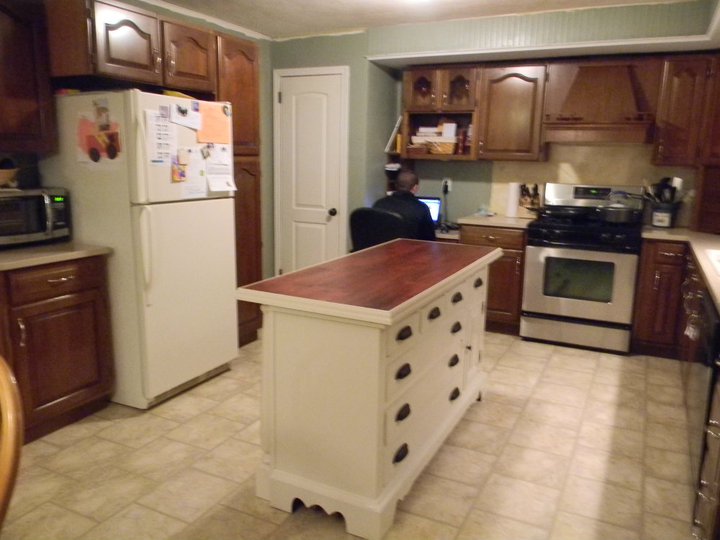
A picture walk through our Craigslist Kitchen Progress thus far (keeping it real with preschool artwork on the fridge & clutter on the counter tops):


You can read about how we made the island here.
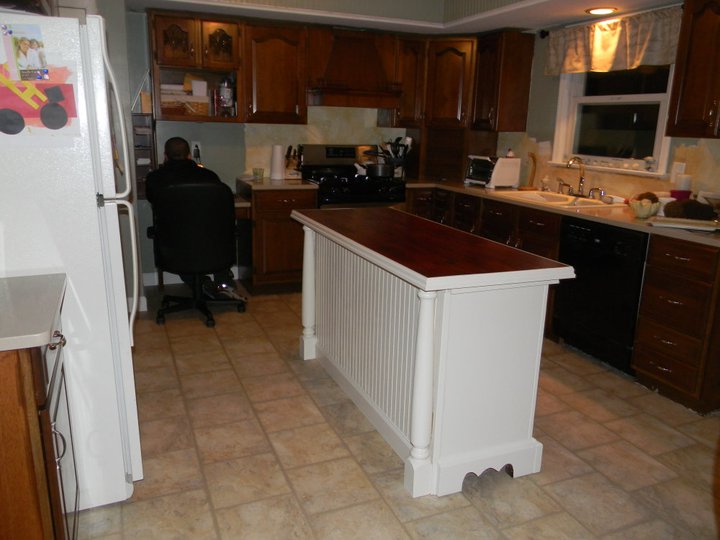
We still need the backsplash and some of the moldings (and eventually a new fridge) but we are this close to being DONE!!
I’m loving my new-to-me kitchen 🙂

Remember this u.g.l.y dresser?
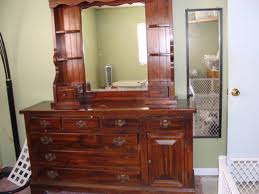
(Ok, not this actual one, I stole this picture from ebay, but it’s the exact same dresser I bought from ReSource York, except mine didn’t come with the hutch.)
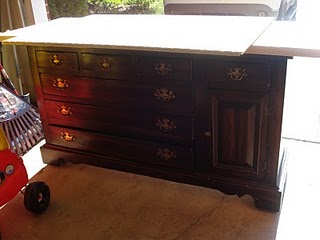
This was the best before picture I could get of our actual dresser in the awful light in our garage.
I wanted to turn it into a kitchen island like I saw Jonni do at House of Johns.
Eddie wanted to make it a little more elaborate so that it looked as much like a piece of kitchen cabinetry as possible.

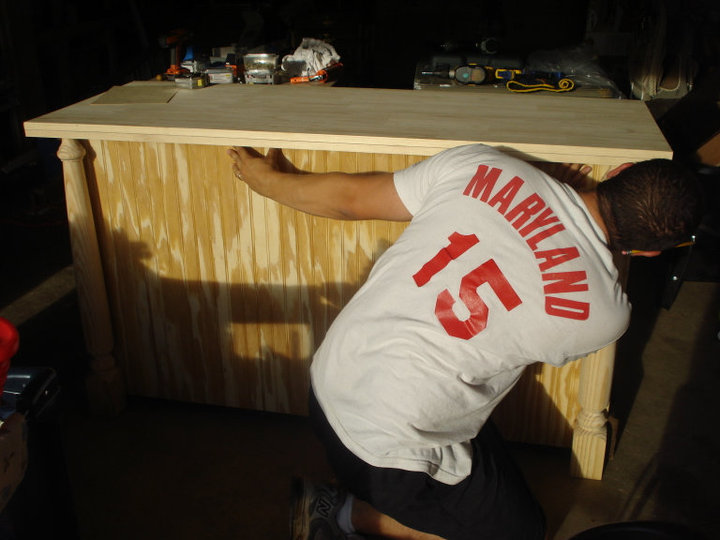
That’s my handy man at work 🙂

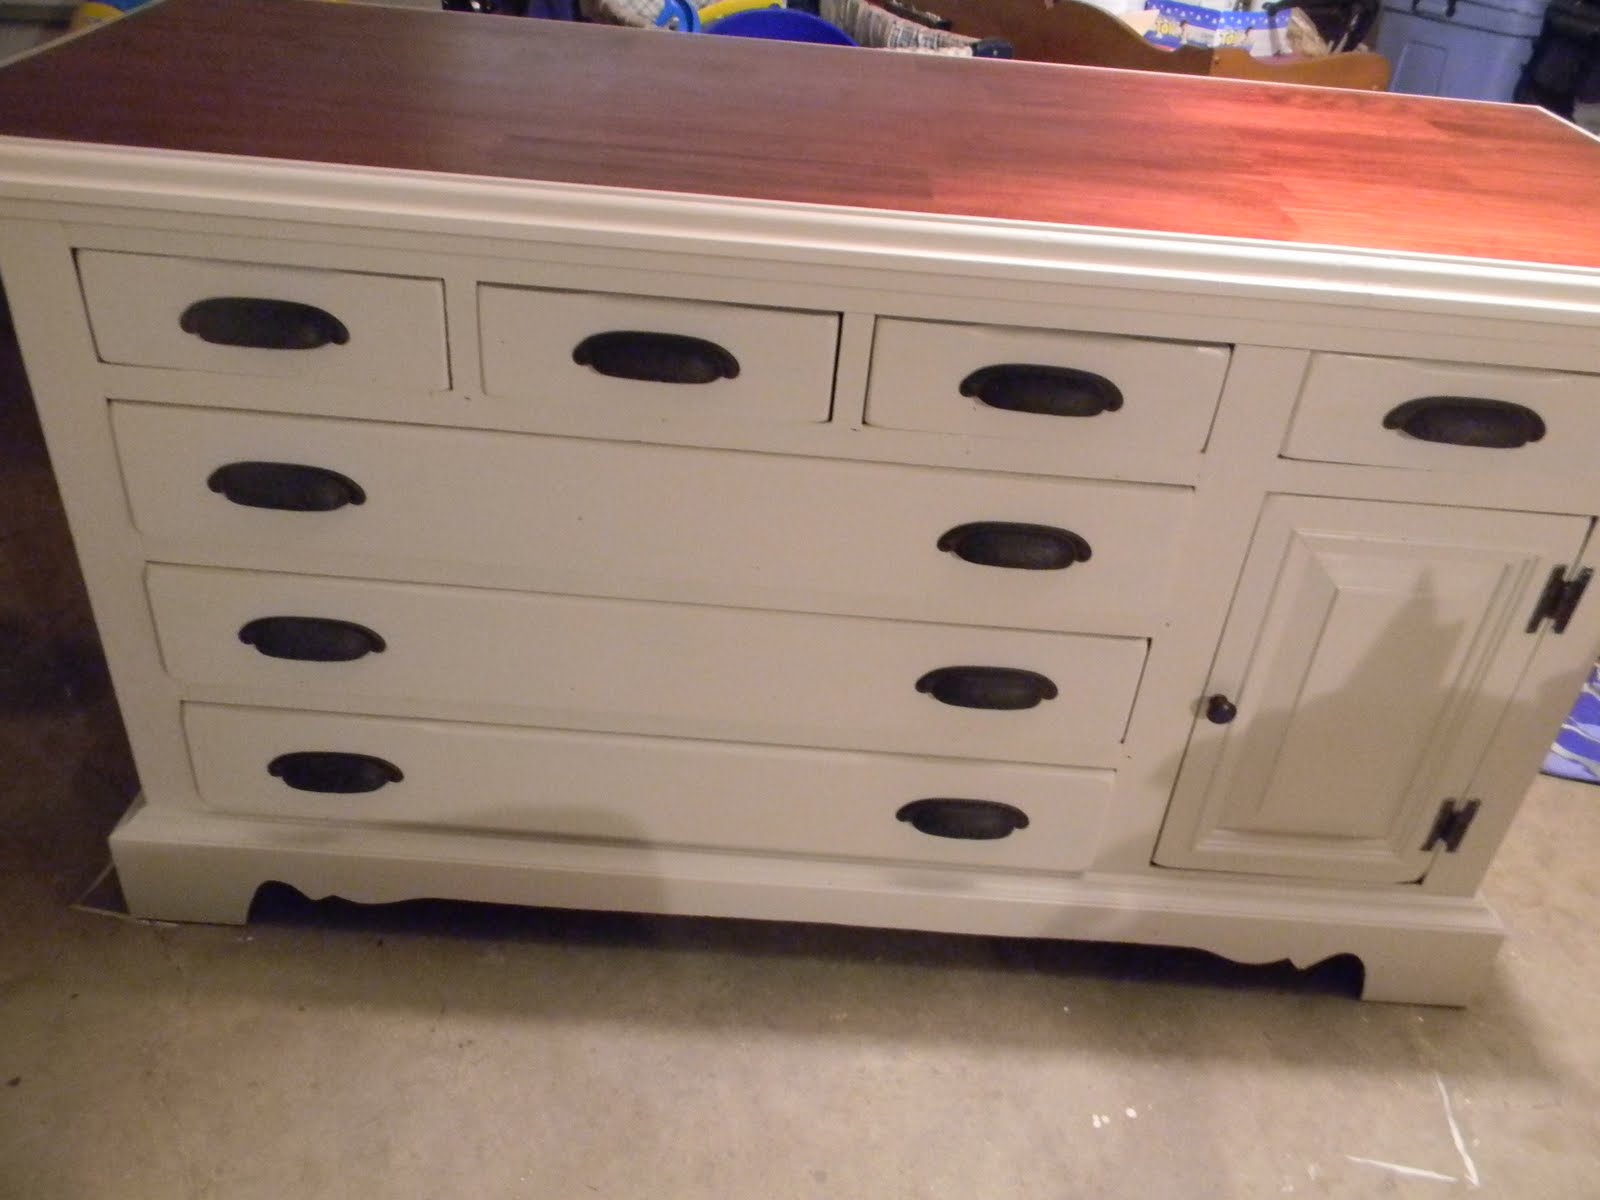
He added bead board to the back and a little overhang/bar area (The top is two pine board panels from Lowes glued together with liquid nails and trimmed out with decorative molding, doing it that way was half the price of buying butcher block from Ikea plus we didn’t have to rip it down like we would have the Ikea top.) and I sanded and stained and primed and painted my little heart out and a month later we now have…
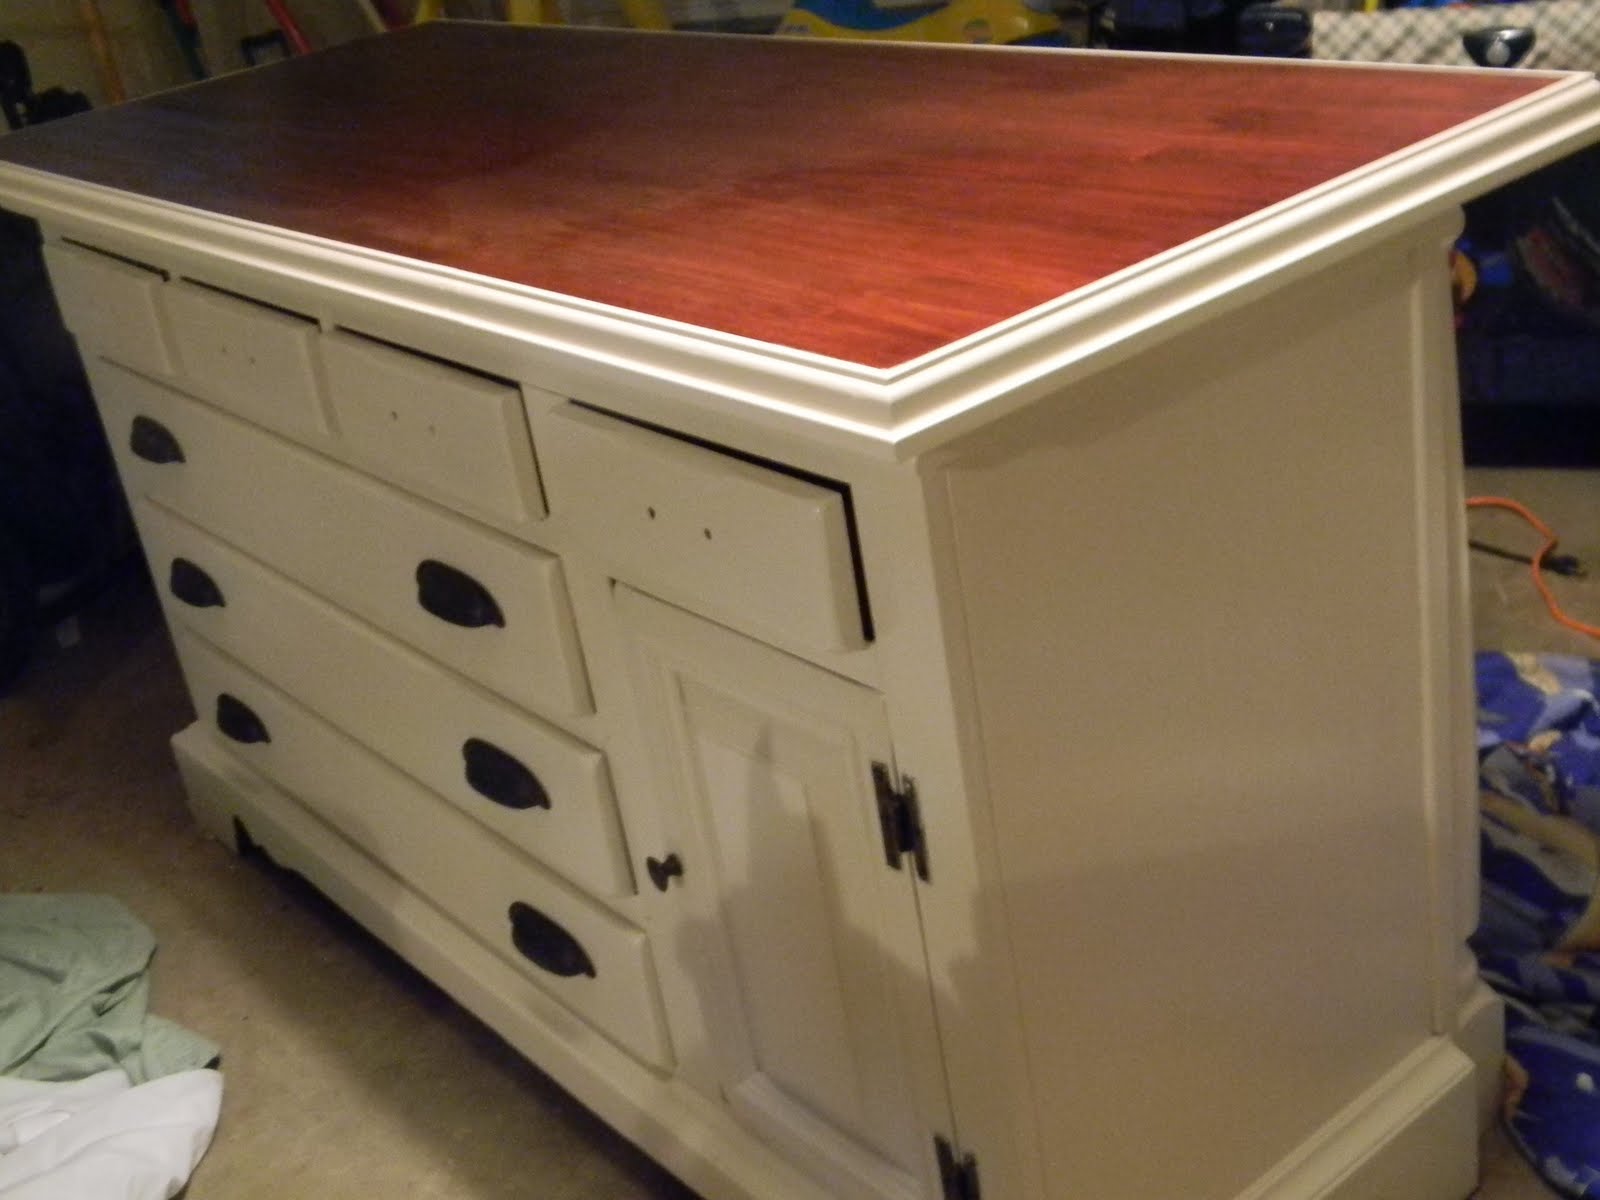
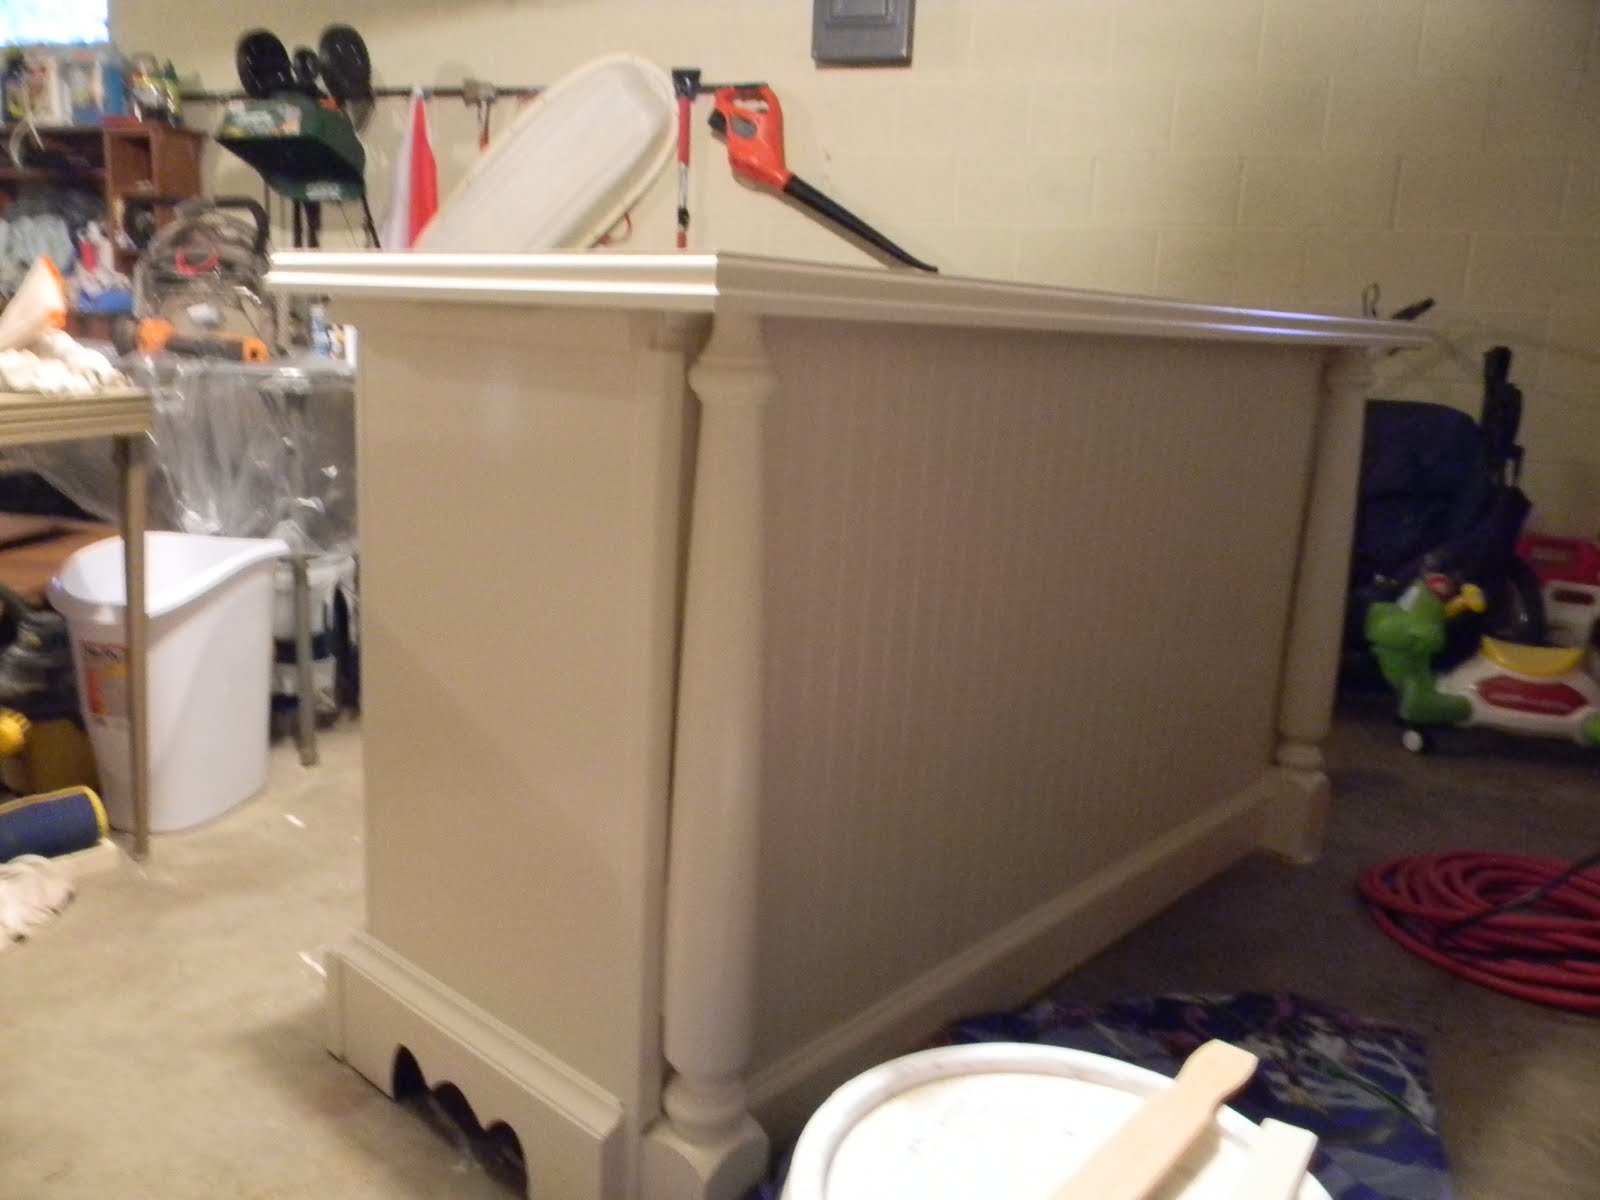
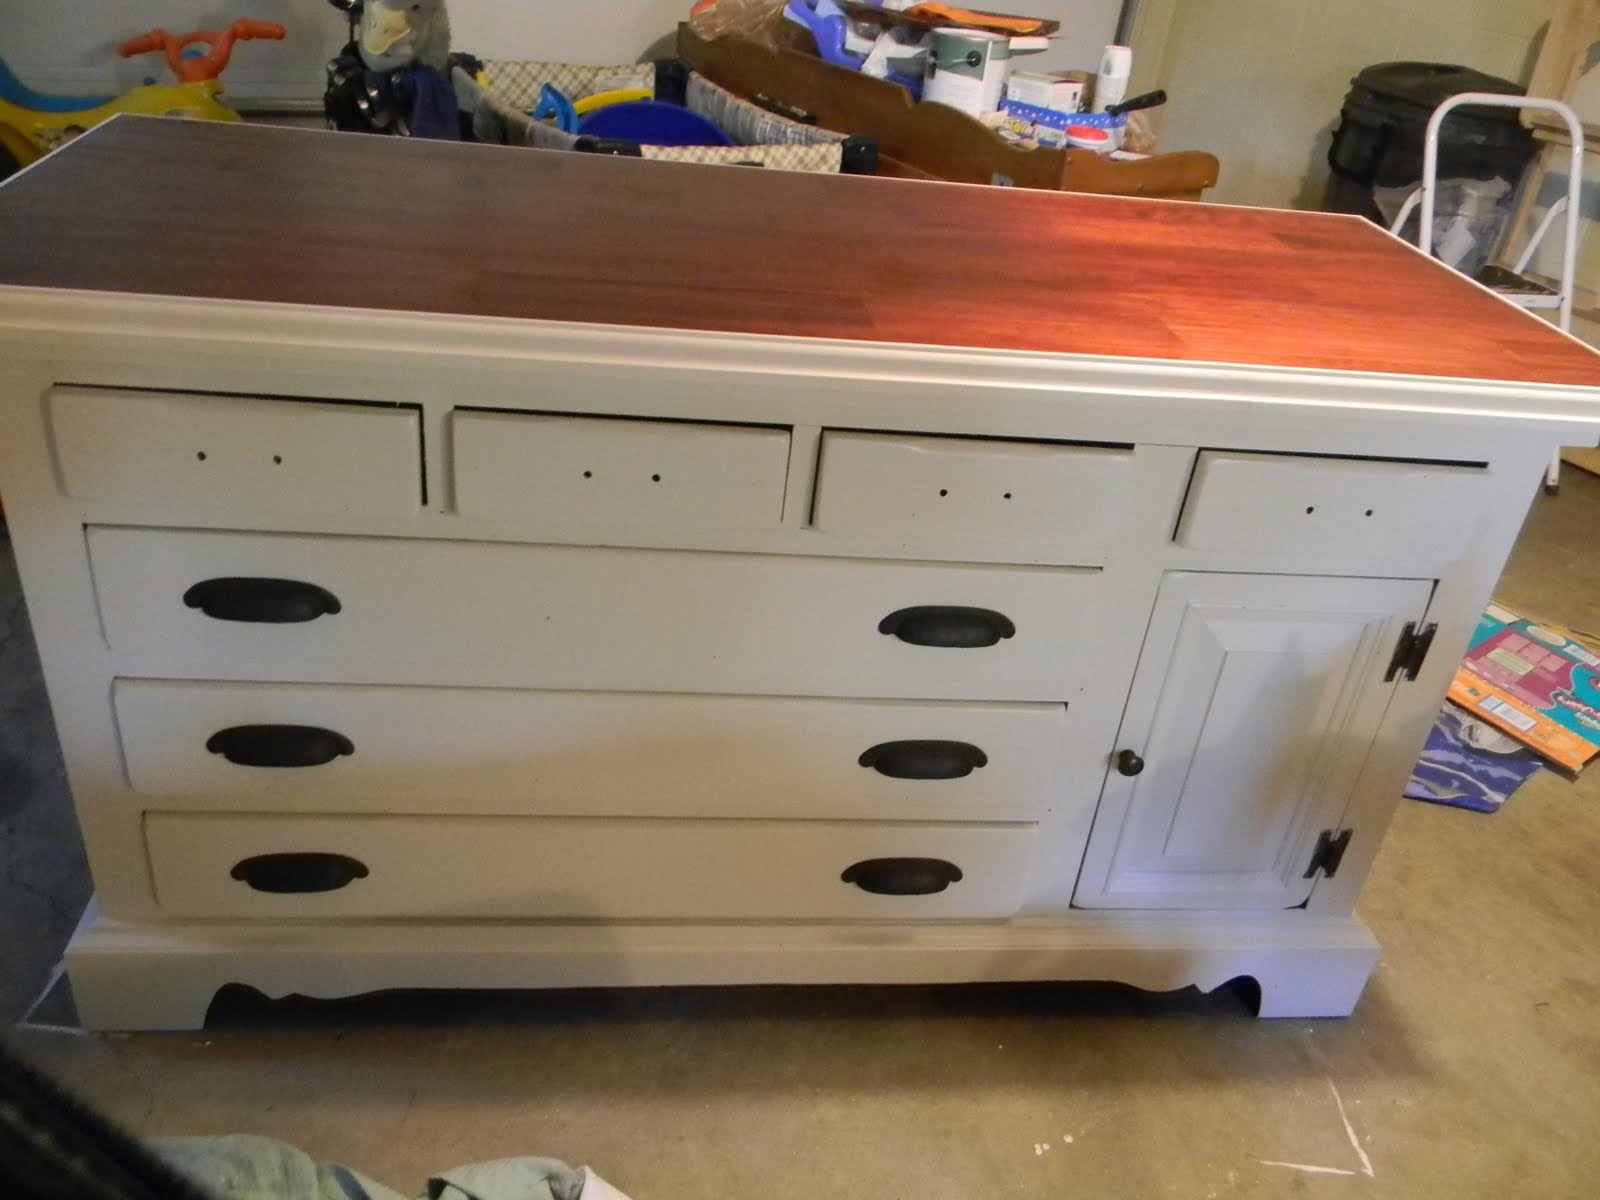
Still sitting in the garage waiting for the last few steps to be completed, but once we break out the drill for new holes for hardware in the top drawers (they are spaced differently than the lower drawers, bummer) and put a coat of polyurethane on top, she is done!!
The total came in around $300, which is more than I thought I would spend (and was due in large part to the fact that I splurged on really expensive hardware) but totally worth it.
Estimated costs break down:
dresser & delivery fee: $75
paint: $30 I bought a gallon because I’m going to use the rest for something else, you really only need a quart. You can get a quart of Oops paint for $2.50
beadboard: $20
decorative posts: $60 not really necessary, but I love them
Top:$70 You could cut that in half by just buying one panel, but I wanted the height so that island was the same height as the other kitchen counters.
Hardware: $65 again, not really necessary, I could have spray painted the old ones, but I splurged and I LOVE the new ones
Stain, sandpaper, nails, trim, caulk, primer: already on hand $0
Total: $315 (ish)
I’m SO excited to get it into the kitchen this weekend!!
Update: DONE!!!!!!!!!!!!! Click here to see it in the kitchen and see how we used Craigslist to remodel the whole room.
Tips if you want to try this yourself:
1. Try to find a dresser with a combination of wide and narrow drawers. The wide ones are great for things like baking sheets and table linens. The narrow ones are good for cookbooks and cooking utensils.
2. Check the height of your counters. I know that my counters hit me right at my hip bone so when I was out looking for dressers it was easy to tell if they were going to be a good counter top height even if I didn’t have a tape measure.
3. Paint. Don’t try to stain anything but the top because it is made of so many different kinds of materials by the time it all comes together paint is the best bet. 2 coats of primer and 3 or 4 coats of a semi-gloss. Maybe even a clear coat on top of that. (Don’t forget to sand first!)
4. If you can find a dresser with a door in it scoop it up! I really think this helps it look less like a dresser and more like a piece intended for a kitchen. That was the main reason I chose this piece. (plus it’s a great place to keep a mixer or a bread machine)
Let me know if you try it!

This is my new stove.
Isn’t she pretty? Guess what? She was FREE. Actually, I made $5 for upgrading. “How?” you might say. It’s all part of my Craigslist Kitchen Transformation. It might be taking forever, but I estimate that in the end I will have saved about $20,000. Maybe more!
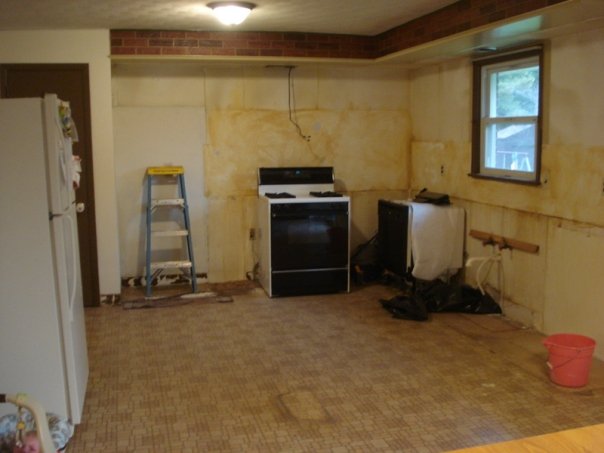
It all started a year ago when we got a decent tax refund and I went to Lowes to get a quote for new cabinets. You see, our old kitchen looked like this:

When we first bought the house I was planning to live with this for a while. “A while” lasted all of about 6 months before I couldn’t take it anymore. The old cabinets were literally disintegrating, as in you would put your clean dishes away and before you could use them again you had to re-wash them because they were full of sawdust. There was also an uneven and ugly floor, fake bricks, and a giant burn mark on the white-with-gold-flecks laminate counter top.
Anyway, back to my story. Lowes wanted $12,000 for mid-grade cabinets. Um, no. Our tax refund wasn’t that big. But I had big dreams for this kitchen, I wanted it nice and I wanted it NOW. (The “now” part turned out to be negotiable.) I was NOT paying that much just for cabinets. I wanted to stay under 5 grand for the entire kitchen.
So I started scouring Craigslist and I found out about Re-source York, a local store that re-sells building materials at discount prices. I decided that we could go green and save big bucks at the same time by reusing someone else’s old cabinets.
I know God loves me because one day I happened to find an ad on Craigslist for an entire kitchen that had almost the same layout as ours. Solid cherry cabinets, solid surface counters, a porcelain sink, a stove, and a dishwasher. They wanted $2,500 dollars. SOLD! We rented a U-Haul and rounded up cousins & fraternity brothers and they helped us haul all of it up the sellers 100+ foot inclined driveway and across town into our garage where it sat until we could save up enough money to hire a contractor to install it. That was July 3rd, 2009.
In the meantime, their stove was electric and we have a gas hook-up, so I re-listed their stove on Craigslist and got $500 for it. Therefore my kitchen only cost $2,000.
In October we decided to sell some stock and hire a contractor because I was completely fed up with the old kitchen. Hubby is handy, but not quite handy enough to tackle a job this big. Lucky for us, our neighbor and his dad are contractors and they ripped up the old floor & installed the cabinets, counters, etc for $1,600.
This is when we learned that the counters are Silestone and go for anywhere between $45-$90 per foot. We have a BIG kitchen. Those counters would have easily cost the $2,000 we paid for the whole kitchen.
Plus, we saved even more money be re-using the old cabinets in the garage to store Eddie’s tools.
So now my total was up to $3,900 (counting the U-Haul and some new cabinet hardware) and I had my cabinets, counters, and sink. We decided to live without a floor and with our old appliances for a while. In the meantime we bought some paint and trim and a little beadboard for the soffet. That all cost about $150. At $4,050 I was getting dangerously close to my limit and I still need a floor, new pantry door, a stove, a back splash, and a fridge.
In April of this year we got another tax refund and used it to buy a vinyl floor. So far this was the only compromise I had to make. I REALLY wanted tile, but it just couldn’t be done without taking out and replacing the entire sub-floor. That was not in the budget and we were going to be in danger of over-improving for the area. Plus our kitchen & dining room area is huge, so just the tile itself was going to be expensive. As it was, the Allure vinyl cost us about $800.
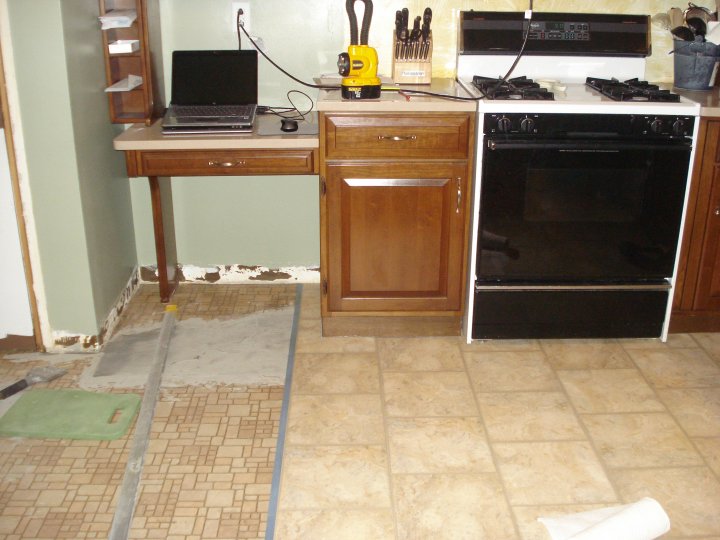
That’s the original vinyl floor on the left, which was hiding under the red floor and is also glued directly to the sub-floor. It took us almost a month of working on the weekends, leveling the old floor, and enlisting the help of my father-in-law to get this thing laid down.
That put me at $4,850 and with our new pantry door $4,887. For the record, do not buy 2 panel doors at Lowes. The only one they had cost $120. Home Depot had the same thing for $37. Go to Home Depot for doors.

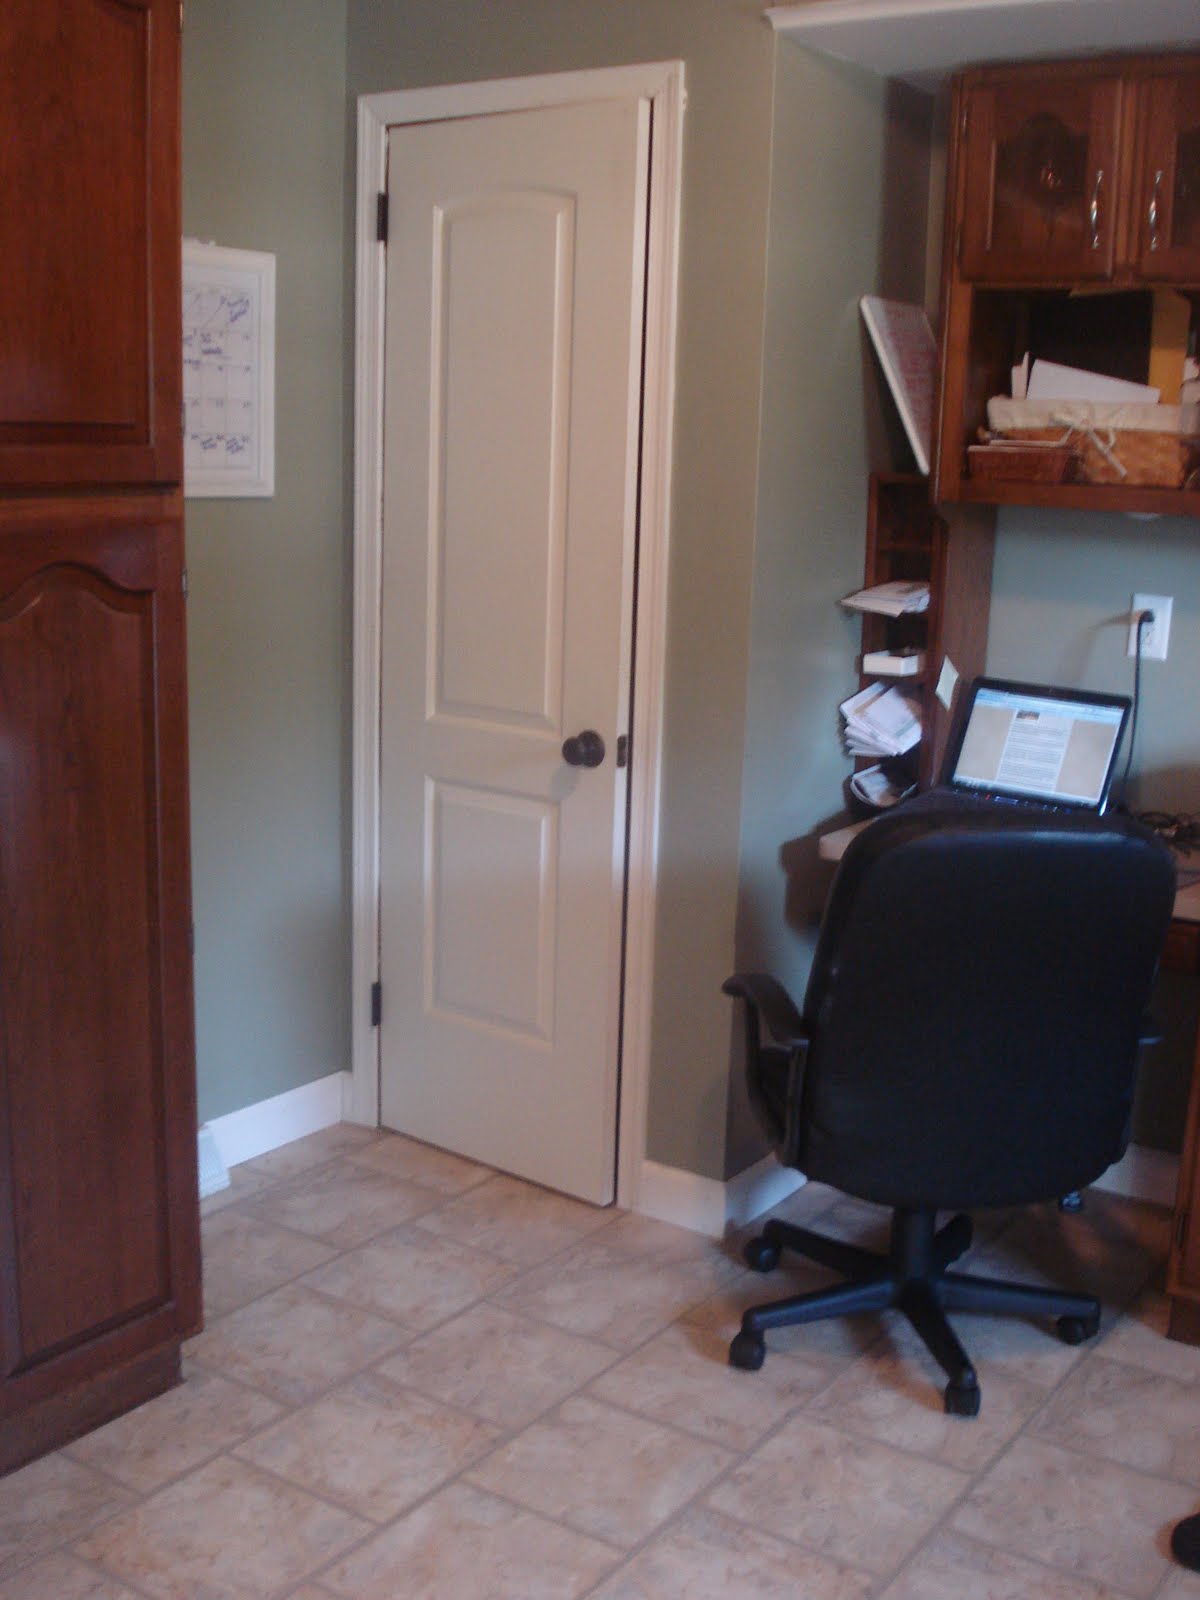
This is the new one.
We’ve decided to do bead board in a cream color for a back splash, but it isn’t up yet. I think that’s going to put me right at my limit. But noooooo…I still needed a new stove & a fridge. I don’t think there’s any way to avoid going over budget on a fridge. It’s going to happen, but maybe not until next year’s tax refund comes around. However, I did manage to score a sweet stove for free this week.
When I saw an ad on Craigslist for a stainless steel gas stove for $75 my eyes just about popped right out of my head! We really didn’t have an extra $75 laying around at the time, but I told Eddie I was almost positive that if the new stove worked (that was a big “if”) I could sell our old stove for at least that much, if not more, which would make the new stove free.
So we bought the stainless steel stove and it does work. The old owner said one of the burners was broken, but Hubby gave it a good cleaning and read the manual that they were kind enough to give us. It turned out the child safety lock was on and everything works perfectly!
This morning I sold our old stove for $80. When the man came to pick it up I had my little brother lock himself in the house with the kids and I went out to meet the guy with some Mace and a knife in the waistband of my skirt as a precaution. That’s the first time I’ve sold something on Craigslist without Eddie home, but it went well. The man was very nice. (and I didn’t even have to assault him)
So far I have been ridiculously lucky with my Craigslist finds, but I do caution you to be careful if you try this yourself!
Last week marked a year since we began this kitchen remodel. We’ve still got a solid few months to go, but eventually it will be GORGEOUS! (and cheap, he he)


What You’re Saying