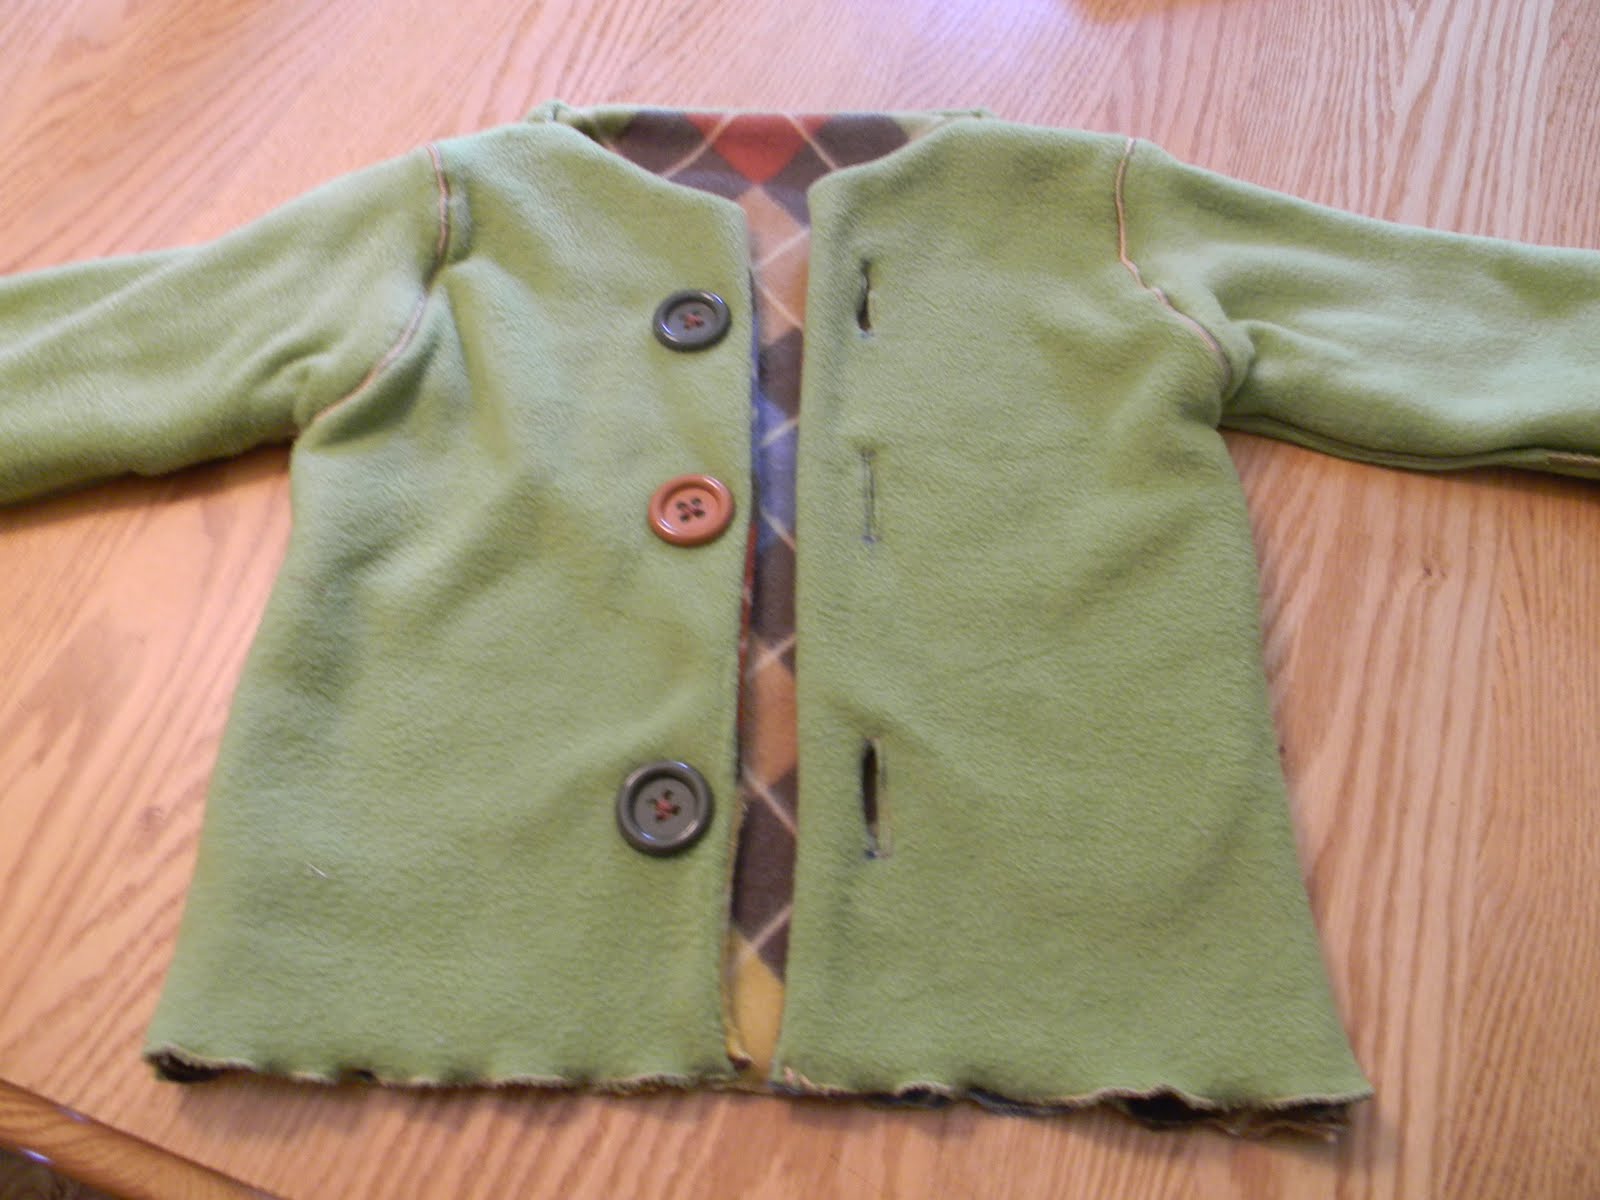
Today I wanted to add buttons to the reversible coat I made for Nicholas. Small problem: I have no idea how to create a button hole. Usually I go to YouTube or Google for this kind of problem, but all of the tutorials I found were for much fancier machines than mine or involved attachments that I don’t have. I was really nervous about messing this up because it was going to have to look good on both sides since the coat is reversible. Ugh. My brain hurt.
To save you the brain cramp I had from trying to figure this out myself (of course maybe you are smarter than I am and you already know a better way to do this, if so this post is not for you.) here’s the method I wound up using.
To create a button hole on a basic sewing machine:
1. Rest your button over the area where you would like to create the hole. With a pen mark the top & the bottom of the button to get an accurate size for the hole.
2. Draw a straight line between the points you just made.
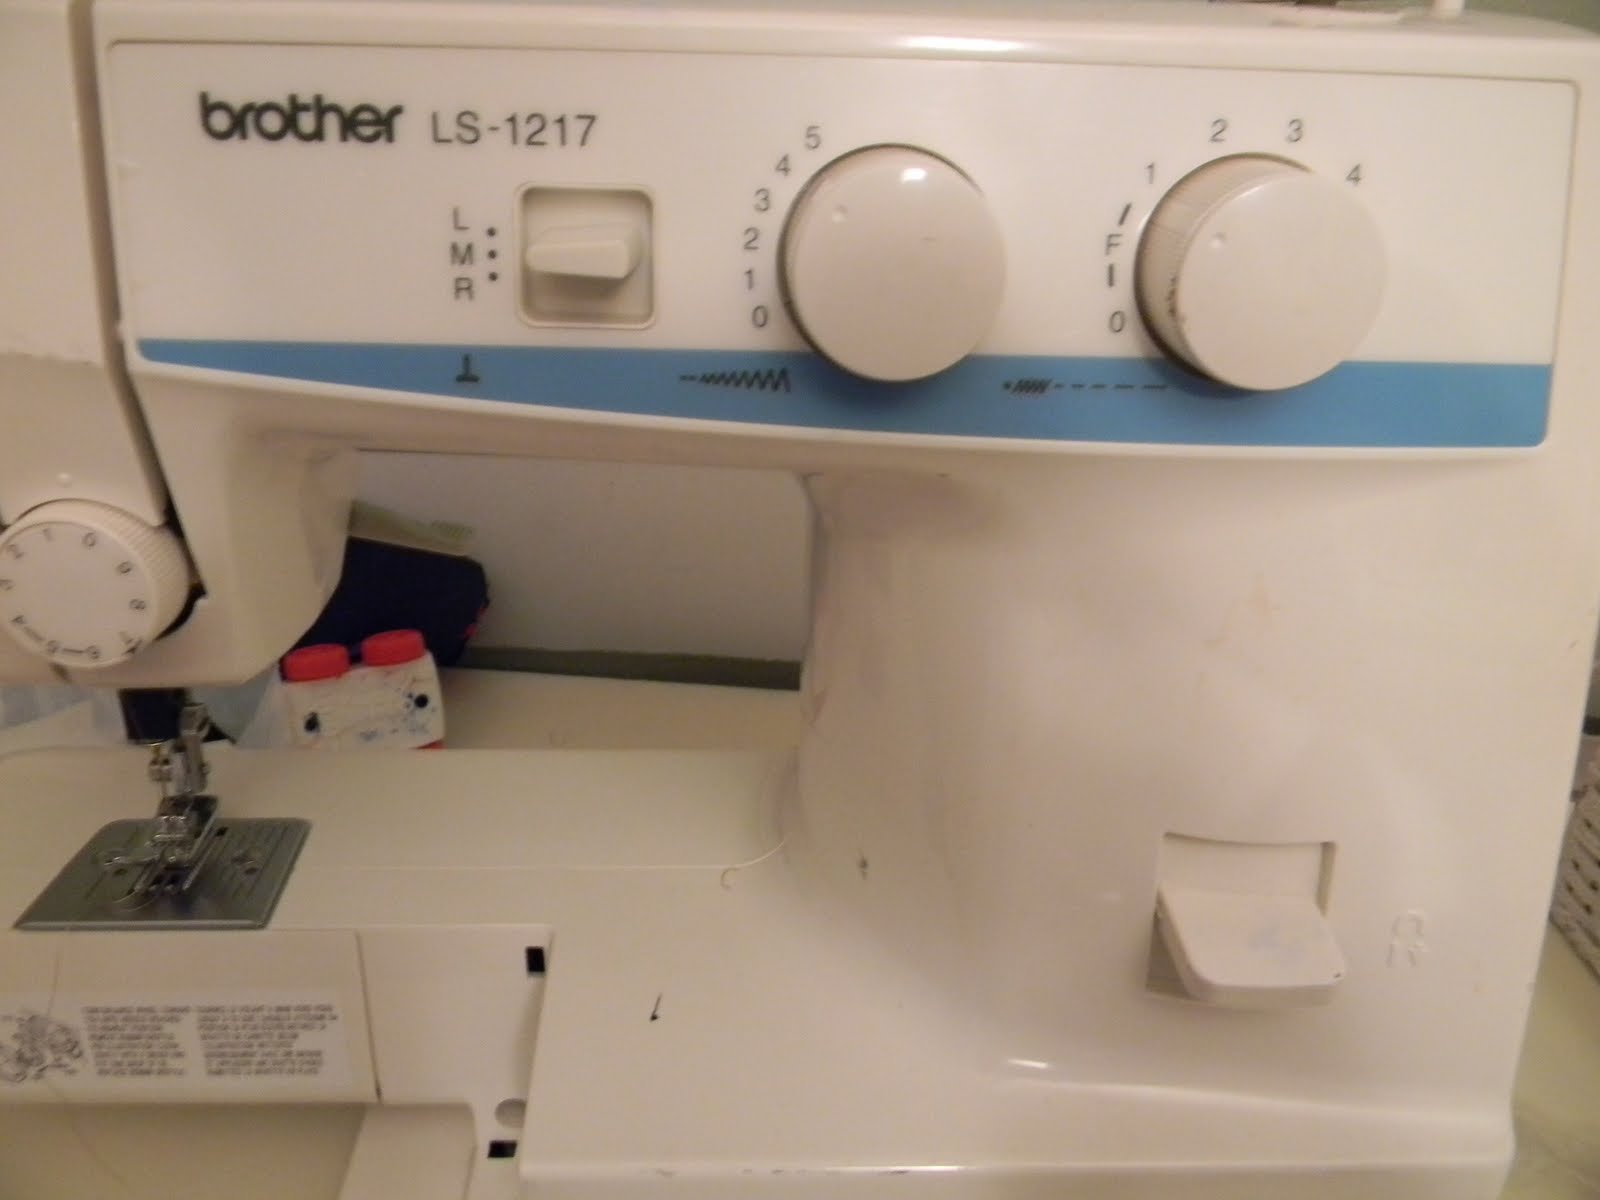
3. See those those two knobs and a switch marked LMR? (L=Left M=Middle R=Right)
a) Set the switch to “M”
b) Turn the middle knob up to 4 or 5 (large stitch size)
c) Turn the right knob down to F or where ever your zig-zag setting is.
4. Place the needle on the fabric where you marked the top of the hole and stitch back and fourth a few times staying in the same spot.
5. Now set the switch on the right to “R” and the middle switch to a lower number like 1 or 2. Leave the left knob alone. Slowly stitch a straight line down the right side of the line you drew.
6. Once you get to the bottom of your line repeat step 3.
7. Set the switch on the right to “L” and the middle switch back to 1 0r 2. Here comes the tricky part. Hold down the reverse lever at the same time that you sew a straight line backwards on the left side of the line you drew up until you meet the first stitch you made.
8. Take a seam ripper and rip the fabric in the middle of the rectangle you’ve just made being careful not to break and of your stitches.
I strongly suggest practicing on a piece of scrap fabric first. Once I did a practice run it was much easier and all of the holes on the coat came out just fine. Yay! 🙂


Leave a Reply