Binkies and Briefcases

SUBSCRIBE

  • About
    • Work With Me!
      • Blog & Small Business Consulting
    • Disclosures
  • Popular Posts
  • Adoption & Special Needs
  • Saving Money
  • Recipes
    • Breads
    • Breakfasts
    • Sides
    • Soups
    • Entrées
    • Desserts
  • For the Home
    • For the Home
    • Beauty
    • Crafts
      • For Kids
  • My Books

Kitchen Island Almost Done!

October 15, 2010 By: Stephanie38 Comments

If you're new here, you may want to subscribe to my Email Newsletter. Thanks for visiting!

Welcome back! Be sure to check out my Email Newsletter. Thanks for visiting!

How to turn a dresser into a kitchen island

Remember this u.g.l.y dresser?

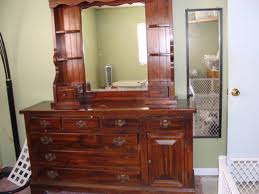
(Ok, not this actual one, I stole this picture from ebay, but it’s the exact same dresser I bought from ReSource York, except mine didn’t come with the hutch.)

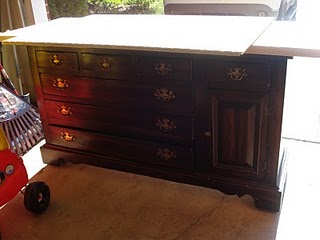
This was the best before picture I could get of our actual dresser in the awful light in our garage.

I wanted to turn it into a kitchen island like I saw Jonni do at House of Johns.

Eddie wanted to make it a little more elaborate so that it looked as much like a piece of kitchen cabinetry as possible.


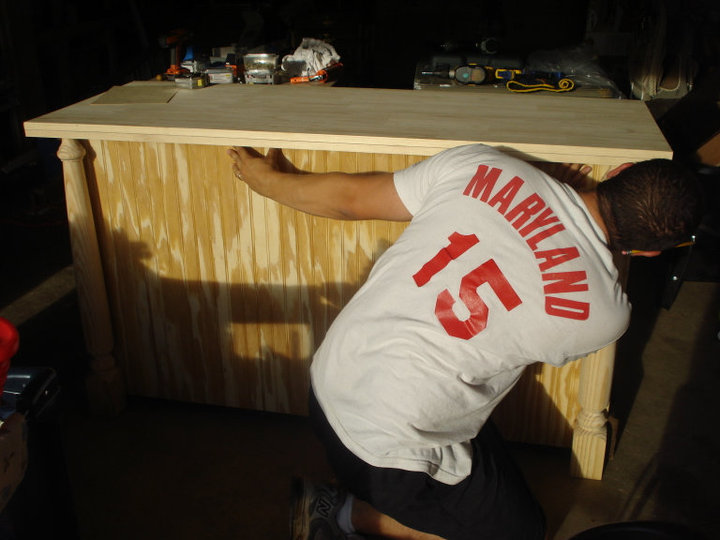
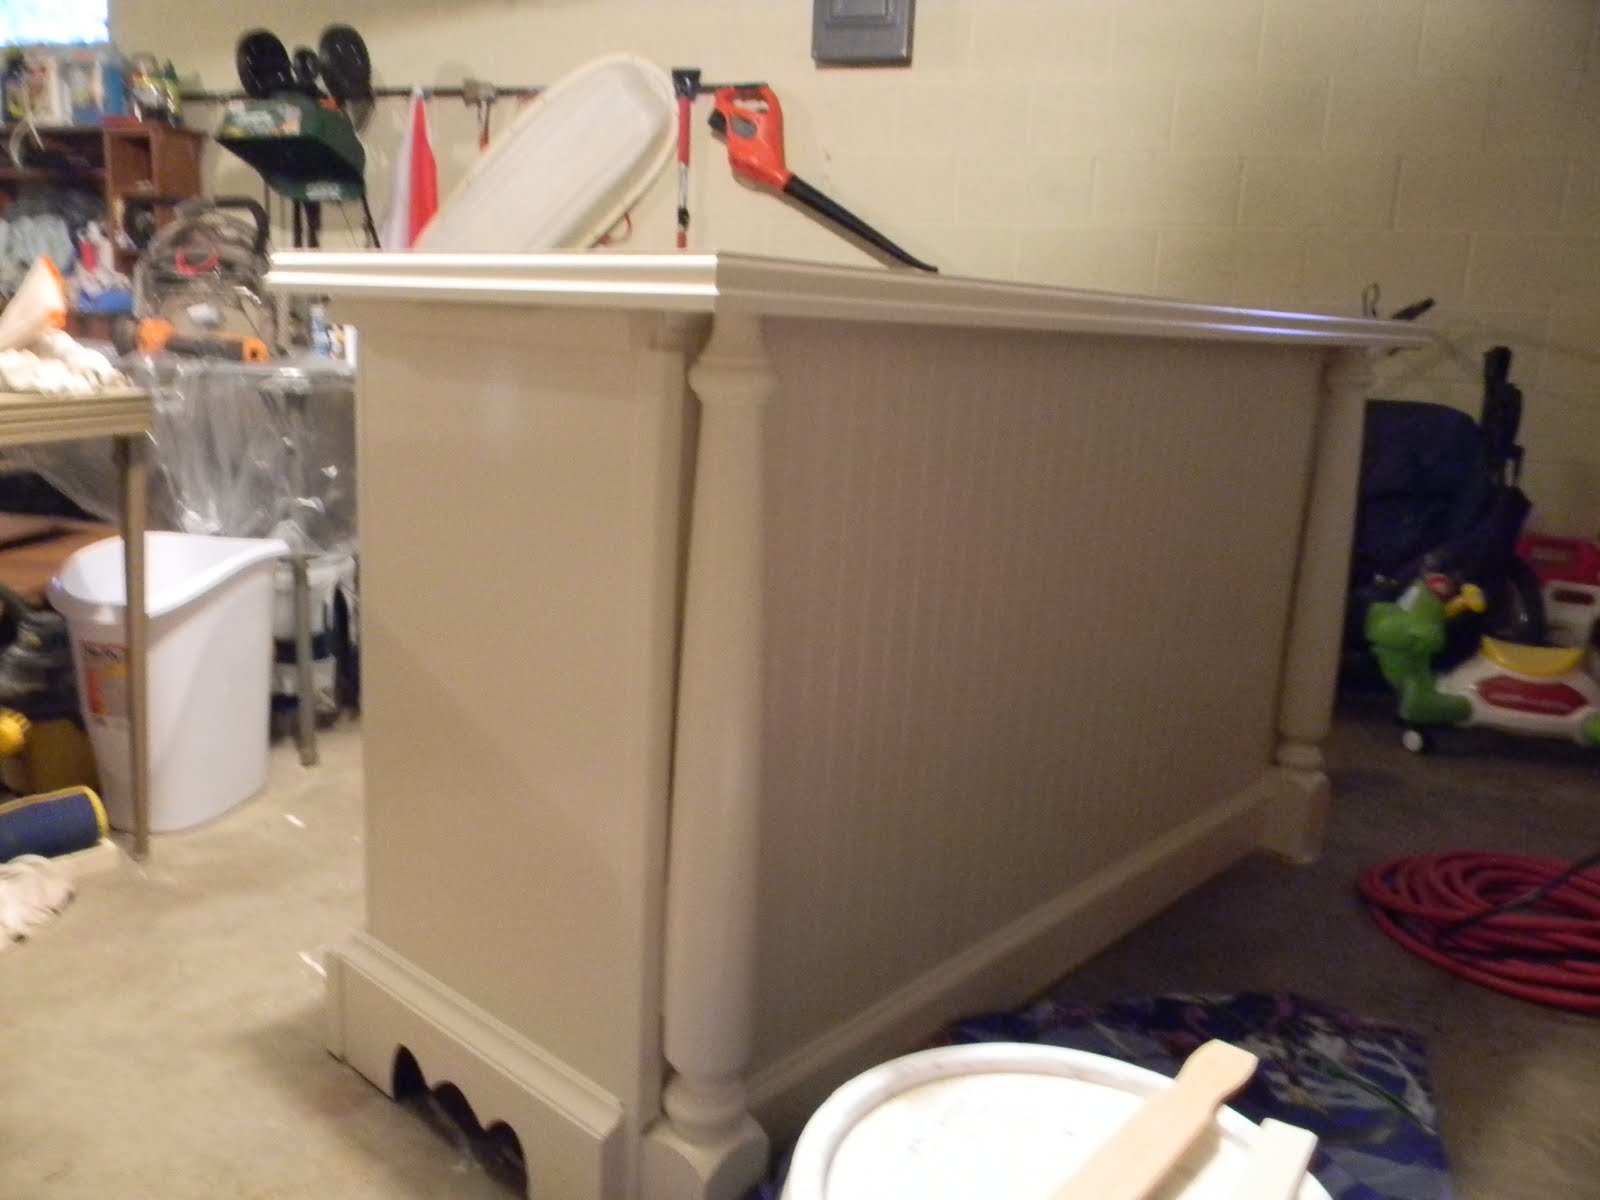
That’s my handy man at work 🙂

He added bead board to the back and a little overhang/bar area (The top is two pine board panels from Lowes glued together with liquid nails and trimmed out with decorative molding, doing it that way was half the price of buying butcher block from Ikea plus we didn’t have to rip it down like we would have the Ikea top.) and I sanded and stained and primed and painted my little heart out and a month later we now have…

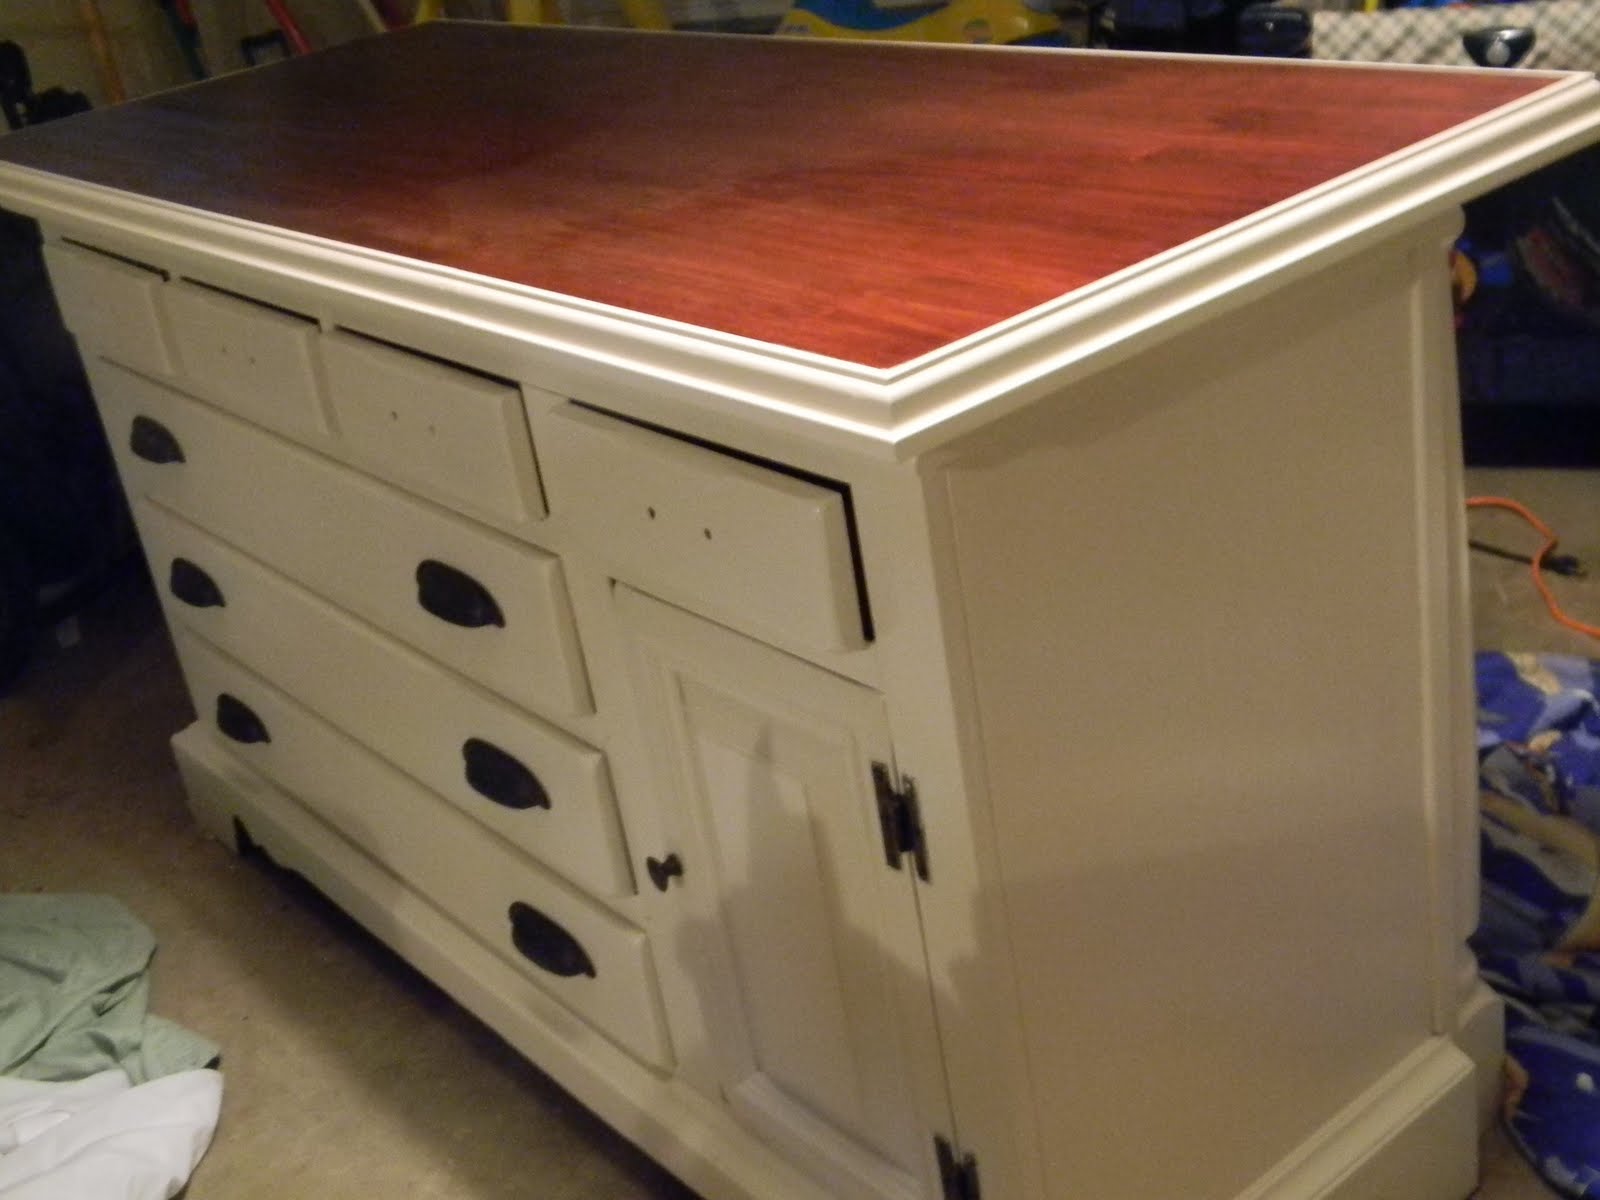
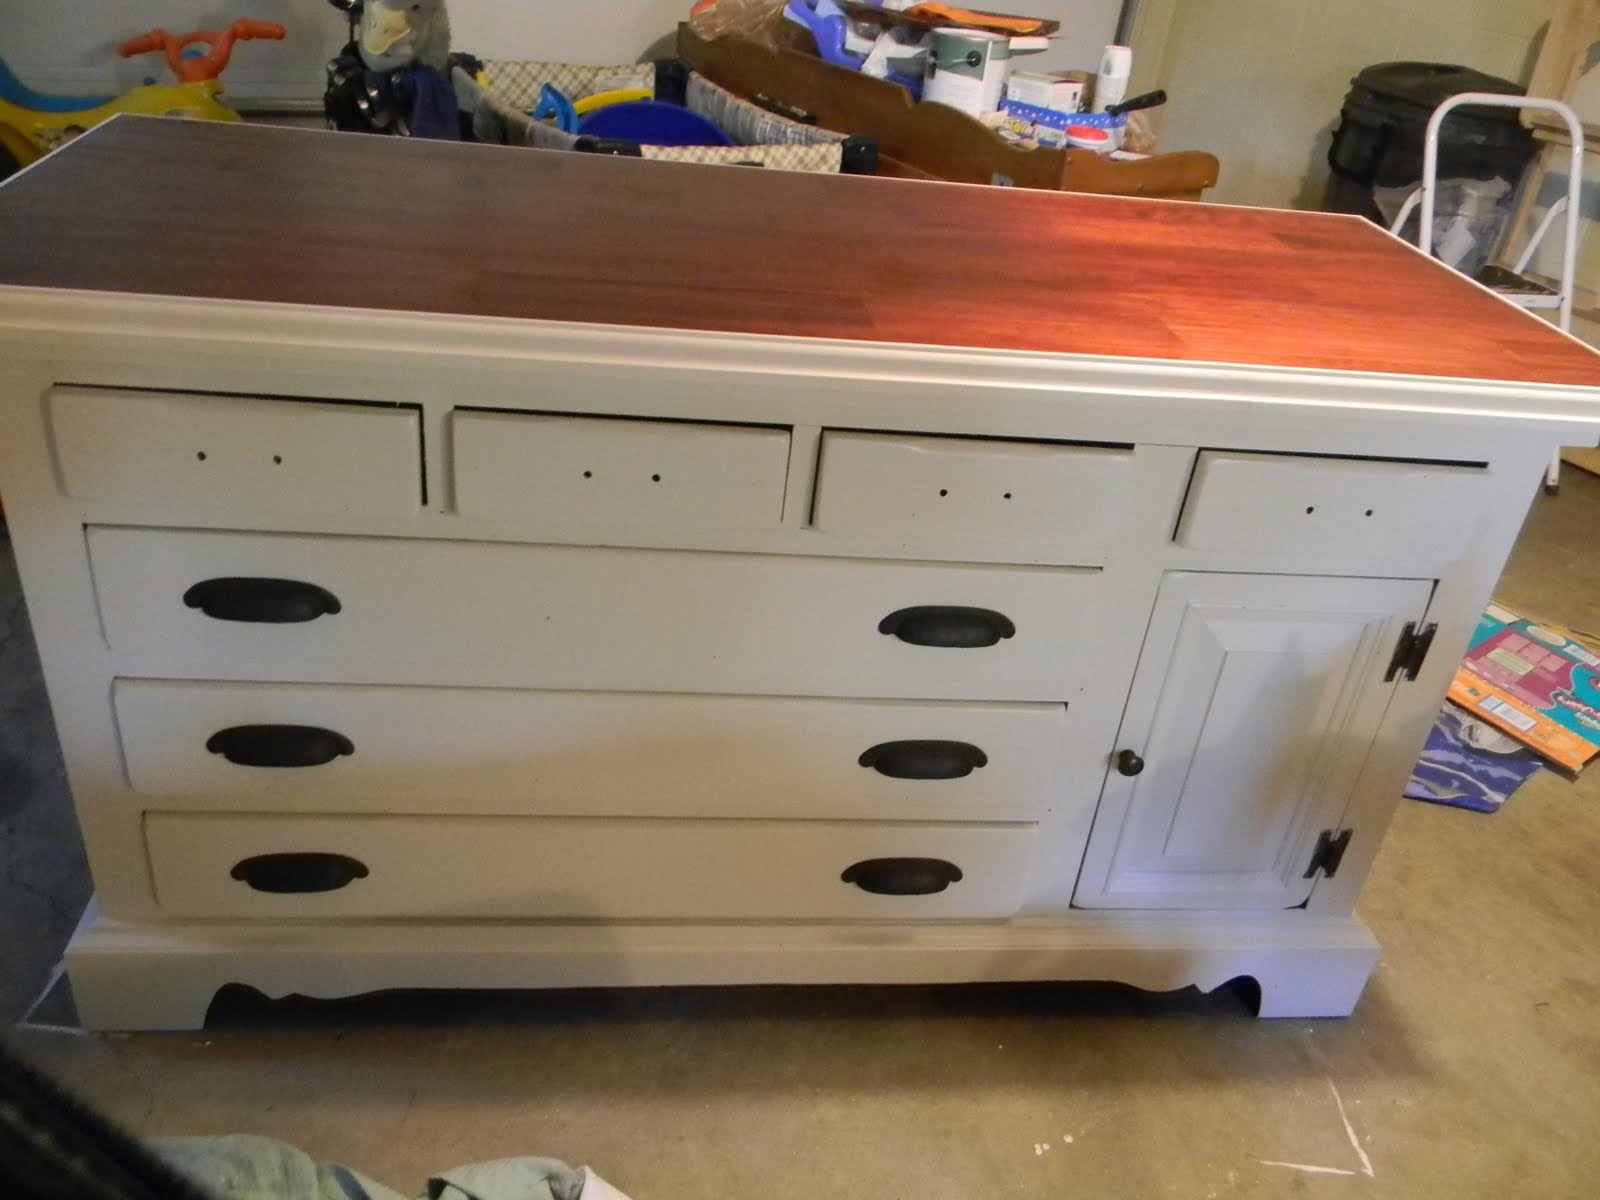
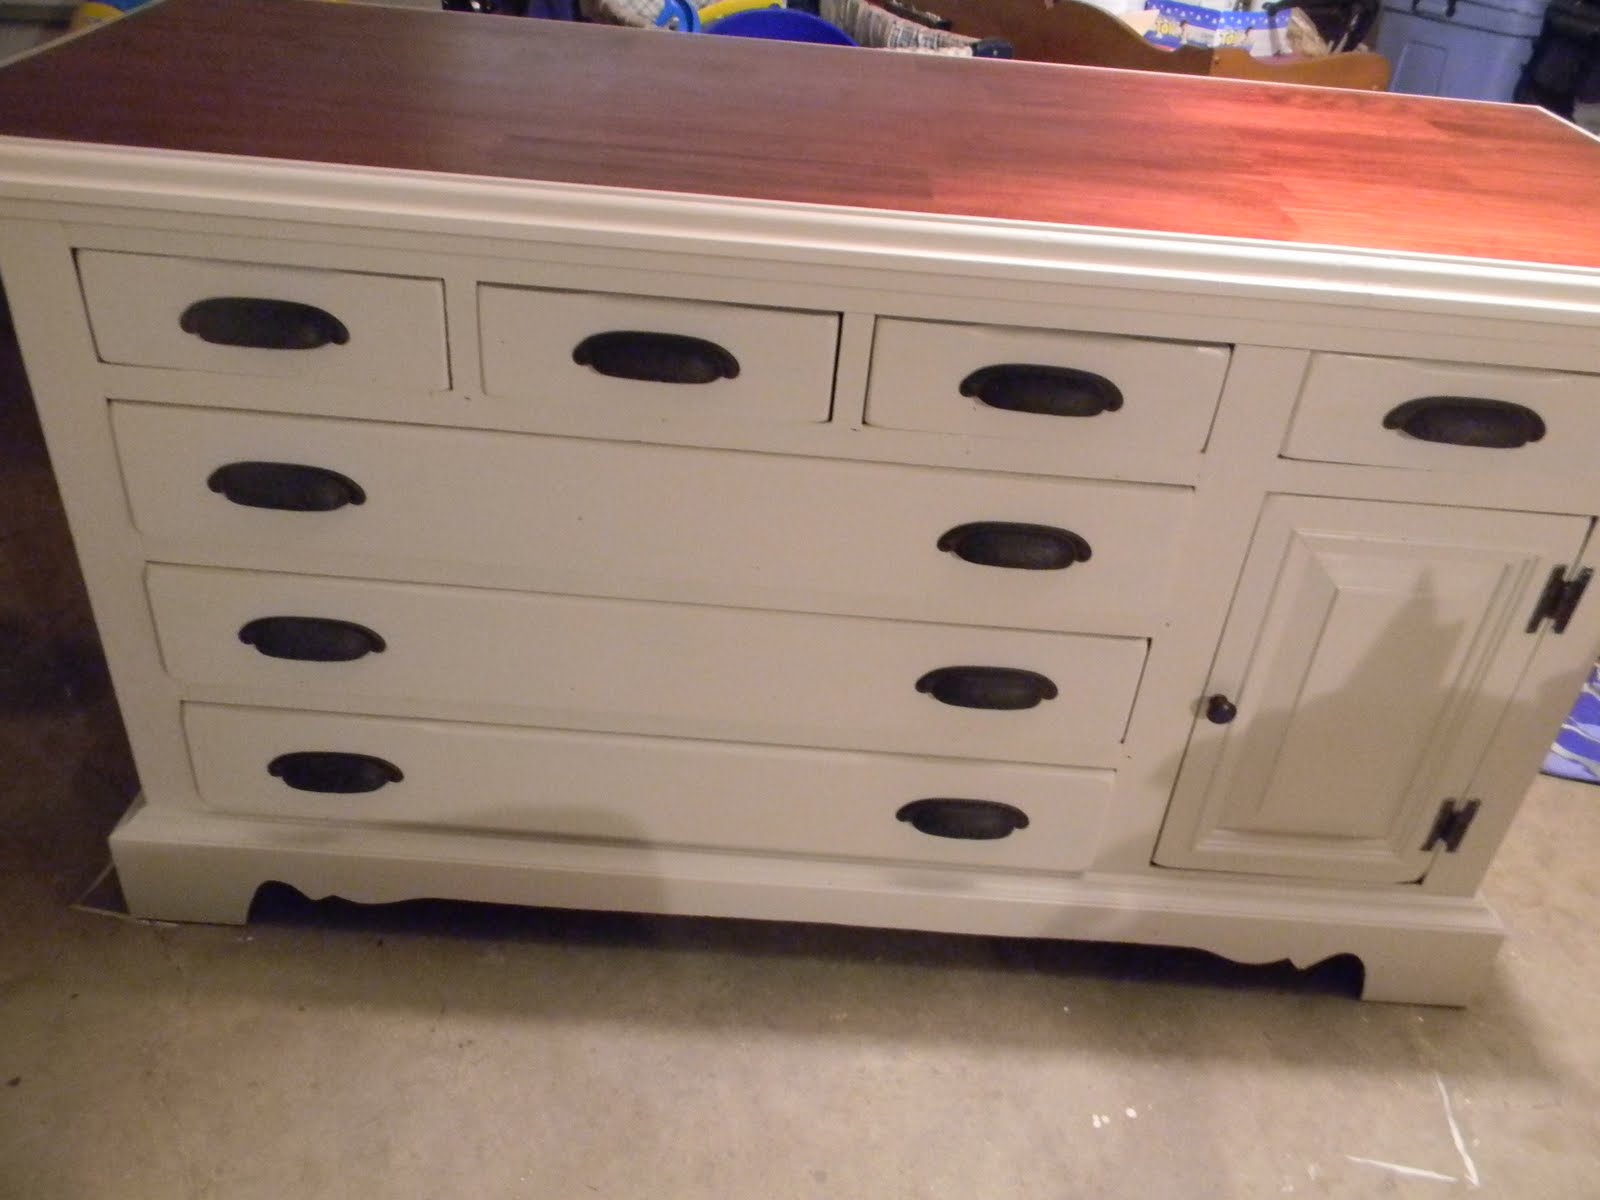
Still sitting in the garage waiting for the last few steps to be completed, but once we break out the drill for new holes for hardware in the top drawers (they are spaced differently than the lower drawers, bummer) and put a coat of polyurethane on top, she is done!!

The total came in around $300, which is more than I thought I would spend (and was due in large part to the fact that I splurged on really expensive hardware) but totally worth it.

Estimated costs break down:
dresser & delivery fee: $75
paint: $30 I bought a gallon because I’m going to use the rest for something else, you really only need a quart. You can get a quart of Oops paint for $2.50
beadboard: $20
decorative posts: $60 not really necessary, but I love them
Top:$70 You could cut that in half by just buying one panel, but I wanted the height so that island was the same height as the other kitchen counters.
Hardware: $65 again, not really necessary, I could have spray painted the old ones, but I splurged and I LOVE the new ones
Stain, sandpaper, nails, trim, caulk, primer: already on hand $0

Total: $315 (ish)

I’m SO excited to get it into the kitchen this weekend!!

Update: DONE!!!!!!!!!!!!! Click here to see it in the kitchen and see how we used Craigslist to remodel the whole room.

Tips if you want to try this yourself:
1. Try to find a dresser with a combination of wide and narrow drawers. The wide ones are great for things like baking sheets and table linens. The narrow ones are good for cookbooks and cooking utensils.
2. Check the height of your counters. I know that my counters hit me right at my hip bone so when I was out looking for dressers it was easy to tell if they were going to be a good counter top height even if I didn’t have a tape measure.
3. Paint. Don’t try to stain anything but the top because it is made of so many different kinds of materials by the time it all comes together paint is the best bet. 2 coats of primer and 3 or 4 coats of a semi-gloss. Maybe even a clear coat on top of that. (Don’t forget to sand first!)
4. If you can find a dresser with a door in it scoop it up! I really think this helps it look less like a dresser and more like a piece intended for a kitchen. That was the main reason I chose this piece. (plus it’s a great place to keep a mixer or a bread machine)

Let me know if you try it!

Share this:

  • Click to share on Facebook (Opens in new window)
  • Click to share on Pinterest (Opens in new window)
  • Click to share on Twitter (Opens in new window)
  • More
  • Click to share on Pocket (Opens in new window)
  • Click to share on Tumblr (Opens in new window)
  • Click to share on Reddit (Opens in new window)
  • Click to share on LinkedIn (Opens in new window)
  • Click to print (Opens in new window)

Comments

  1. Merry Mary says

    October 15, 2010 at 8:54 pm

    I love it! What a great idea. The hardware is great – worth the splurge.

    Reply
  2. kathie says

    October 15, 2010 at 9:00 pm

    That is going to be one fabulous island!! I’m bookmarking this page for reference later 🙂 You did a great job on it, the beadboard & posts really make it look extra special!

    Reply
  3. Gaia says

    October 15, 2010 at 10:09 pm

    Wow! What an amazing transformation! You did a great job!

    Reply
  4. Leah says

    October 15, 2010 at 10:48 pm

    Beautiful! I’m so impressed and inspired when someone can look at something and imagine changing it into something else like this – well done!

    Reply
  5. Iris says

    October 16, 2010 at 5:43 am

    Hot diggety dog! What a wonderful project and how well it turned out!

    Reply
  6. Pamela says

    October 16, 2010 at 12:20 pm

    Looks like it will be soo lovely in your kitchen! I am hoping to finish our transformed island soon. Great job!

    Reply
  7. Cassie says

    October 16, 2010 at 8:31 pm

    That is ingenious! I would never have thought to turn that into an island!! Kudos!

    Reply
  8. Ann @ makethebestofthings says

    October 16, 2010 at 10:55 pm

    Gorgeous gorgeous gorgeous. I will definitely have to borrow this idea for my kitchen. It turned out wonderfully well!

    Reply
  9. Jacqueline says

    October 17, 2010 at 9:52 am

    That came out amazing. My man made me a island using nice oak from Home Depot for a top. It was easy and cheap.

    Reply
  10. Ticking and Toile says

    October 17, 2010 at 12:29 pm

    Holy cow! What an amazing transformation! Great job!

    Shellagh

    Reply
  11. Green Willow Pond says

    October 18, 2010 at 11:52 pm

    That is an awesome transformation! Great job. Visiting from Sassy Sites.

    Reply
  12. Sharon@thisthriftyhouse says

    October 20, 2010 at 4:54 pm

    What a fantastic idea! It looks amazing!! I am tucking this one away in my file of genius ideas!

    Reply
  13. Sawdust and Paperscraps says

    October 20, 2010 at 9:50 pm

    That is fantastic! To think I just spent the last 2 months building an island for my craft room and I could have just looked for an old dresser to transform in half the time! Drat!!! Well, great job on this transformation. I think it is a fantastic idea!

    Reply
  14. Cristie says

    October 20, 2010 at 10:47 pm

    I totally love it! Lucky you to have a handy man! This is really a great idea. Thanks, have a lovely week.

    Reply
  15. Meg says

    October 20, 2010 at 11:56 pm

    WOW! So impressive. I love this, you’re doing such a great job!

    I hope you can join my giveaway going on now! alittleknickknack.blogspot.com

    Reply
  16. Sawdust and Paperscraps says

    October 22, 2010 at 7:47 am

    I’m so glad you linked up. This is a really awesome project. Thanks for using my button too. Hheee, even if it doesn’t make a bit of sense. Halloween. 🙂 I really need to make a new one!

    Reply
  17. Cori says

    October 22, 2010 at 11:53 am

    WOW, just WOW.

    This island is absolutely amazing! Talk about the ultimate “look for less”. And, you’re right, it’s much better than your original inspiration piece.

    You did such a fabulous job of imagining this and making it a reality.

    So glad I found you at MMS. Count me in as one of your followers : )

    Cori
    Starview Sonnet

    Reply
  18. Katie says

    October 22, 2010 at 3:27 pm

    Great job!! I love this, this sort of thing is what I like to do in my free time. What is that (: Looks awesome

    Reply
  19. LNich says

    October 22, 2010 at 6:14 pm

    That is a terrific transformation. Great job!

    Reply
  20. Jill ~ Jillify It says

    October 22, 2010 at 7:19 pm

    Love it! Awesome job!!

    Reply
  21. Amanda @ Serenity Now says

    October 22, 2010 at 8:50 pm

    Wowzah!!! Talk about a transformation. 🙂 This is a great makeover post! Thanks for linking up with me. 🙂

    Reply
  22. Paula says

    October 23, 2010 at 7:52 am

    What a great idea for repurposing a piece of furniture. I’m wondering if this piece is the same height as your counters or if you somehow altered it to raise the height. You should be super proud of this project!

    Reply
  23. stephaniegiese says

    October 23, 2010 at 8:16 am

    Thanks so much for all of your kind comments, ladies!! @ Paula, it is almost the exact height of the counters now. (about 1/2 an inch shorter) That was the reason we stacked two pine panels on top of each other to make the top, it gave us the extra height. 🙂

    Reply
  24. Cassie @ Primitive & Proper says

    October 26, 2010 at 9:20 pm

    that turned out beautifully!! i love the whole concept. fabulous!

    Reply
  25. Cassie @ Primitive & Proper says

    October 26, 2010 at 9:20 pm

    that turned out beautifully!! i love the whole concept. fabulous!

    Reply
  26. Cassie @ Primitive & Proper says

    October 26, 2010 at 9:20 pm

    that turned out beautifully!! i love the whole concept. fabulous!

    Reply
  27. Cathy @ The Far Fifty says

    October 27, 2010 at 11:14 am

    What a statement piece, I love the farmhouse feel of it. Gorgeous!

    Reply
  28. Kathy says

    October 30, 2010 at 11:34 am

    WOW! It turned out AWESOME! Great job!

    Reply
  29. Liz says

    November 18, 2010 at 3:17 am

    I had the same exact dresser and gave it away to my church’s garage sale last year because I disliked it so much. Now I can kick myself. It would have made a nice addition to my kitchen or craftroom. Quite stunning.

    Reply
  30. Remodelaholic says

    December 3, 2010 at 10:08 pm

    This is so awesome! I would love to feature it if you are interested just send me a reply email! (you usually get some great traffic!)

    Cassity @ http://www.remodelaholic.com

    Reply
  31. lauren@WESTFURNITUREREVIVAL says

    January 28, 2011 at 12:43 am

    great job saw your post on remodelaholic… love it.

    Reply
  32. Real Housewife in MN says

    January 28, 2011 at 2:31 am

    Saw your post on remodelaholic. What a fantastic idea! Looks so great and the beadboard/new countertop look fantastic. Nice job!

    Reply
  33. Rachel Murphy says

    January 28, 2011 at 3:12 am

    just saw your post on remodelaholic and wow! Now I am trying to figure out what dresser we can do this too. Really great job!

    Reply
  34. Sally says

    March 24, 2011 at 9:59 am

    What is the width and depth of the top of your island? Or maybe I should be asking what size lumber did you use?

    Reply
  35. stephaniegiese says

    March 29, 2011 at 8:22 am

    @Sally, the island is 24″x62″ on top. I believe the original pine panels were 2 feet X 6 feet, but my husband cut a few inches of the length to get it to fit the dresser.

    Reply
  36. Sisterhood of the Sensible Moms says

    February 16, 2014 at 3:48 pm

    That is awesome!

    Reply

Trackbacks

  1. Remodeling on a Budget: Our Craigslist Kitchen - Binkies and Briefcases says:
    July 26, 2013 at 9:15 am

    […] made our own kitchen island from an old dresser that I bought at our local re-source […]

    Reply
  2. Upcycle Dressers into Kitchen Island Treasures - Livin in San Diego says:
    April 18, 2014 at 2:02 pm

    […] Steph at Binkies and Briefcases (isn’t that the cutest name for a blog)  created this island for $300.  Her inspiration was a $900 island from JC Penney’s.  I think her and her hubby did an awesome job.  See how they did it at:  binkiesandbriefcases.com […]

    Reply

Leave a Reply Cancel reply

  • Facebook
  • Instagram
  • Pinterest
  • RSS
  • Twitter

Welcome! I’m Steph.

This is a little corner of the internet we like to fill with honesty, heart, and humor. Read More…

Cover for Binkies and Briefcases with Stephanie Giese
19,431
Binkies and Briefcases with Stephanie Giese

Binkies and Briefcases with Stephanie Giese

Stephanie Giese is an indie author based in Florida. She writes stories about realistic problems with humor, heart, and sass. Her work has a strong focus on mental health and consent. Her North Bay small-town romance series is set for release in 2025.

Binkies and Briefcases with Stephanie Giese

4 months ago

Binkies and Briefcases with Stephanie Giese
This one's on me, Bookworms! Grab your FREE book ... See MoreSee Less

Hello My Radiant RomCom Readers,

wix.to

I have fun news! For a limited time, as a special gift from me to you, the eBook version of Out of Left Field is totally FREE this week to download from Amazon. That's right, you don't even have to be...
View on Facebook
· Share

Share on Facebook Share on Twitter Share on Linked In Share by Email

Binkies and Briefcases with Stephanie Giese

4 months ago

Binkies and Briefcases with Stephanie Giese
Hello My Brilliant Bookworms ... See MoreSee Less

Hello My Brilliant Bookworms,

wix.to

I'm checking in from the pits of work-still-in-progress despair. (Book 3 is actually going pretty well, but I'm feeling dramatic today.) Way Off Base, Book 3 in my North Bay series, is set to go to th...
View on Facebook
· Share

Share on Facebook Share on Twitter Share on Linked In Share by Email

Reader’s Choice

Image HTML map generator

Follow Me on Pinterest

featured-on

What You’re Saying

  • 28 Best Stone Fireplace Ideas And Designs - Perfect Decor Place on DIY Stone Fireplace with AirStone
  • Kevin Hicks on How to Budget for Building Your Own Home
  • Amy on DIY Stone Fireplace with AirStone
  • Gendered clothing - GenderEd on A Target Intervention on Behalf of My Daughters
  • Wellshop Store on Dressing Our Daughters: How Target Responded to My Last Blog Post

Latest Posts

ALL I Never Knowed: The Book Is Here!

It’s finally here, in my hands. It has been a loooong time in the making, but our book, All I Never Knowed: Mental Illness, a Mother’s Love, and a Broken System, is available now. The official launch date is next Tuesday, Oct. 5th. But starting now, you can order from all major retailers. Here’s where […]

Share this:

  • Click to share on Facebook (Opens in new window)
  • Click to share on Pinterest (Opens in new window)
  • Click to share on Twitter (Opens in new window)
  • More
  • Click to share on Pocket (Opens in new window)
  • Click to share on Tumblr (Opens in new window)
  • Click to share on Reddit (Opens in new window)
  • Click to share on LinkedIn (Opens in new window)
  • Click to print (Opens in new window)

Save Money with Fetch

Hey everyone! This is Chelsea, Steph’s asistant, back with the simplest app for getting cash back on things you’re already buying! We’ve covered Ibotta, Shopkick, Coupons.com, Swagbucks and we’re all saving hundreds of dollars by now, right? RIGHT!? I’m really hoping you guys have jumped on the rebate app savings train because it’s just so […]

Share this:

  • Click to share on Facebook (Opens in new window)
  • Click to share on Pinterest (Opens in new window)
  • Click to share on Twitter (Opens in new window)
  • More
  • Click to share on Pocket (Opens in new window)
  • Click to share on Tumblr (Opens in new window)
  • Click to share on Reddit (Opens in new window)
  • Click to share on LinkedIn (Opens in new window)
  • Click to print (Opens in new window)

Splendid Spoon Review

I was excited to receive a box of products to try from Splendid Spoon this summer! They invited me to try their line of plant-based, ready-to-eat foods and delivered them right to my door. Check one in the pro column for convenience. I did receive these products free of charge in order to rate them […]

Share this:

  • Click to share on Facebook (Opens in new window)
  • Click to share on Pinterest (Opens in new window)
  • Click to share on Twitter (Opens in new window)
  • More
  • Click to share on Pocket (Opens in new window)
  • Click to share on Tumblr (Opens in new window)
  • Click to share on Reddit (Opens in new window)
  • Click to share on LinkedIn (Opens in new window)
  • Click to print (Opens in new window)

My Networks

#BlogHer15: Experts Among Us Voices of the Year Honoree