Binkies and Briefcases

SUBSCRIBE

  • About
    • Work With Me!
      • Blog & Small Business Consulting
    • Disclosures
  • Popular Posts
  • Adoption & Special Needs
  • Saving Money
  • Recipes
    • Breads
    • Breakfasts
    • Sides
    • Soups
    • Entrées
    • Desserts
  • For the Home
    • For the Home
    • Beauty
    • Crafts
      • For Kids
  • My Books

How to Make Puppets for Kids from An Old Sweater

July 28, 2010 By: Stephanie15 Comments

If you're new here, you may want to subscribe to my Email Newsletter. Thanks for visiting!

Welcome back! Be sure to check out my Email Newsletter. Thanks for visiting!

How to make puppets for kids out of the sleeves from your old sweaters.

Meet sweater puppets. They’re like a chic, stylish cousin to the sock puppet and pretty much just as easy. Plus, once again, I got a no-spend Christmas present for the kids out of this project. I am tempted to go all out and do a completely no-spend Christmas, but that would mean putting some of the things I am most excited to try (felt steamed crabs!) on the back burner….we shall see.

Anyway, I got this idea from this tutorial and I just had to try it since I already had the stuff to make it around my house.

Once you start making these you will be addicted! Each one only took about 20 minutes.

How to Make Puppets for Kids from an Old Sweater: 

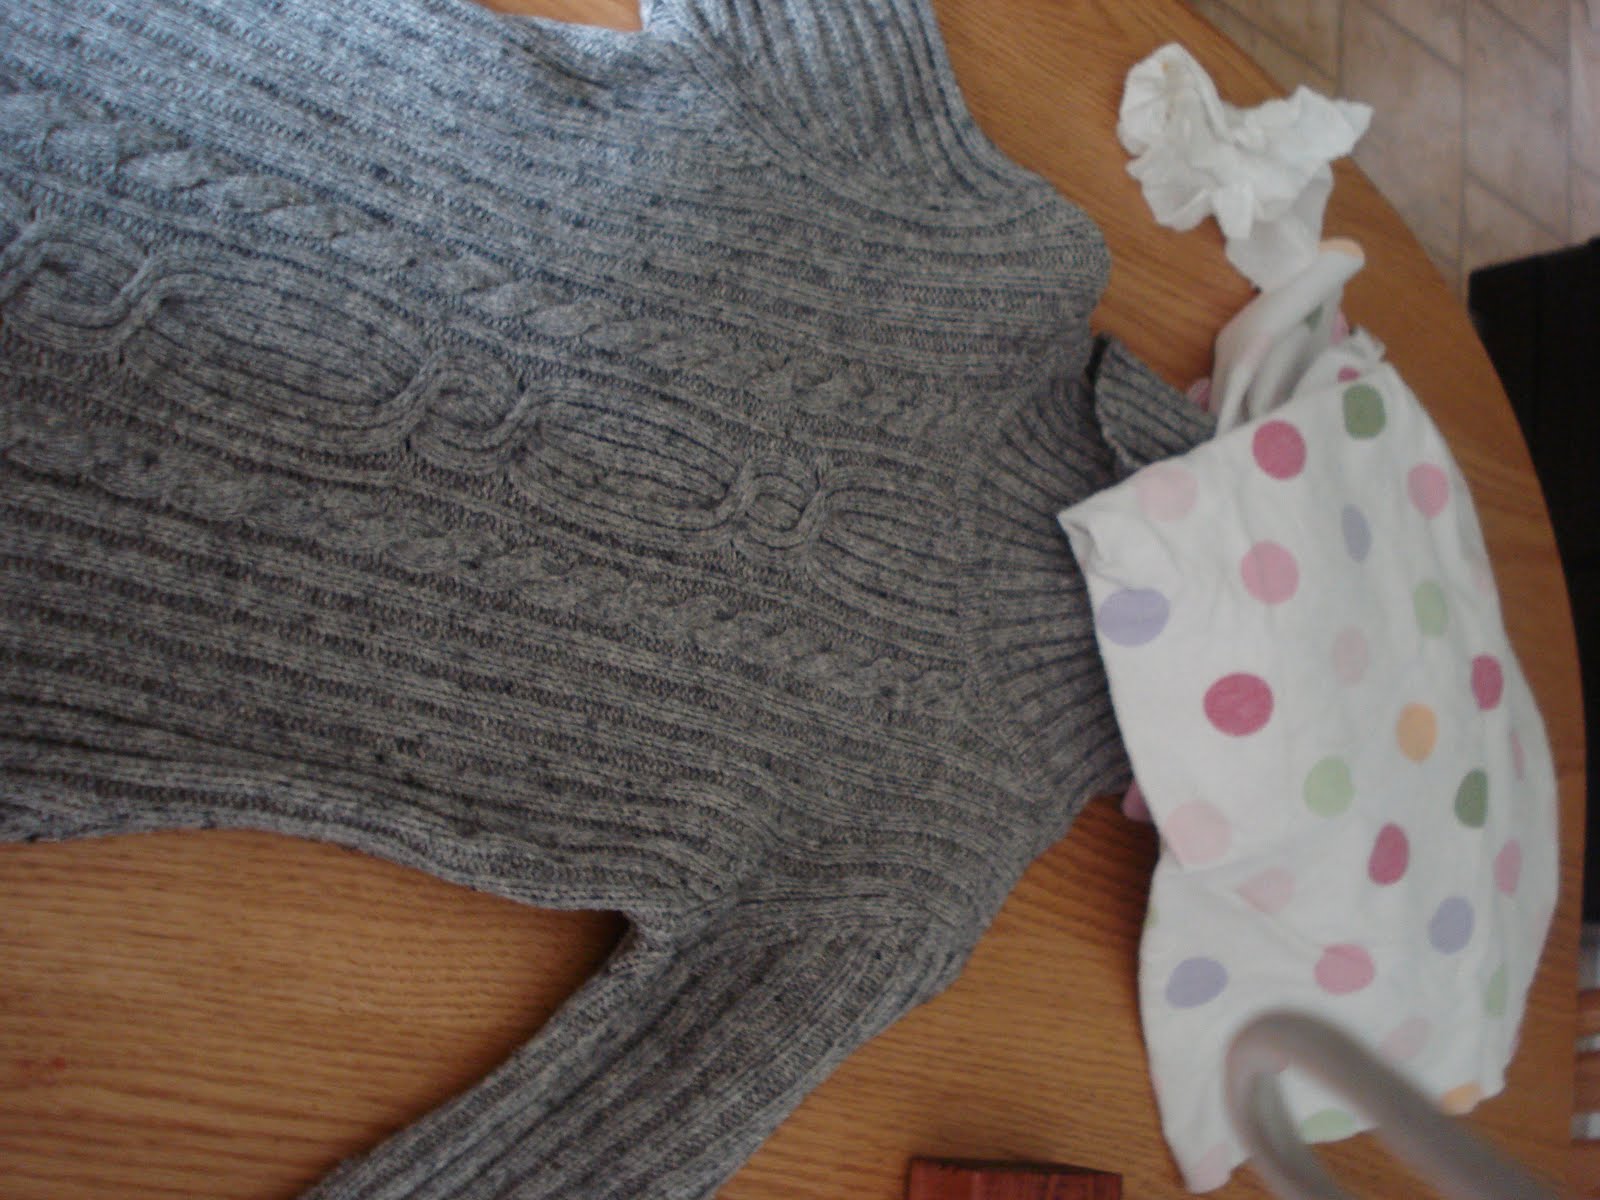
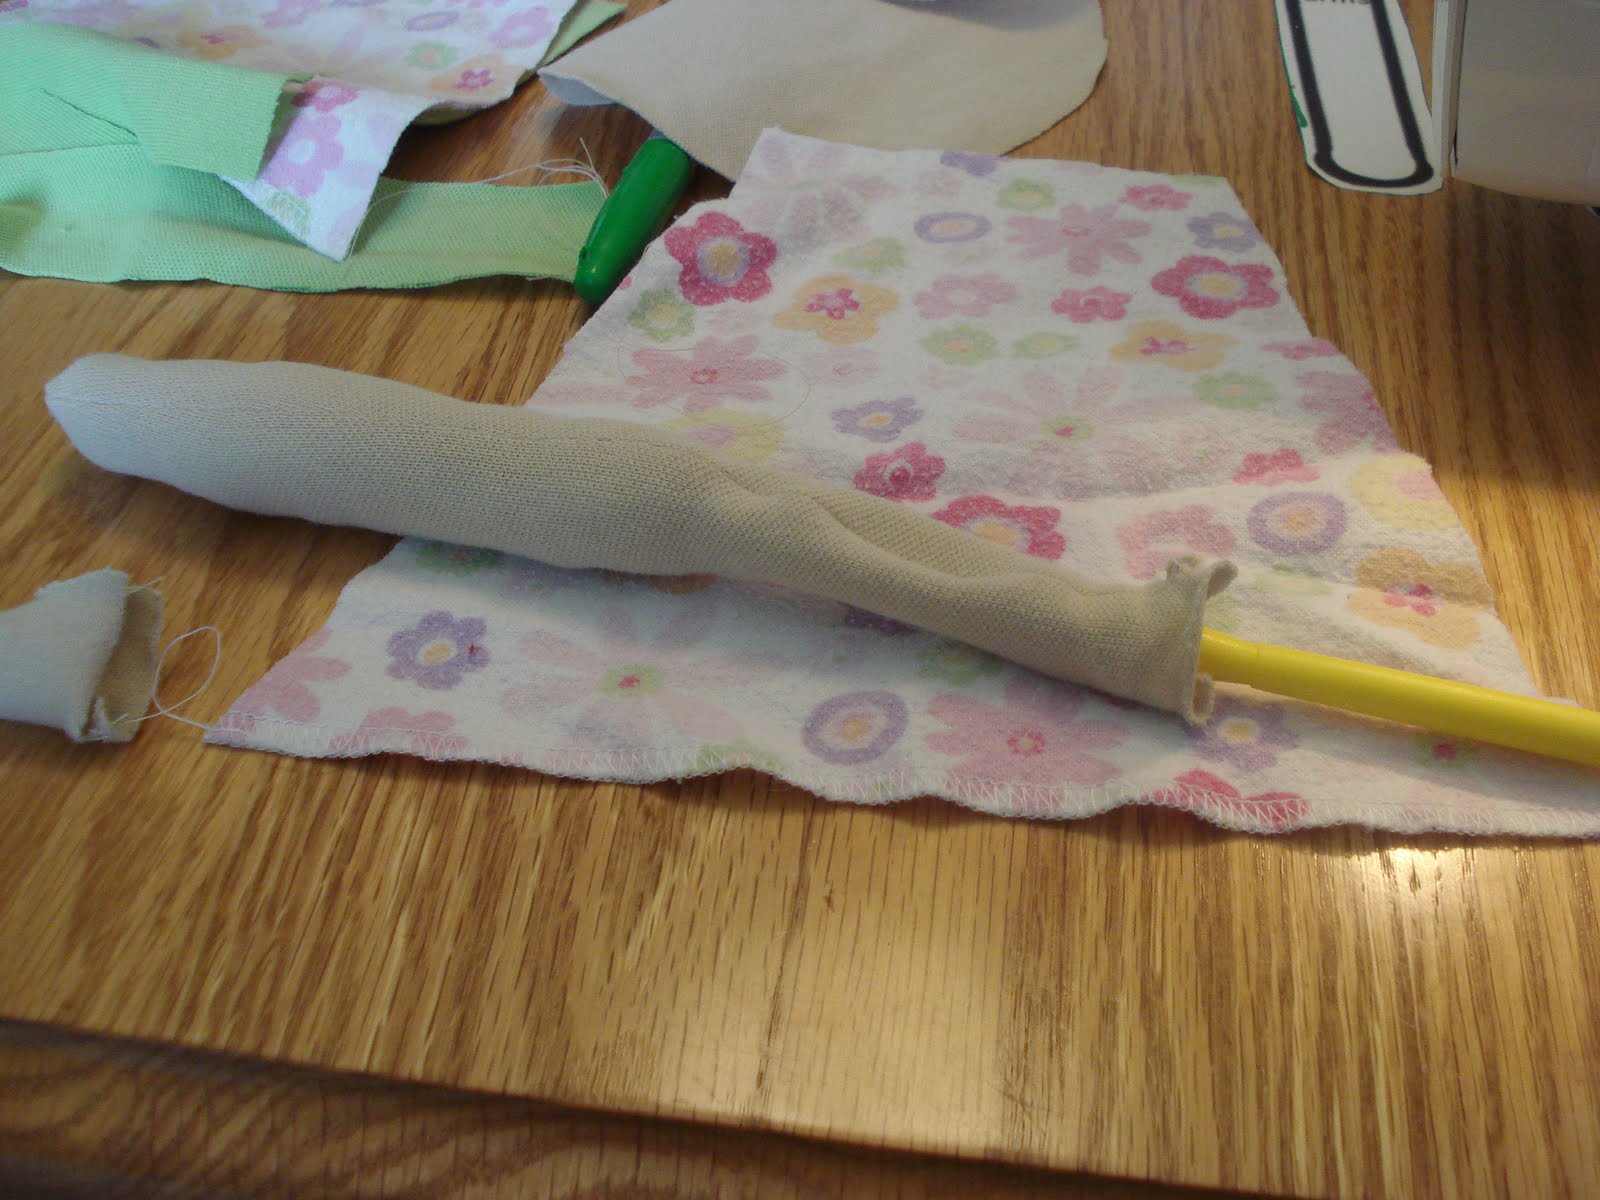
I started with an old sweater dress that had a hole in it and one of Abby’s baby blankets (ok, it’s actually a spit-up rag) My sweater was more than 60% cotton, so I skipped the felting step and just left it as-is. (Only 100% wool will felt)

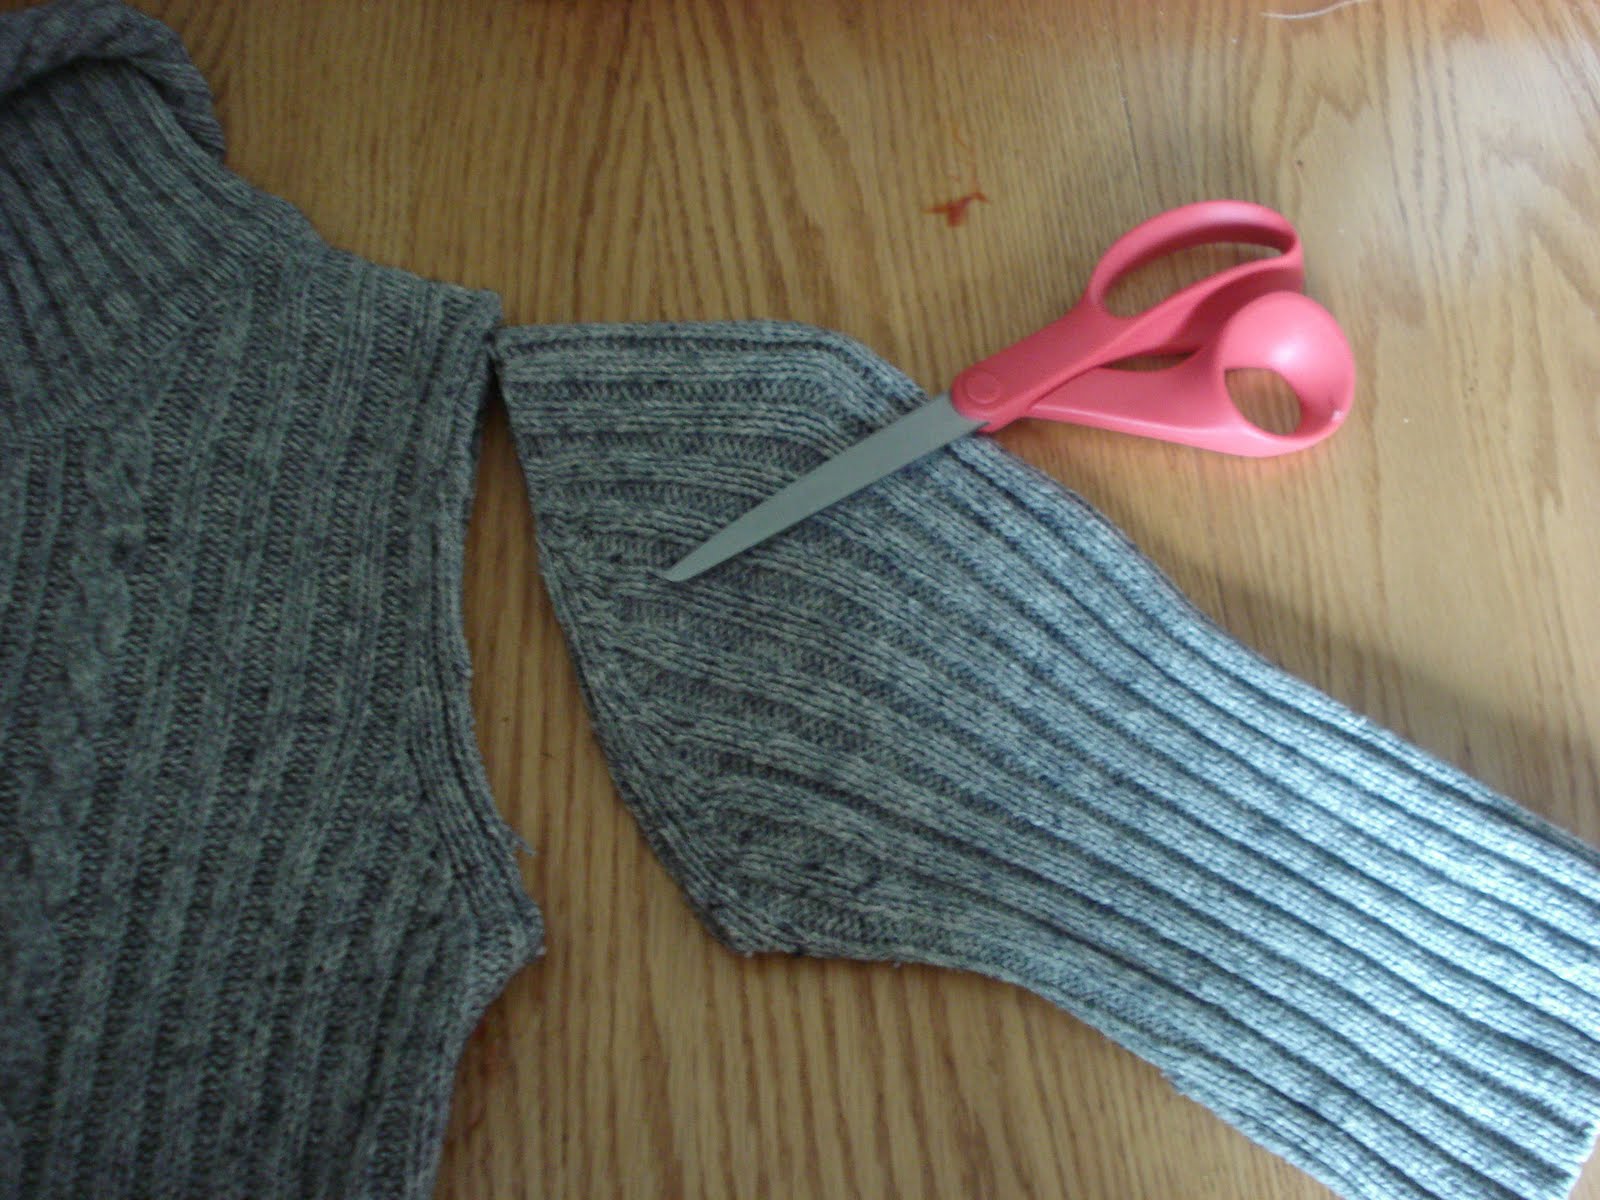
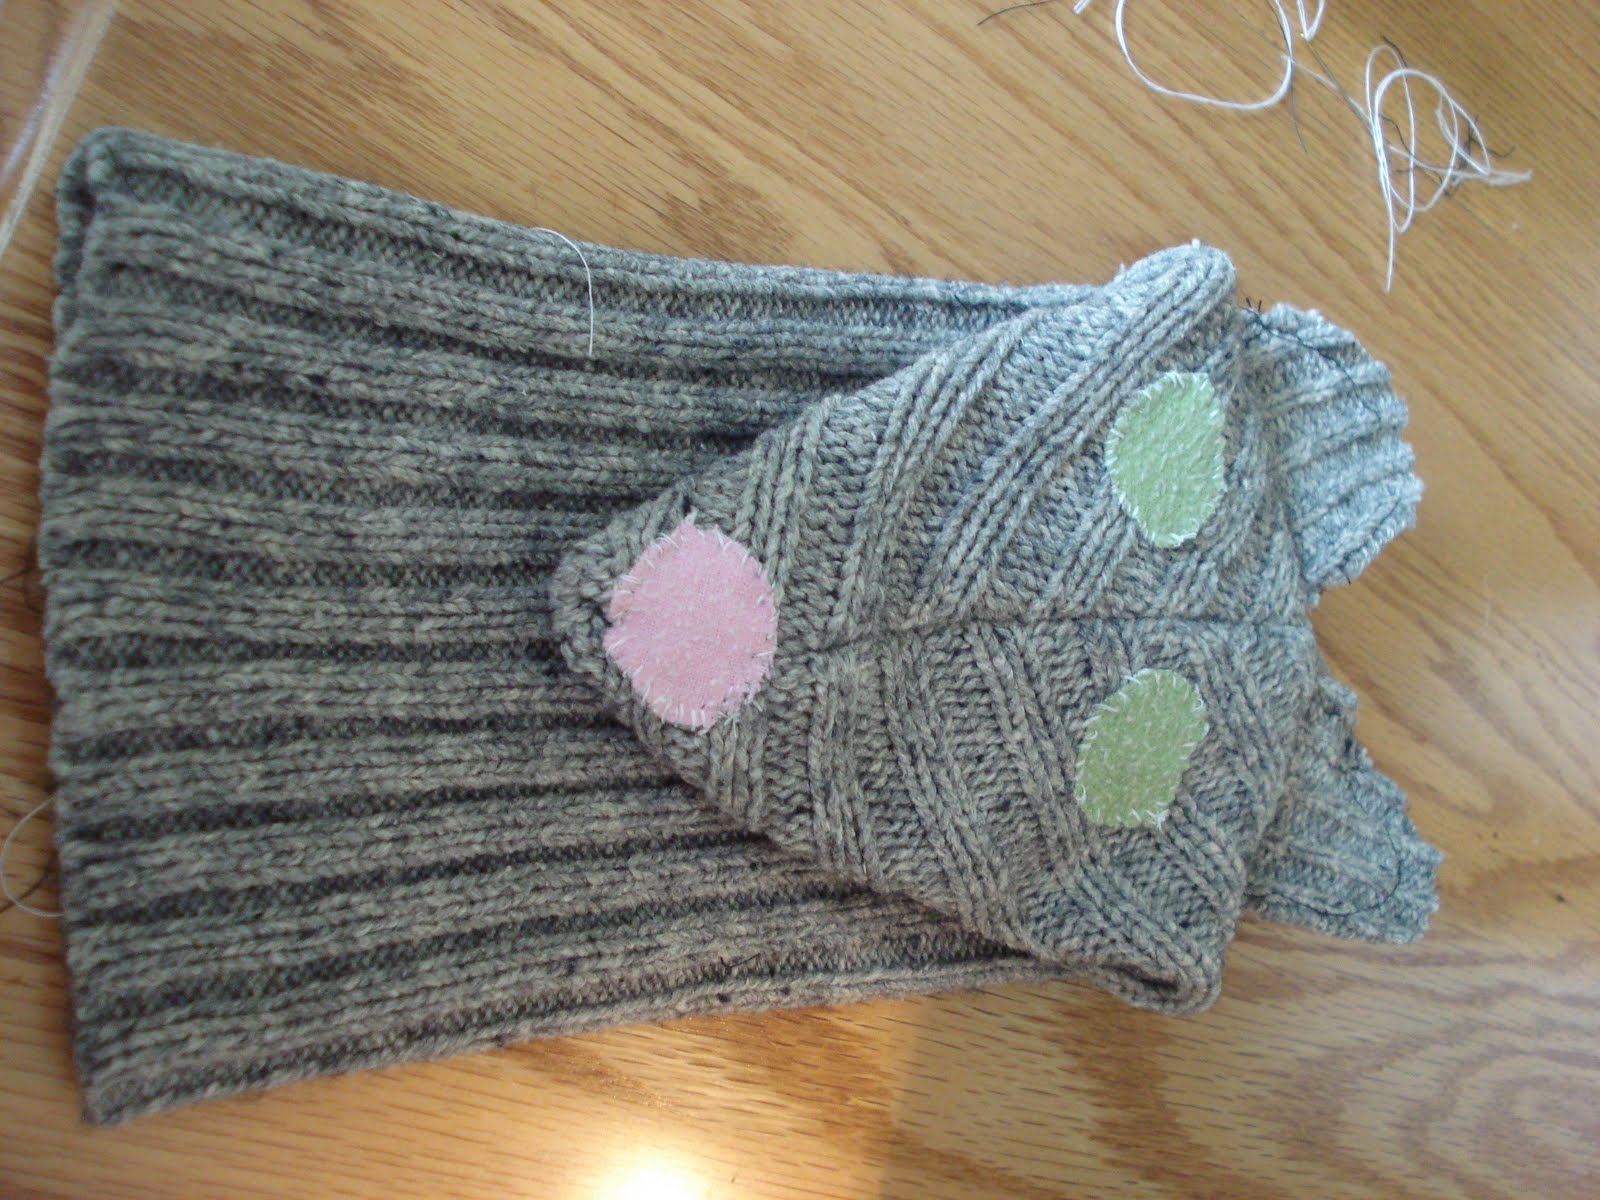
Cut off the sleeves (You only need one sleeve for each puppet)

Turn it inside out, straight stitch over the hole you just made by cutting the sleeve off, and leave the other end open. Turn it back right side out.

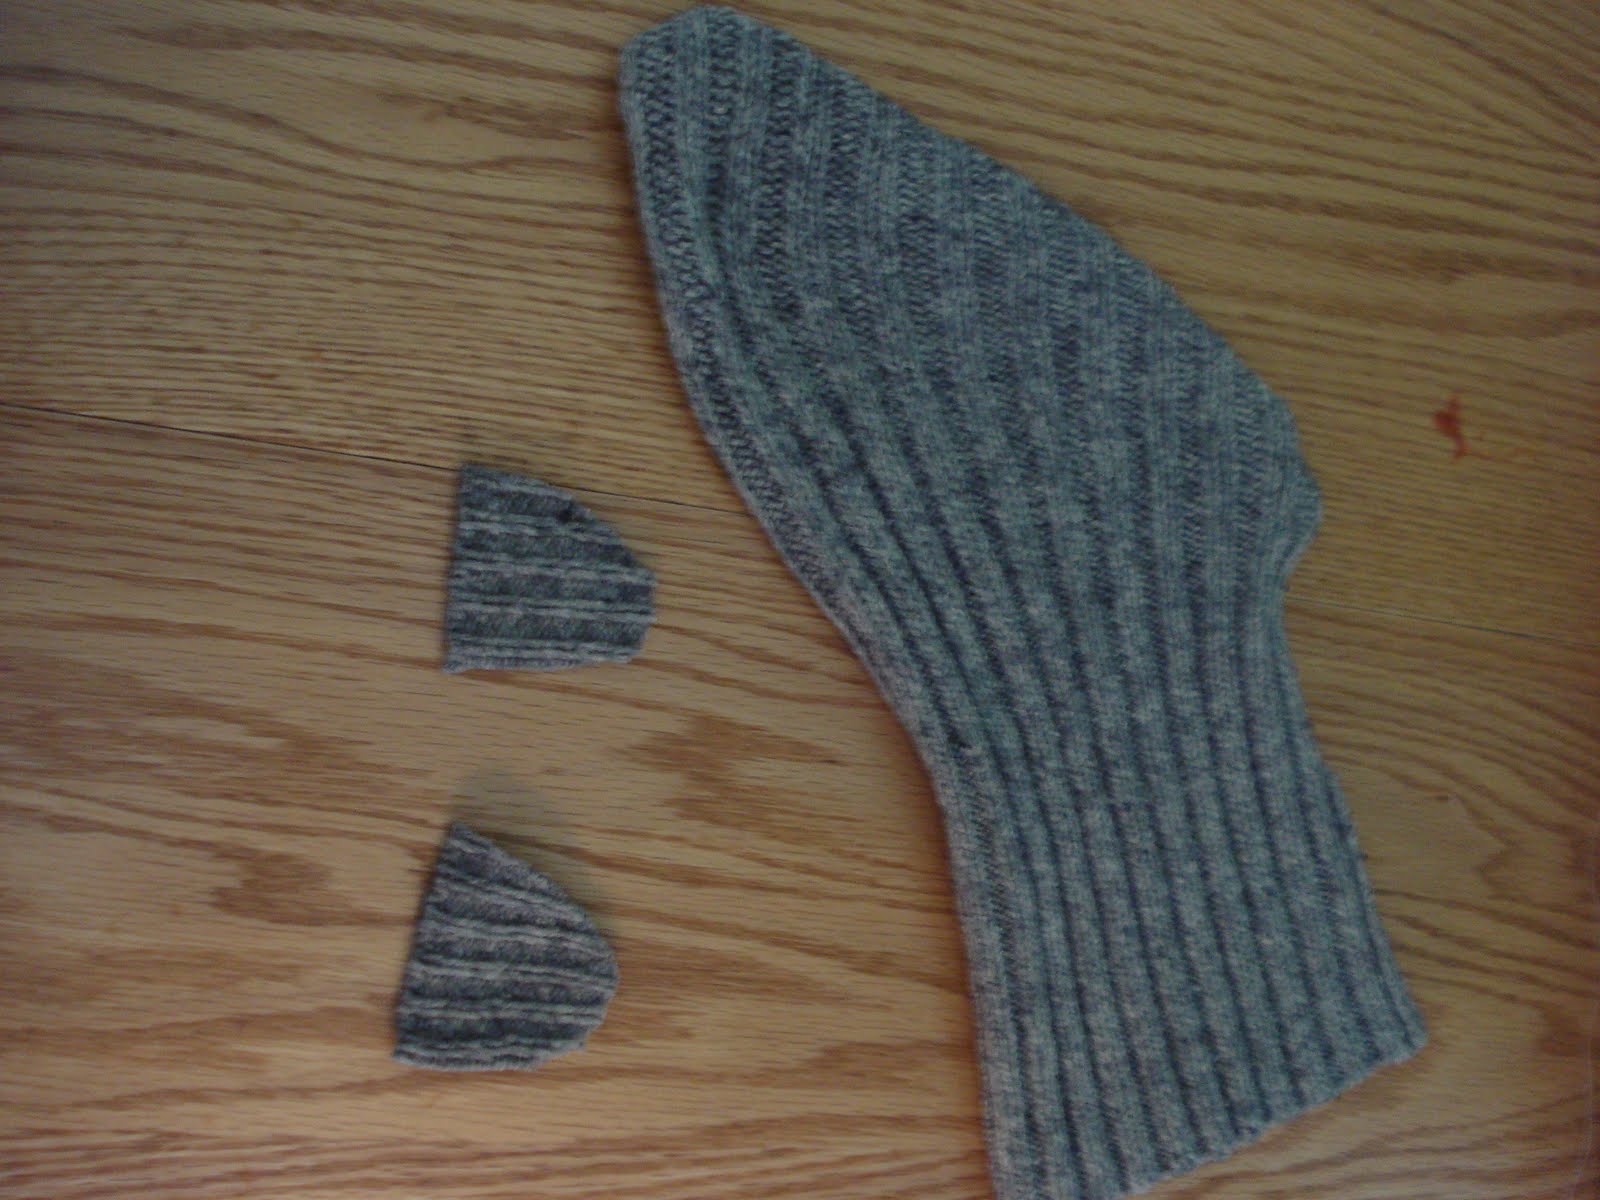
Cut two little round pieces from another part of the sweater. These will be the ears. The only difference between my puppet and the tutorial is that because I didn’t felt the sweater I had to stitch around the edge of the ears so they wouldn’t unravel.

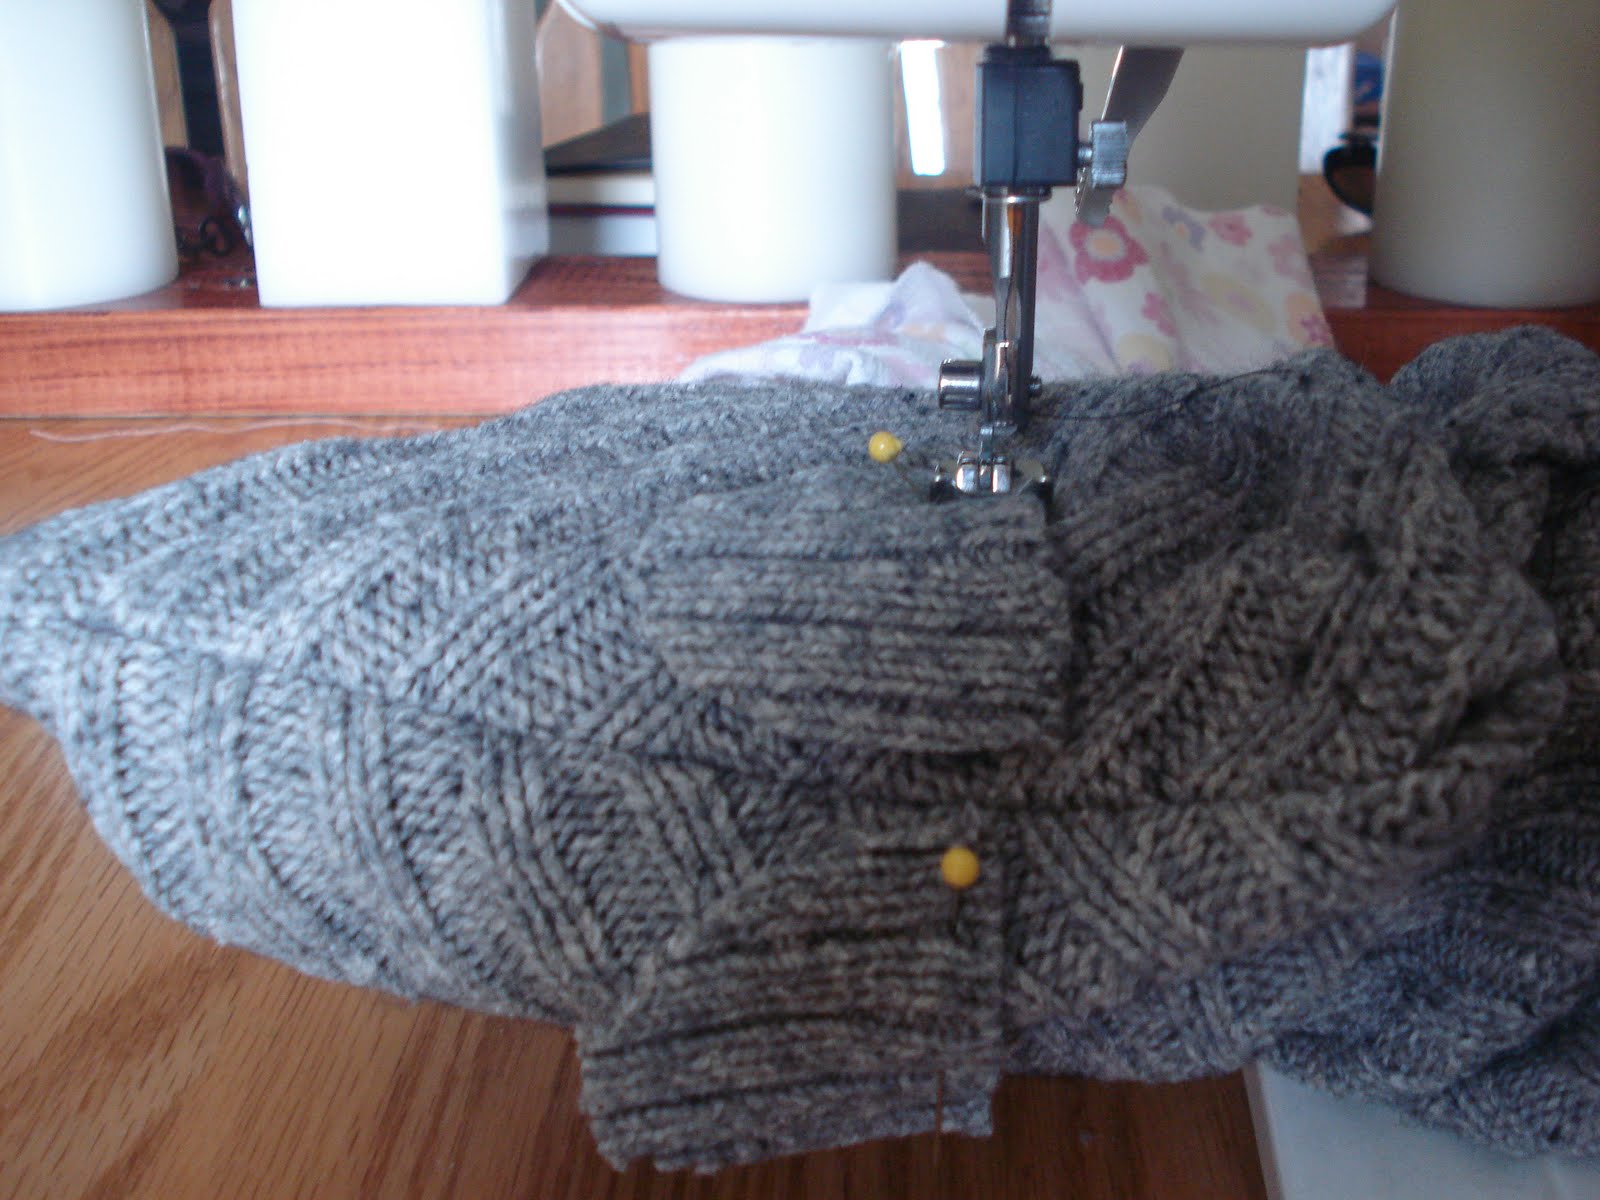
Sew the ears to the top of the head. Make sure to use a matching thread because this seam is visible.

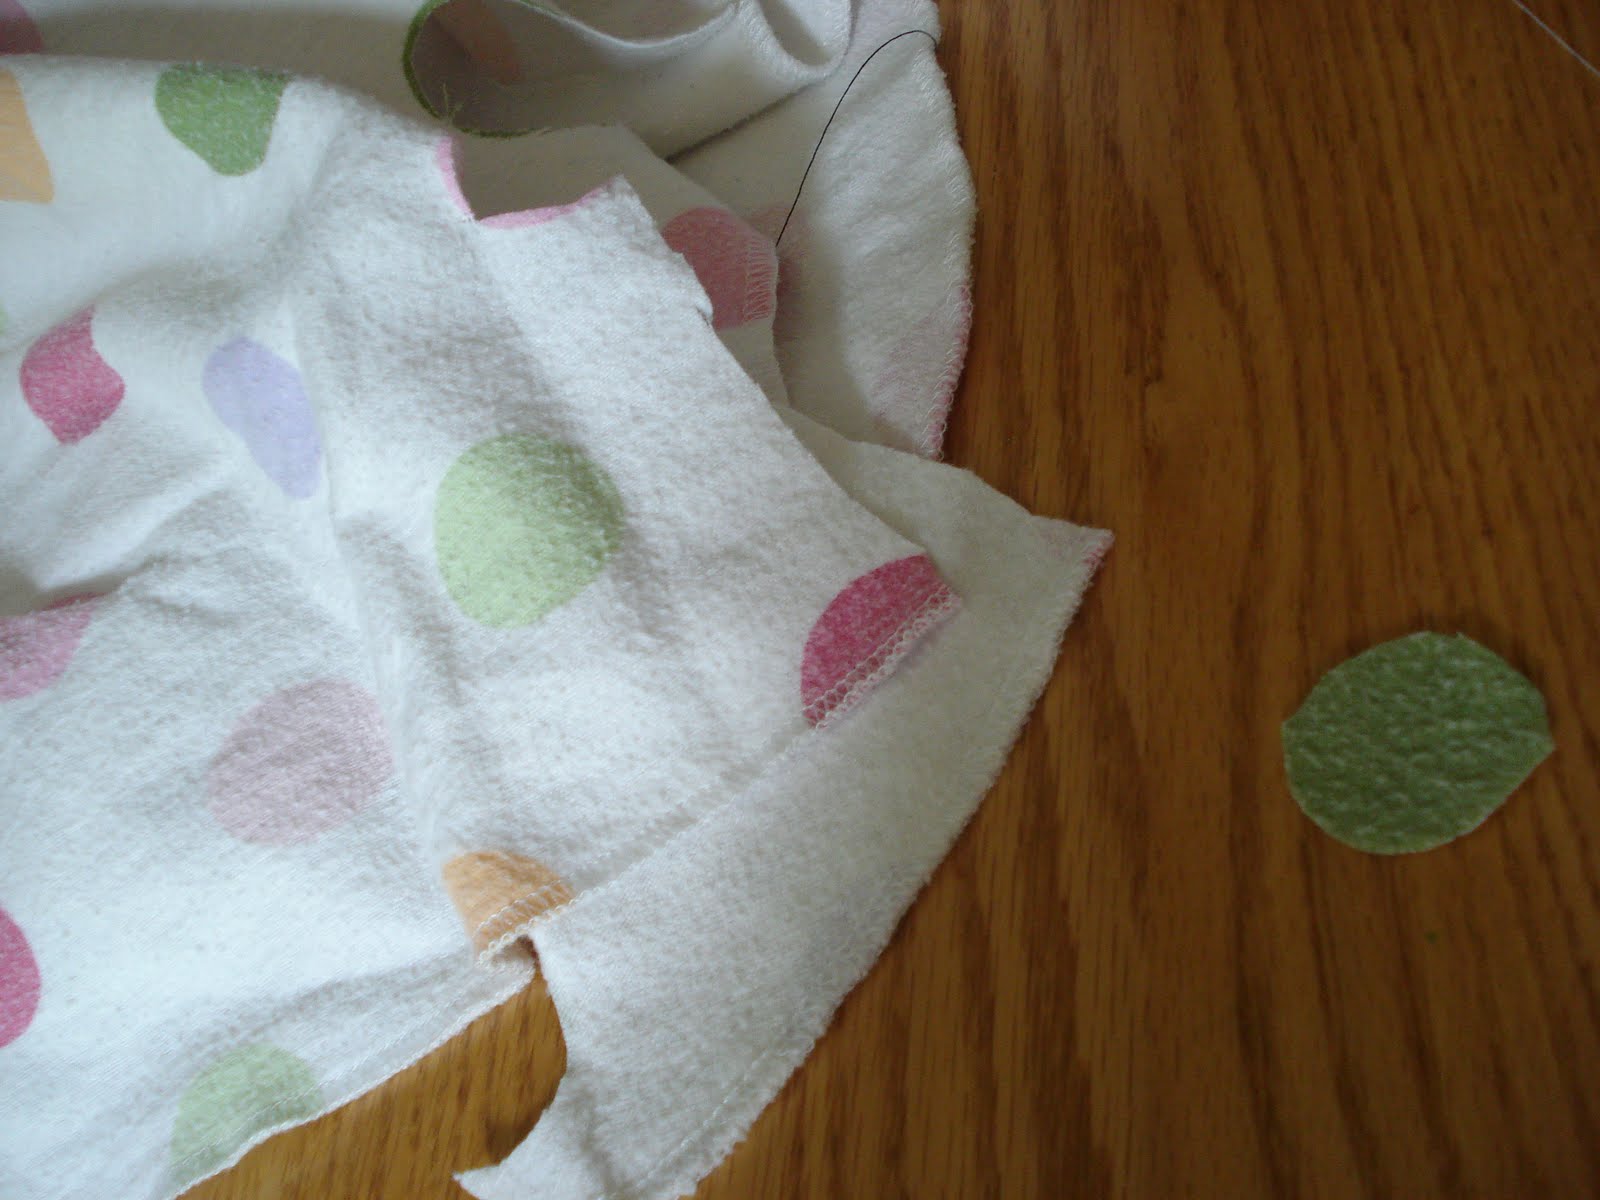
Finally, cut some circles out of contrasting fabric. This is where the baby blanket came in. I cut out the polka dots. You will need one circle for the nose and two for the eyes.

Hand stitch the circles in place. After this step, I also took a Sharpie and added pupils. It was so cute and easy I had to make two!

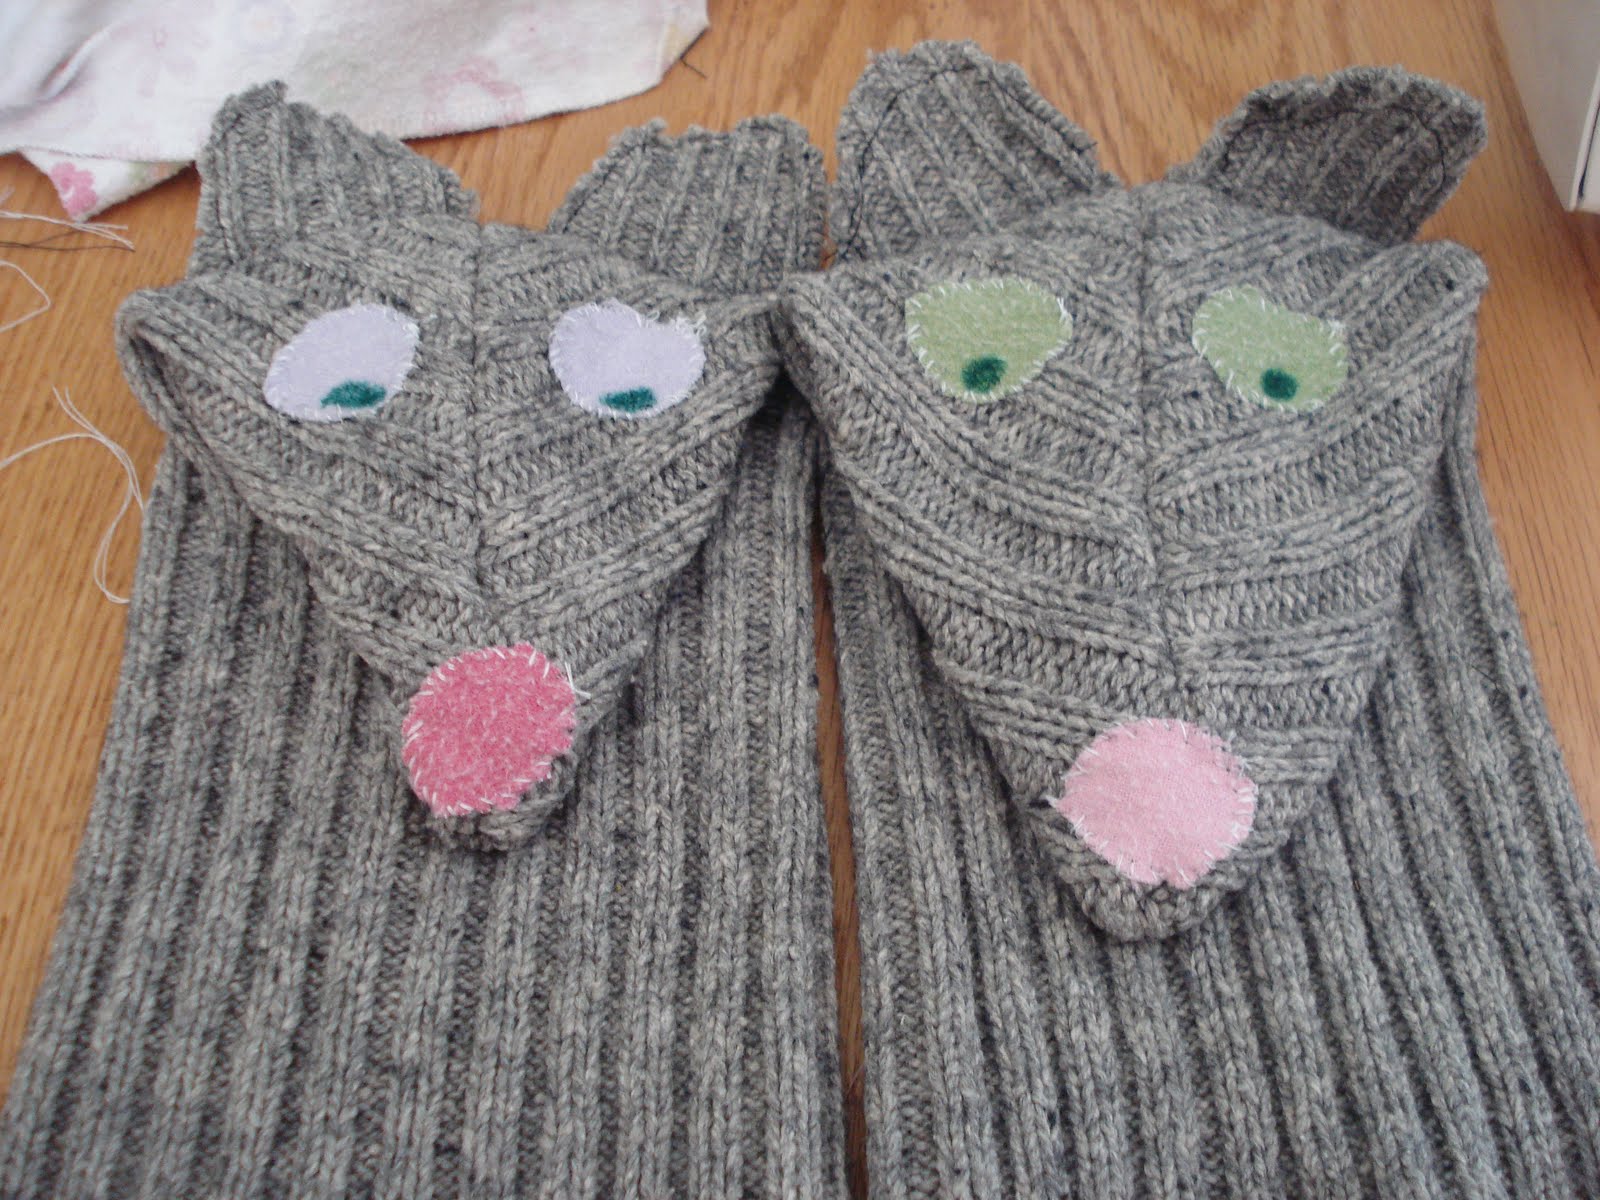
They started out intended to be mice, but I think they look more like wolves. I think I might just need to get my hands on some pink sweaters and make each big bad wolf a set of three little pigs to go with it.

They’ve even made the November TOP 10 in Iron Crafter! Click here to vote for them:

And, as always, I like to see how much money I saved by making them myself out of stuff I already had.

Rosie Hippo charges $49 for their set of 3, and Land of Nod charges almost $22 each for theirs. I think I’ll keep my free ones, thanks.

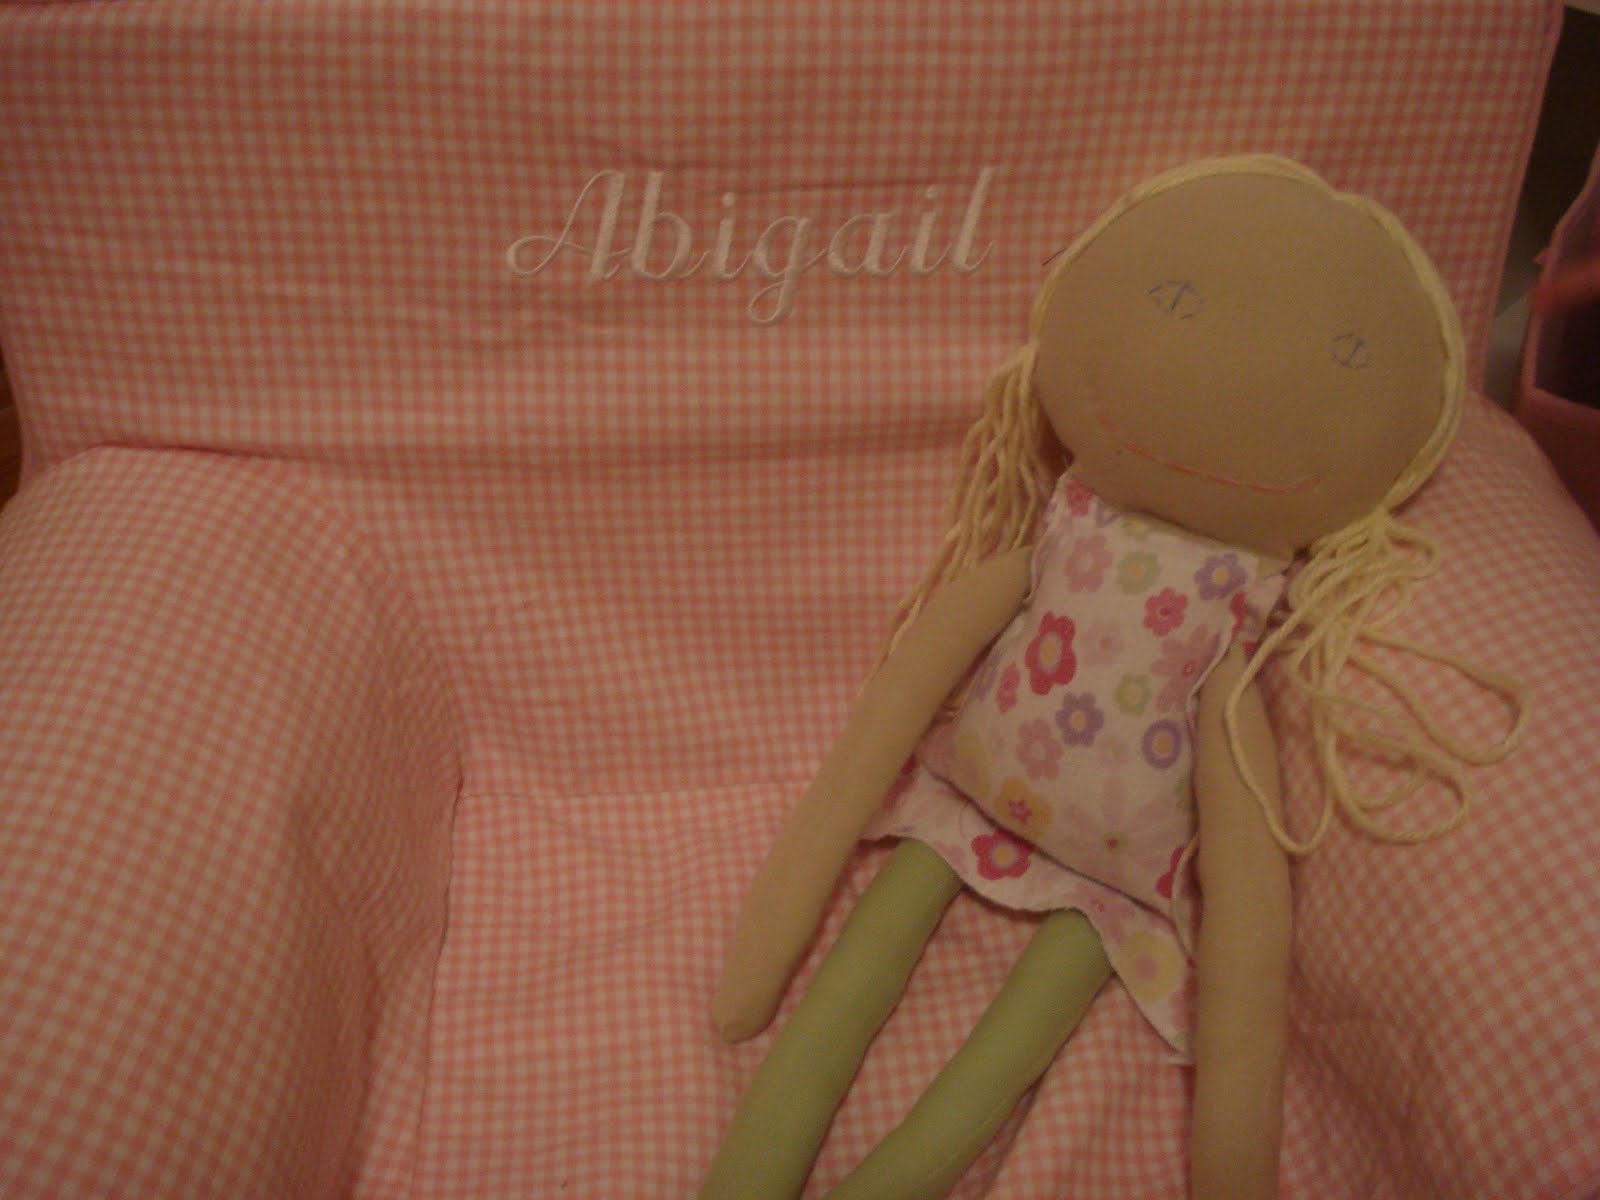
That means thus far I have saved $78 in two days since I didn’t pay $34 for a Pottery Barn rag doll or $44 for two Land of Nod puppets. Not too shabby.


Share this:

  • Click to share on Facebook (Opens in new window)
  • Click to share on Pinterest (Opens in new window)
  • Click to share on Twitter (Opens in new window)
  • More
  • Click to share on Pocket (Opens in new window)
  • Click to share on Tumblr (Opens in new window)
  • Click to share on Reddit (Opens in new window)
  • Click to share on LinkedIn (Opens in new window)
  • Click to print (Opens in new window)

Rag Doll

July 27, 2010 By: Stephanie10 Comments

Ok, so maybe it doesn’t look a thing like these from Pottery Barn Kids, but I think this rag doll is my most favorite thing of all the crafts I’ve done to date.

How to Make a Rag Doll


I set out to make a rag doll out of stuff that we had around the house since that is the history behind this type of doll, hence the name “rag doll.” I love, love, love how she wound up telling a story about me and my daughter.

I started out with two shirts I don’t wear anymore. The beige one is from my days as a classroom teacher and doesn’t fit anymore since giving birth left me much more well-endowed in certain areas. (Did anybody else’s shirts suddenly get shorter after having a baby?) The green one is one of the uniform shirts that the toy library staff would wear. I also grabbed one of Abby’s baby blankets. I already thought it was awesome that this project was going to be made out of her mother’s clothes and her blanket.

There’s just something so very Little House on the Prairie about making a doll out of old clothes. I wish, as an adult, that I had a toy with that kind of family history behind it that I could pass onto my kids.

I traced this pattern onto the fabric and got to work. Basically, just follow the directions, it’s not that hard.

Stuff all the pieces with polyfill. Use a crochet hook (or the yellow drum stick from the Little Einsteins music kit) to get inside the long skinny pieces.

Sew all the pieces together (just follow the directions from the pattern) and add yarn for hair. I was so excited when the idea for the face hit me that I almost shrieked loud enough to wake up my two napping children. I made it reversible! (I might be too excited about this.) I embroidered a different face on each side.

She can be asleep

Or awake

I am the first to admit that my embroidery skills leave much to be desired, but I still think she’s pretty awesome. I was also stoked that I had yellow yarn because that meant I was able to give her blond hair and blue eyes, just like Abby’s.

So there you go, the first made-by-mommy Christmas present of the year for a grand total of $0.

Share this:

  • Click to share on Facebook (Opens in new window)
  • Click to share on Pinterest (Opens in new window)
  • Click to share on Twitter (Opens in new window)
  • More
  • Click to share on Pocket (Opens in new window)
  • Click to share on Tumblr (Opens in new window)
  • Click to share on Reddit (Opens in new window)
  • Click to share on LinkedIn (Opens in new window)
  • Click to print (Opens in new window)

Money Diet Christmas

July 27, 2010 By: Stephanie1 Comment

Ok, we are in serious need of a money diet around here. We’ve already cut all unnecessary spending (that would be anything bedsides food, bills, and gas for the cars) for the next month, like Michele. You might have noticed that my last three projects were all no-spend.

It’s also July. That means it’s time to start thinking about Christmas. Hallmark is doing their ornament release, there are tons of Christmas in July sales, etc. Normally I would be buying toys on clearance and stocking them away. Not this year. Nope. This year, like my new friend over at 12 Crafts Til Christmas I will be making my children’s Christmas presents. Yep. It’s time to go Amish. It’s a throw-back to the Great Depression. Ok, it’s not really all that serious. Actually, I think it will be cool for them to grow up remembering toys that their mom hand-made especially for them. Luckily, it is not 1933, it’s 2010 and I have the internet to help me. So here is my list:

For Nicholas:

  1. A wooden boat like this one that my dear friend Satoko made for her oldest son.
  2. A fabric garage for his matchbox cars.

For Abby:

  1. A fabric house of her own, but this one will be more of a dollhouse like this. *UPDATE: I checked this project off my list and I didn’t have to shell out the $49 for the Pottery Barn version. Check out the fabric dollhouse HERE. 
  2. A rag doll inspired by one I recently saw in a Pottery Barn catalog. *UPDATE: I did it! And it’s one of my favorite DIY crafts to date and I spent exactly $0 making this adorable double-sided doll.
How to Make a Rag Doll
 
 
For them to share:


  1. A few felted sweater puppets. UPDATE: Another one checked off my list! I love how these puppets turned out and my kids are going to love them, too!How to make puppets for kids out of the sleeves from your old sweaters.
  2. Maybe some felt food but I think I am actually going to try to figure out how to make a felt version of some steamed crabs and put them in a wooden basket with some mallets. In my head, this is going to be awesome. If it works, I’ll post a tutorial.
  3. Possibly a beanbag toss.
  4. One of the few ideas I came up with all by myself (although it is by no means original): hand paint a piece of wood to create a special personalized board game. (literally. board game.) *UPDATE: Check out the finished project HERE! My kids are going to love these double-sided dominoes.How to make double-sided dominoes out of just one board from the home improvement store. Love that these can be adjusted and used by kids of multiple age groups!
  5. A crayon roll and my last quasi-original idea: A coloring book of family pictures. I’ll use Picnik.com to print out family photos like this one of Nick and bind them together with yarn.

To get this effect, just go to Picnik, upload your photo, click the “Create” button at the top, and scroll down to the pencil sketch option. Save and print a bunch of photos and ta-da! You’ve made a child a coloring book full of pictures of him/herself. For FREE! (I think this is also my new idea for birthday presents for other people’s kids. Steal pictures off their Facebook page and make a free personalized coloring book. Yes, I am a genius and you can thank me later when you realize that Johnny’s 6th birthday party is in an hour and you forgot to get a gift.)

I think that would be plenty of stuff under the tree and would also give me a great sense of accomplishment because I’d be giving my kids awesome stuff with which to build memories and saving lots of money at the same time. Plus, I always love a good knock-off.

Pottery Barn sells these rag dolls for $34 apiece. They also sell a puffy dollhouse for $49. I guarantee I can make my stuff almost as cute and way cheaper. At least, in my mind, that’s how it’s going to happen. Wish me luck!

If you’re all about affordable gifts, I’ve got a whole post with five ideas for affordable or FREE gifts that are great for all ages and occassions.

5 Gifts to Give When You Are Broke. Some really creative gift ideas here!

Share this:

  • Click to share on Facebook (Opens in new window)
  • Click to share on Pinterest (Opens in new window)
  • Click to share on Twitter (Opens in new window)
  • More
  • Click to share on Pocket (Opens in new window)
  • Click to share on Tumblr (Opens in new window)
  • Click to share on Reddit (Opens in new window)
  • Click to share on LinkedIn (Opens in new window)
  • Click to print (Opens in new window)
  • « Previous Page
  • 1
  • …
  • 252
  • 253
  • 254
  • 255
  • 256
  • …
  • 268
  • Next Page »
  • Facebook
  • Instagram
  • Pinterest
  • RSS
  • Twitter

Welcome! I’m Steph.

This is a little corner of the internet we like to fill with honesty, heart, and humor. Read More…

Cover for Binkies and Briefcases with Stephanie Giese
19,380
Binkies and Briefcases with Stephanie Giese

Binkies and Briefcases with Stephanie Giese

Stephanie Giese is an indie author based in Florida. She writes stories about realistic problems with humor, heart, and sass. Her work has a strong focus on mental health and consent. Her North Bay small-town romance series is set for release in 2025.

Binkies and Briefcases with Stephanie Giese

5 months ago

Binkies and Briefcases with Stephanie Giese
This one's on me, Bookworms! Grab your FREE book ... See MoreSee Less

Hello My Radiant RomCom Readers,

wix.to

I have fun news! For a limited time, as a special gift from me to you, the eBook version of Out of Left Field is totally FREE this week to download from Amazon. That's right, you don't even have to be...
View on Facebook
· Share

Share on Facebook Share on Twitter Share on Linked In Share by Email

Binkies and Briefcases with Stephanie Giese

6 months ago

Binkies and Briefcases with Stephanie Giese
Hello My Brilliant Bookworms ... See MoreSee Less

Hello My Brilliant Bookworms,

wix.to

I'm checking in from the pits of work-still-in-progress despair. (Book 3 is actually going pretty well, but I'm feeling dramatic today.) Way Off Base, Book 3 in my North Bay series, is set to go to th...
View on Facebook
· Share

Share on Facebook Share on Twitter Share on Linked In Share by Email

Reader’s Choice

Image HTML map generator

Follow Me on Pinterest

featured-on

What You’re Saying

  • 28 Best Stone Fireplace Ideas And Designs - Perfect Decor Place on DIY Stone Fireplace with AirStone
  • Kevin Hicks on How to Budget for Building Your Own Home
  • Amy on DIY Stone Fireplace with AirStone
  • Gendered clothing - GenderEd on A Target Intervention on Behalf of My Daughters
  • Wellshop Store on Dressing Our Daughters: How Target Responded to My Last Blog Post

Latest Posts

ALL I Never Knowed: The Book Is Here!

It’s finally here, in my hands. It has been a loooong time in the making, but our book, All I Never Knowed: Mental Illness, a Mother’s Love, and a Broken System, is available now. The official launch date is next Tuesday, Oct. 5th. But starting now, you can order from all major retailers. Here’s where […]

Share this:

  • Click to share on Facebook (Opens in new window)
  • Click to share on Pinterest (Opens in new window)
  • Click to share on Twitter (Opens in new window)
  • More
  • Click to share on Pocket (Opens in new window)
  • Click to share on Tumblr (Opens in new window)
  • Click to share on Reddit (Opens in new window)
  • Click to share on LinkedIn (Opens in new window)
  • Click to print (Opens in new window)

Save Money with Fetch

Hey everyone! This is Chelsea, Steph’s asistant, back with the simplest app for getting cash back on things you’re already buying! We’ve covered Ibotta, Shopkick, Coupons.com, Swagbucks and we’re all saving hundreds of dollars by now, right? RIGHT!? I’m really hoping you guys have jumped on the rebate app savings train because it’s just so […]

Share this:

  • Click to share on Facebook (Opens in new window)
  • Click to share on Pinterest (Opens in new window)
  • Click to share on Twitter (Opens in new window)
  • More
  • Click to share on Pocket (Opens in new window)
  • Click to share on Tumblr (Opens in new window)
  • Click to share on Reddit (Opens in new window)
  • Click to share on LinkedIn (Opens in new window)
  • Click to print (Opens in new window)

Splendid Spoon Review

I was excited to receive a box of products to try from Splendid Spoon this summer! They invited me to try their line of plant-based, ready-to-eat foods and delivered them right to my door. Check one in the pro column for convenience. I did receive these products free of charge in order to rate them […]

Share this:

  • Click to share on Facebook (Opens in new window)
  • Click to share on Pinterest (Opens in new window)
  • Click to share on Twitter (Opens in new window)
  • More
  • Click to share on Pocket (Opens in new window)
  • Click to share on Tumblr (Opens in new window)
  • Click to share on Reddit (Opens in new window)
  • Click to share on LinkedIn (Opens in new window)
  • Click to print (Opens in new window)

My Networks

#BlogHer15: Experts Among Us Voices of the Year Honoree