My 3-year-old recently figured out how to open our pantry door, which led to a scary incident where I found him carrying a bottle of maple syrup around the living room and a bunch of plastic grocery store bags on the kitchen floor where my 1-year-old could get them. That could have been a disaster! Also, now that I am starting to work a few more hours there are other family members here with the kiddos more often and I wanted to make it easier for them to find what they needed for snacks & dinner time.
I search blogland for some ideas for getting the pantry organized, but most of them involved glass jars, baskets that couldn’t easily been seen into or sanitized, and other ideas that just didn’t seem all that practical for my everyday life with two toddlers, so I fell back on the way that I used to organize areas in my elementary school classroom.
And now our pantry looks like this (Sorry, I forgot to take a before picture, but it was a big ol’ mess)
I already had these plastic bins because I just about bought out Target when they had them on sale for $2 each.
I took inventory of what we had in the pantry, threw out anything that was expired, and divided everything into these groups:
- Paper & Plastic Ware
- Snacks
- Pasta & Sauces
- Drinks
- Cans & Jars
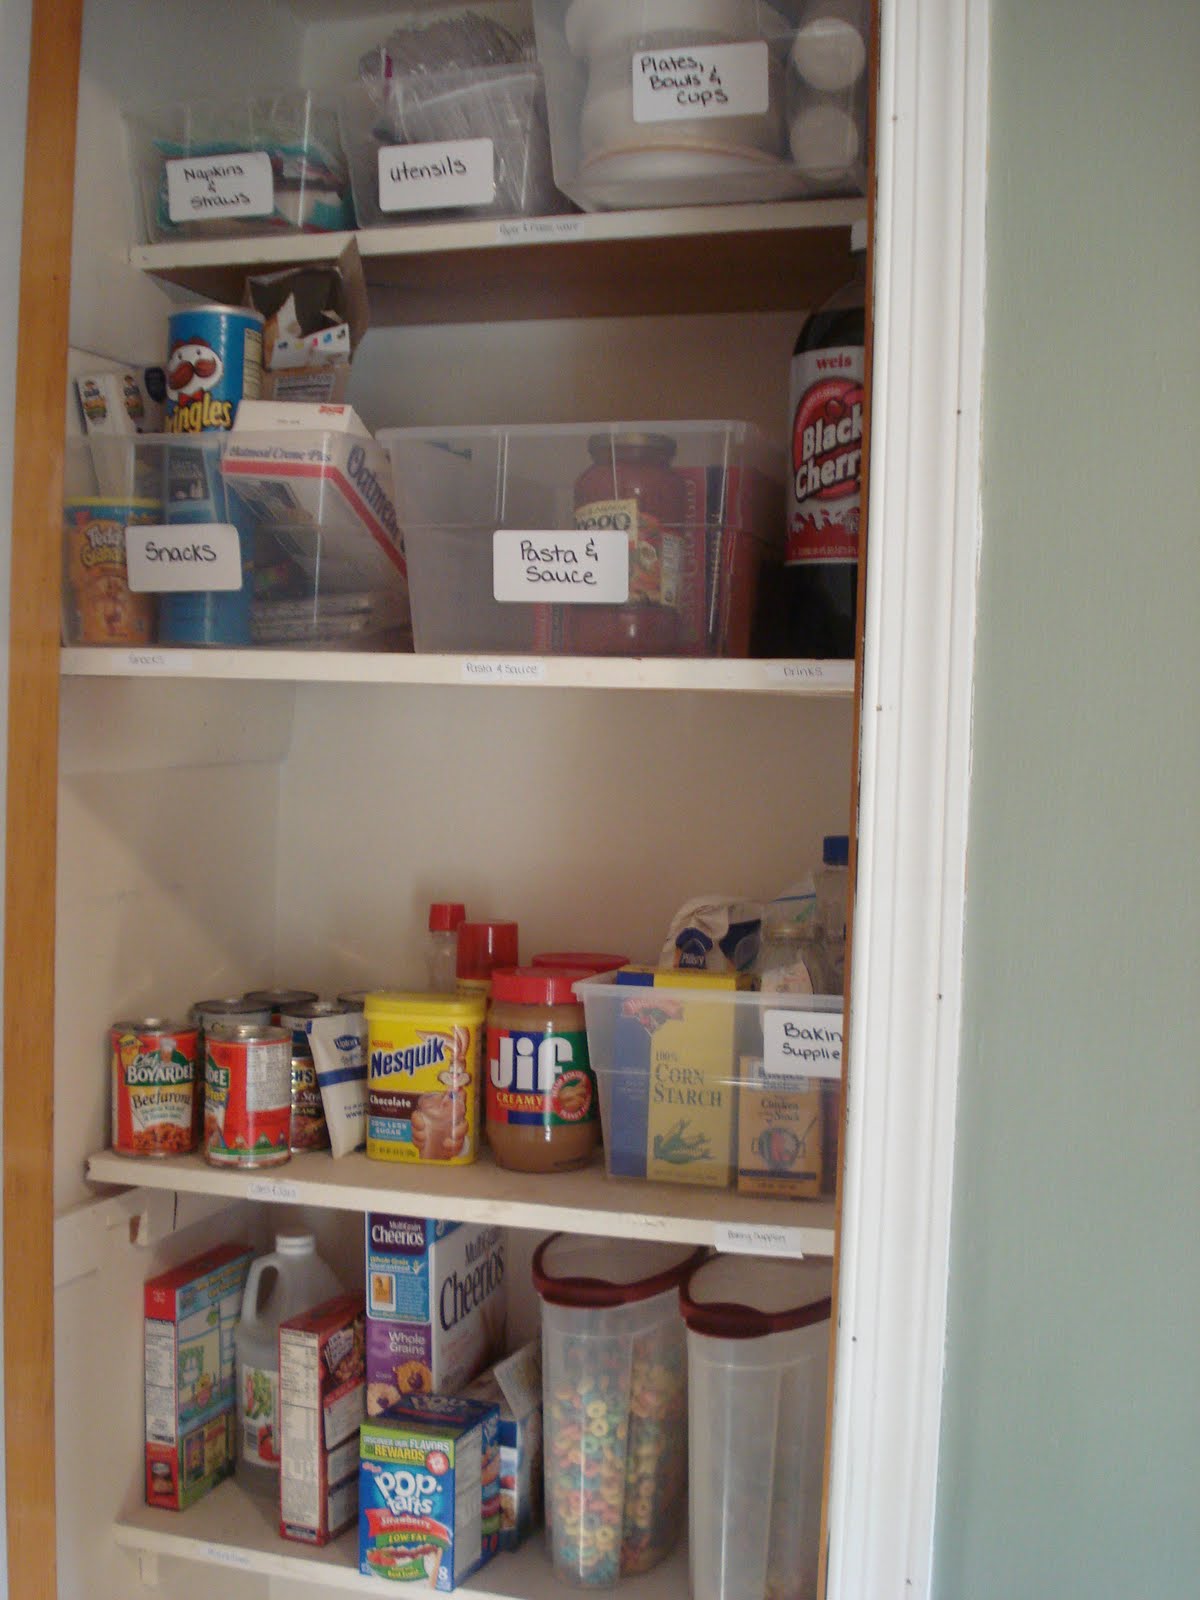
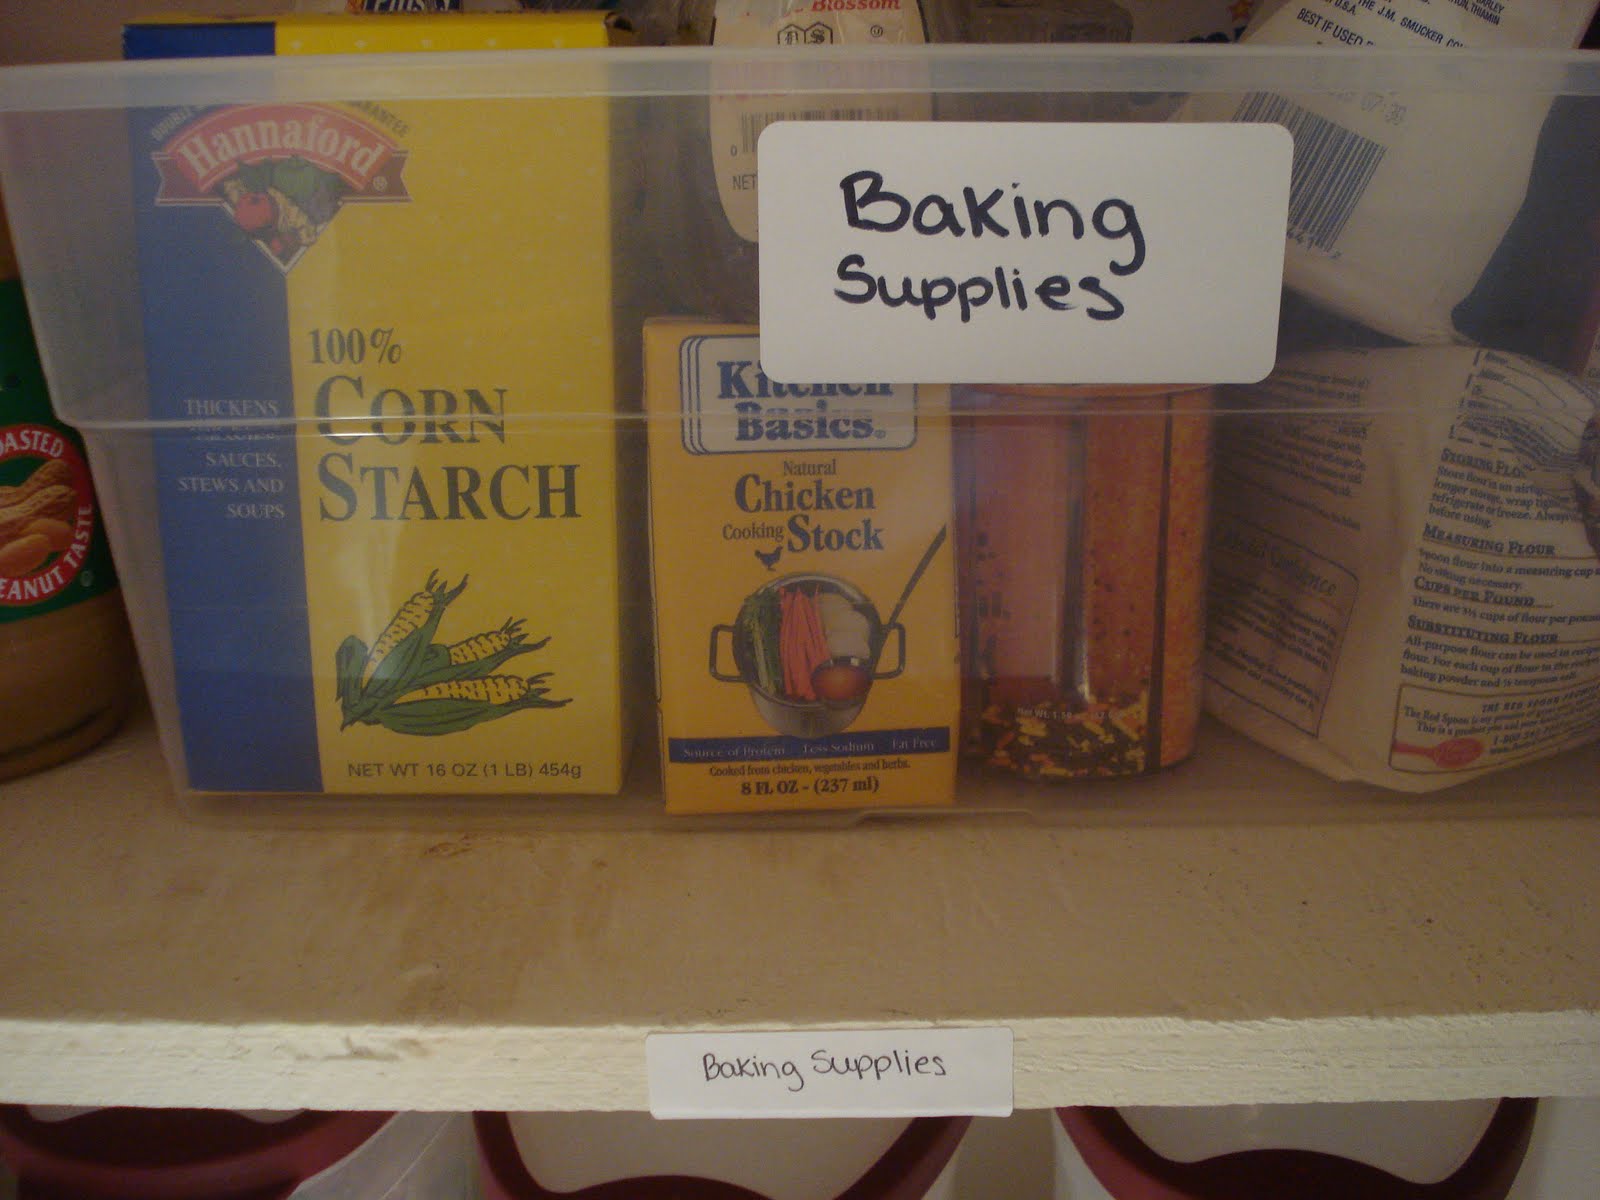
- Baking Supplies
- Breakfast Foods
- Miscellaneous
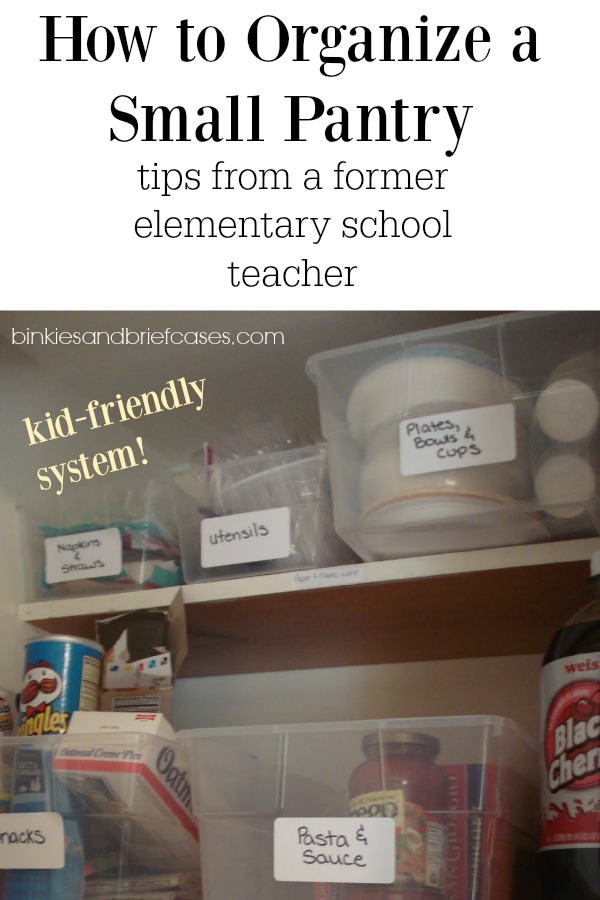
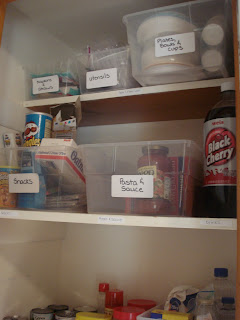
I put the paper & plastic ware on the top shelf because we don’t use it that often. I divided it into three separate bins: Napkins & Straws, Utensils (which I grouped into plastic bags according to type & the mount I would need for a small party), and Plates, Bowls, & Cups (which have a large bin)
I chose to put the snacks out of reach so that my little ones can’t reach in and grab a cookie whenever they want one, but for older children I would put it on the bottom shelf for easier access.
You could also add pictures to the bins to make it easier for kids to find what they need.
Boxes of pasta & jars of sauce have their own bin and next to that I left an open space for drink mixes or bottles of unopened soda or juice.
There is an area for cans & jars-syrup in the back!- and a large plastic bin for my baking supplies. I like the idea of the plastic bins to deter little critters (we sometimes have ant issues) from climbing into open packages of flour, etc.
The bottom shelf is for Breakfast foods so that my kids can see their choices in the morning and I left a space for miscellaneous items that didn’t seem to fit in my other categories or were too tall for the shelf where they would otherwise belong.
There are labels on the bins and also on the shelf itself to identify each section. My husband was thrilled that he could find what he wanted and even commented that it would be so much easier to put away groceries. I think it’s important to label both the bin and the shelf so that if someone takes a few bins out to make dinner then they can be sure to put them back in the correct spot.
I also have a plastic bag holder that I picked up at a little country store, but you can make one out of an old dish towel using this tutorial.

I plan to use chalkboard paint to create a chalkboard on the back of my pantry door (which is one of the cool ideas I found on blogland) but if you are renting or if you are more practical then you can just mount a clipboard on a nail inside the pantry with some paper for jotting down your store list. (That way you don’t have to re-write your list from the chalkboard.) Personally, I think the chalkboard will be a fun way to teach the kids how to write their letters and a cute and unexpected surprise for people who open the pantry.
Happy organizing!


What good tips! Our pantry could use a revamp, I might have to dive in and tackle it one day. I saw your kitchen remodel- it’s turning out great! So many great Craigslist finds! We sold some of our old kitchen stuff on CL for some extra remodel money, but didn’t have all the good finds you got.