Binkies and Briefcases

SUBSCRIBE

  • About
    • Work With Me!
      • Blog & Small Business Consulting
    • Disclosures
  • Popular Posts
  • Adoption & Special Needs
  • Saving Money
  • Recipes
    • Breads
    • Breakfasts
    • Sides
    • Soups
    • Entrées
    • Desserts
  • For the Home
    • For the Home
    • Beauty
    • Crafts
      • For Kids
  • My Books

When Hubby’s Away

August 16, 2010 By: Stephaniecomment

Eddie left this morning for his 3-month-long business trip. 🙁

In the mean time I’ll be trying to catch up on stuff I’ve been meaning to get done.

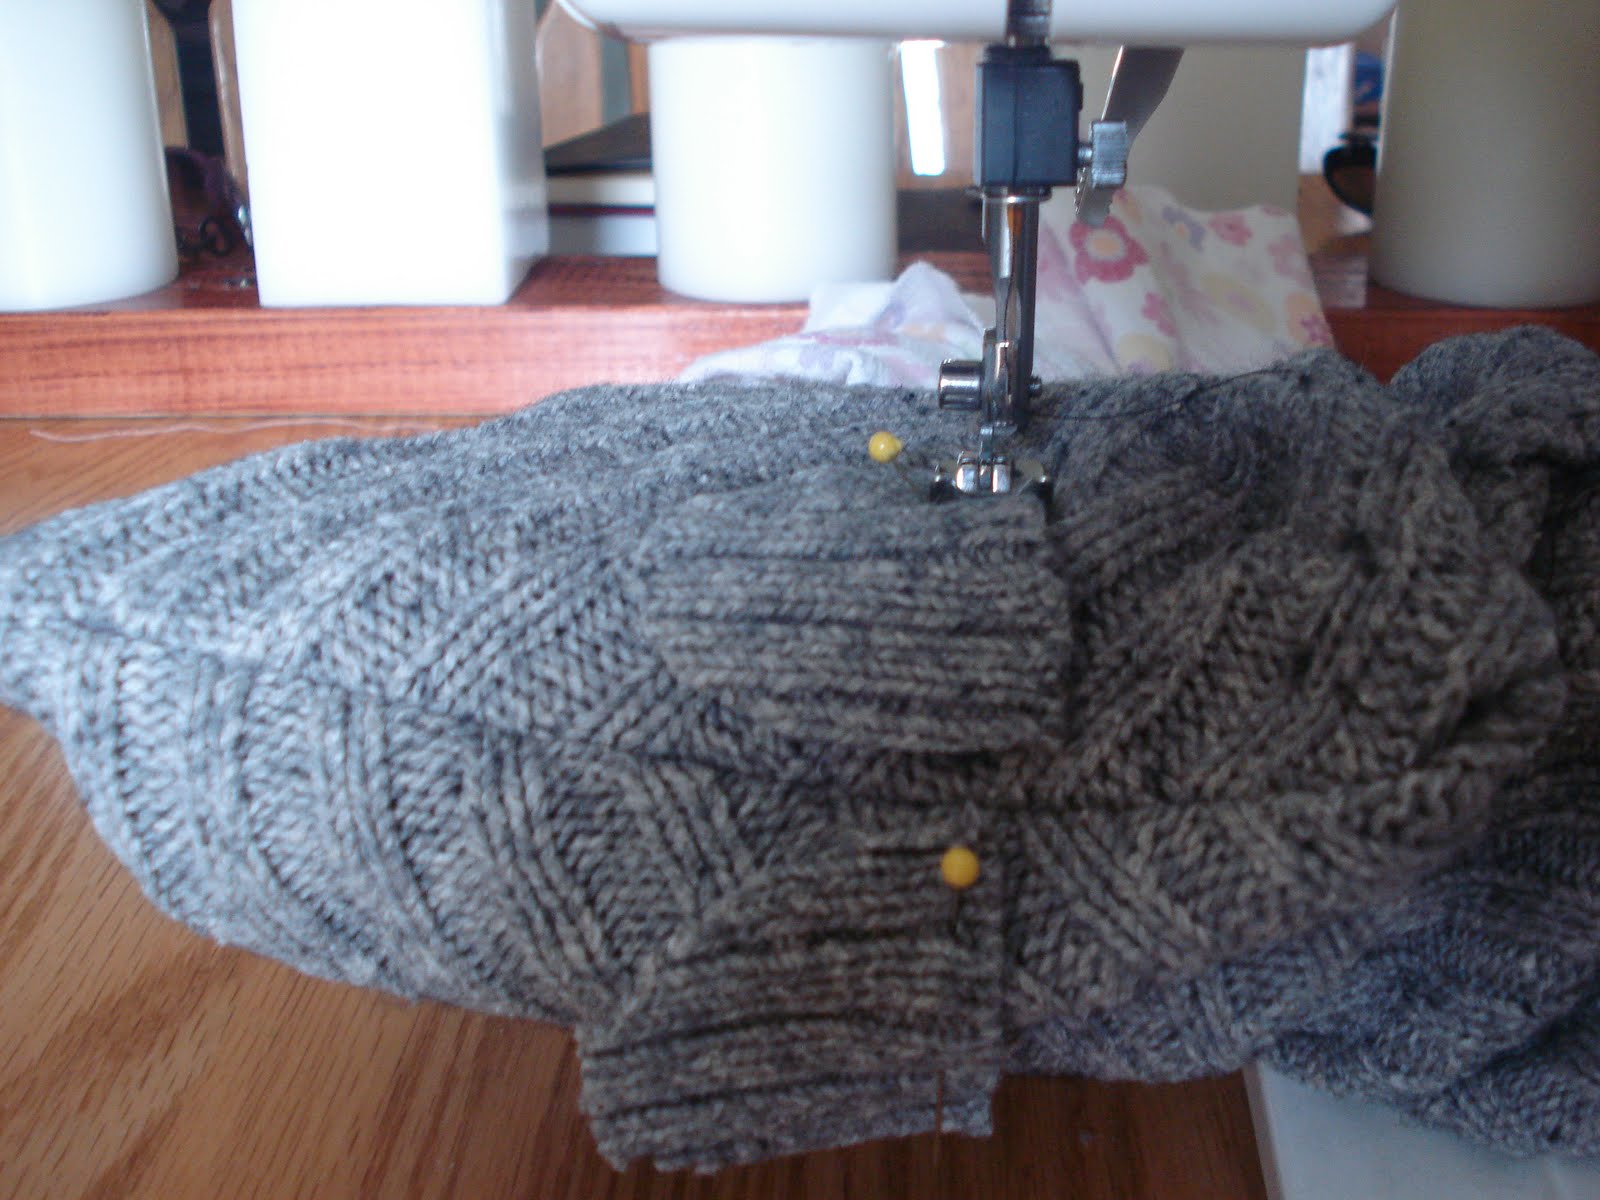
So far today I have:

  • taken Nick to play therapy
  • taken Abby to Lowes (during Nick’s appointment)
  • painted the pantry door with chalkboard paint
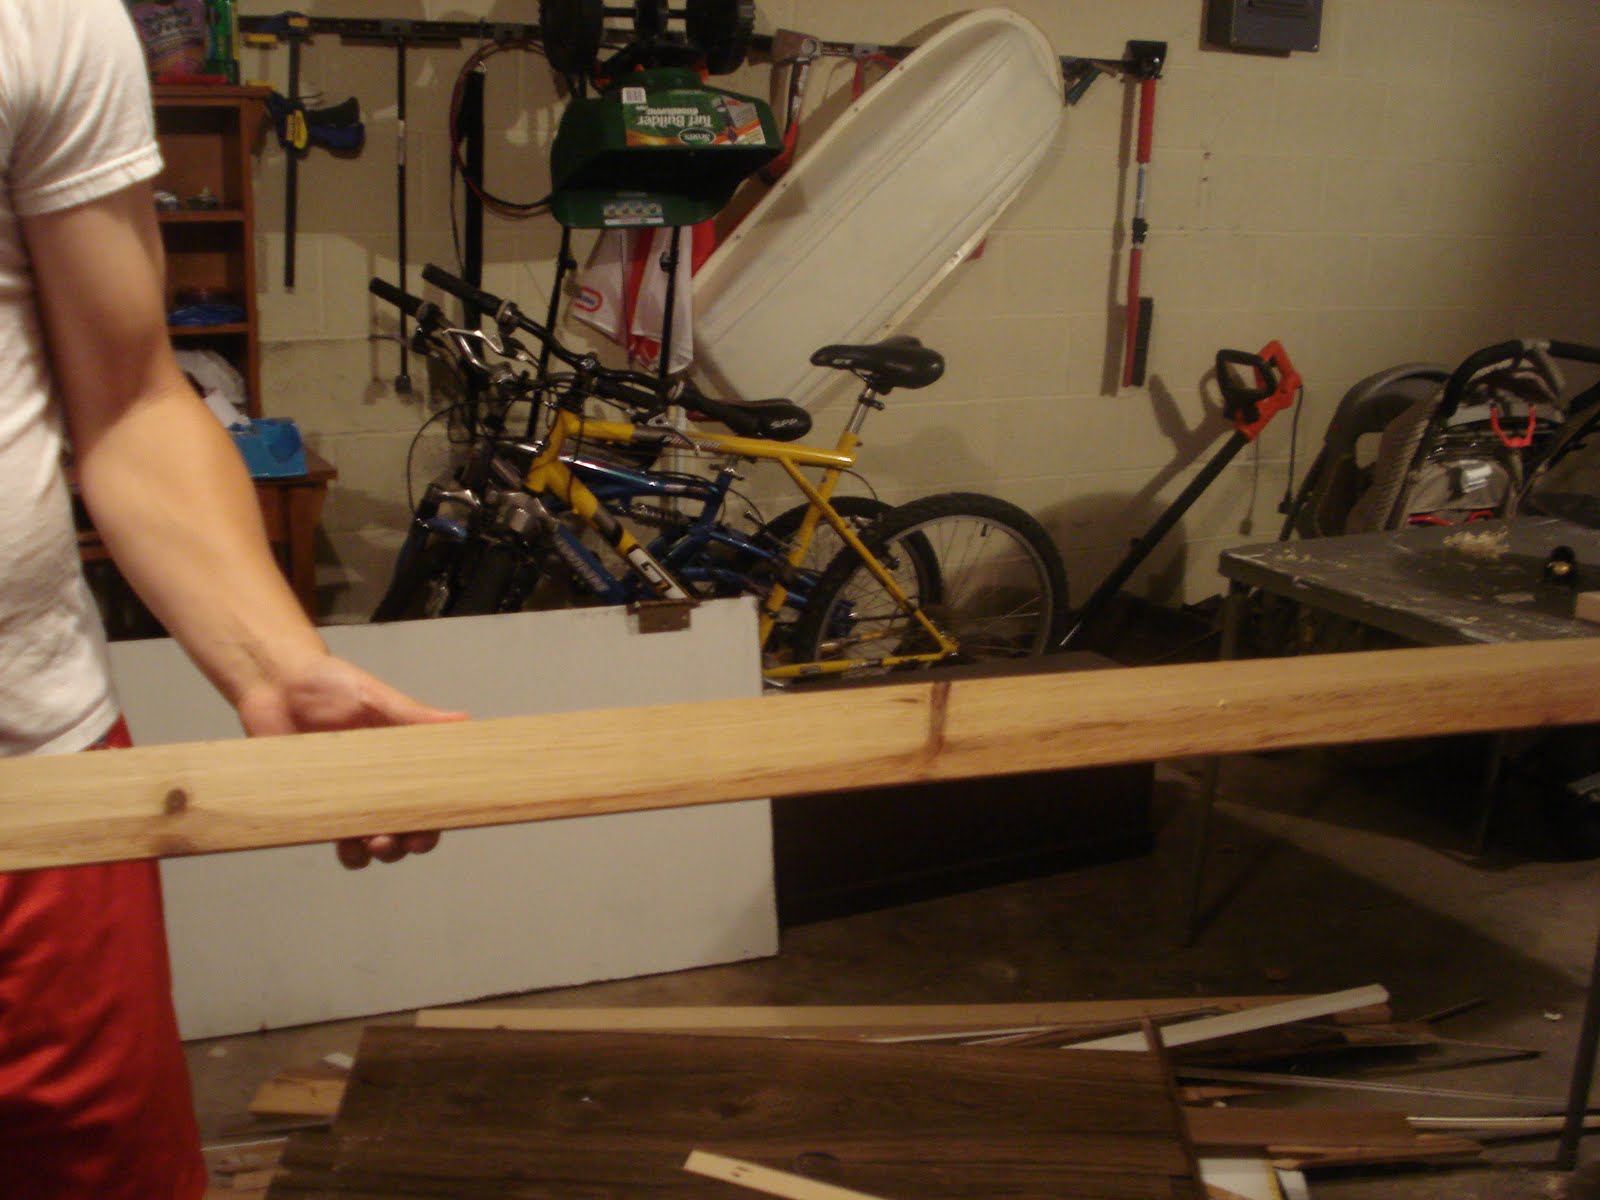
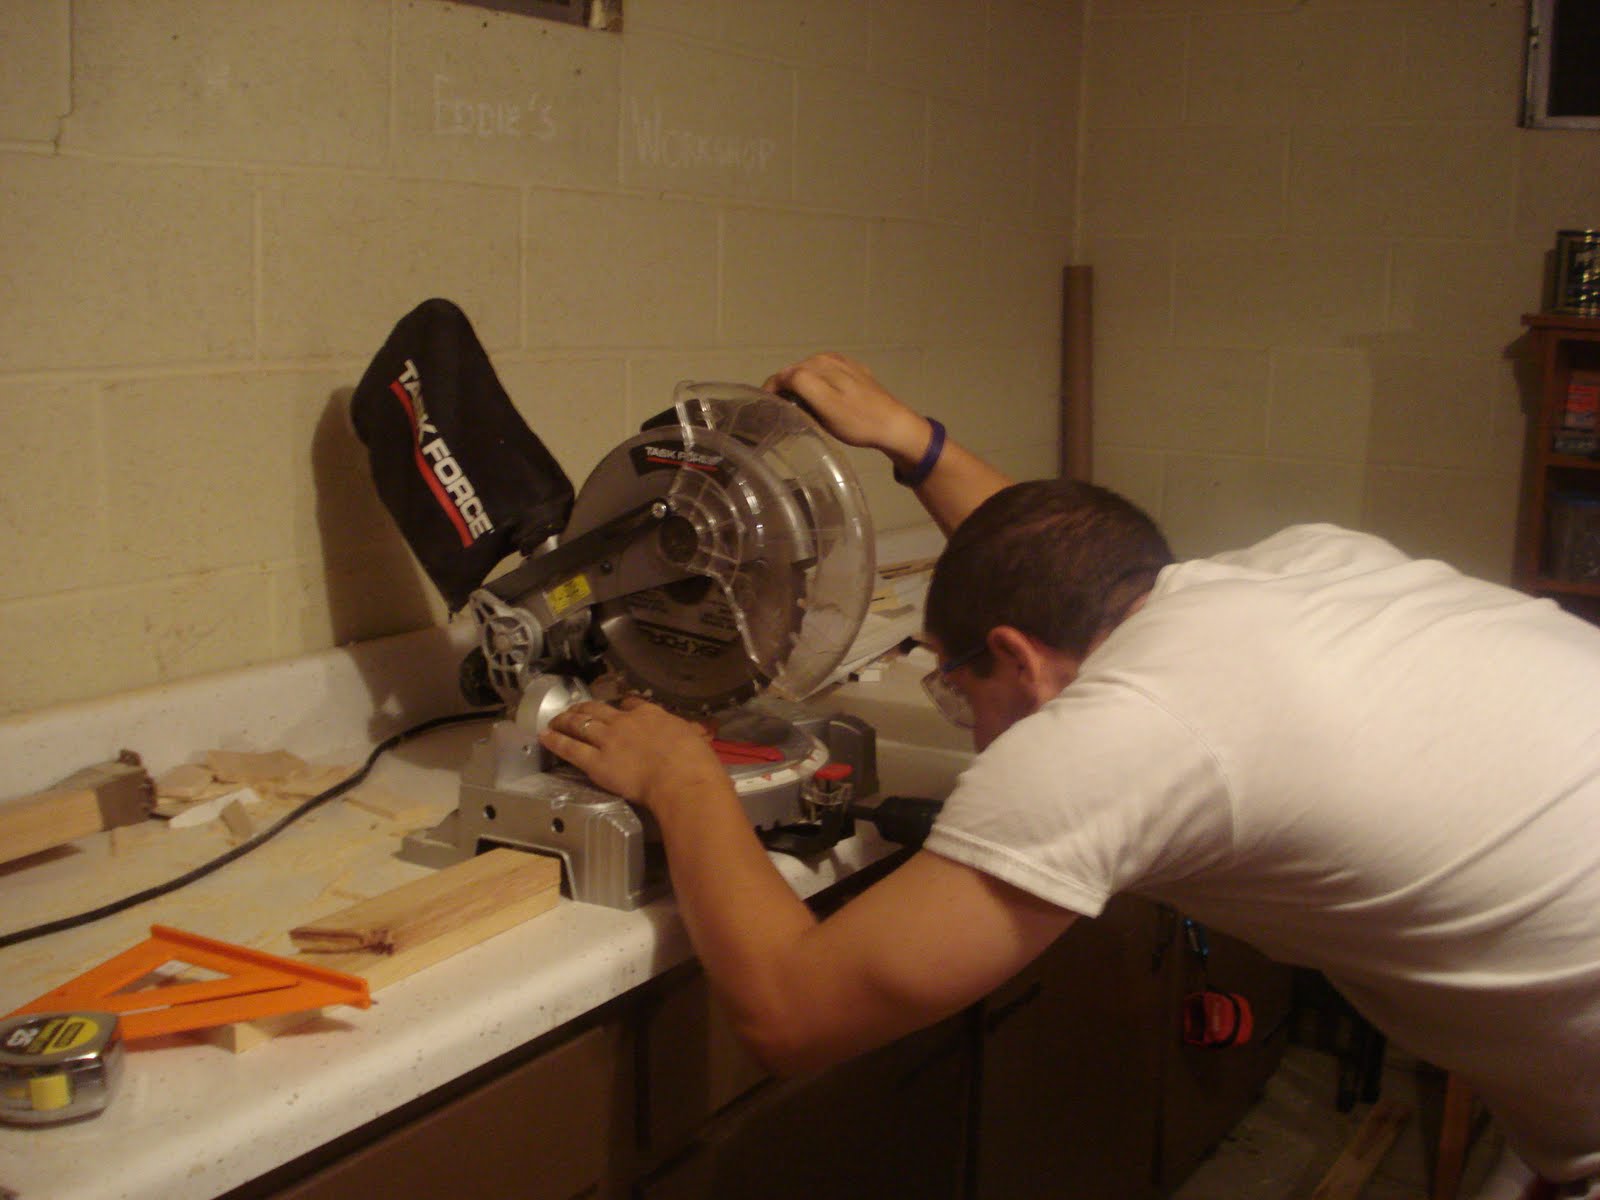
  • started building a separate chalkboard. (The man at Lowes cut the wood for me)
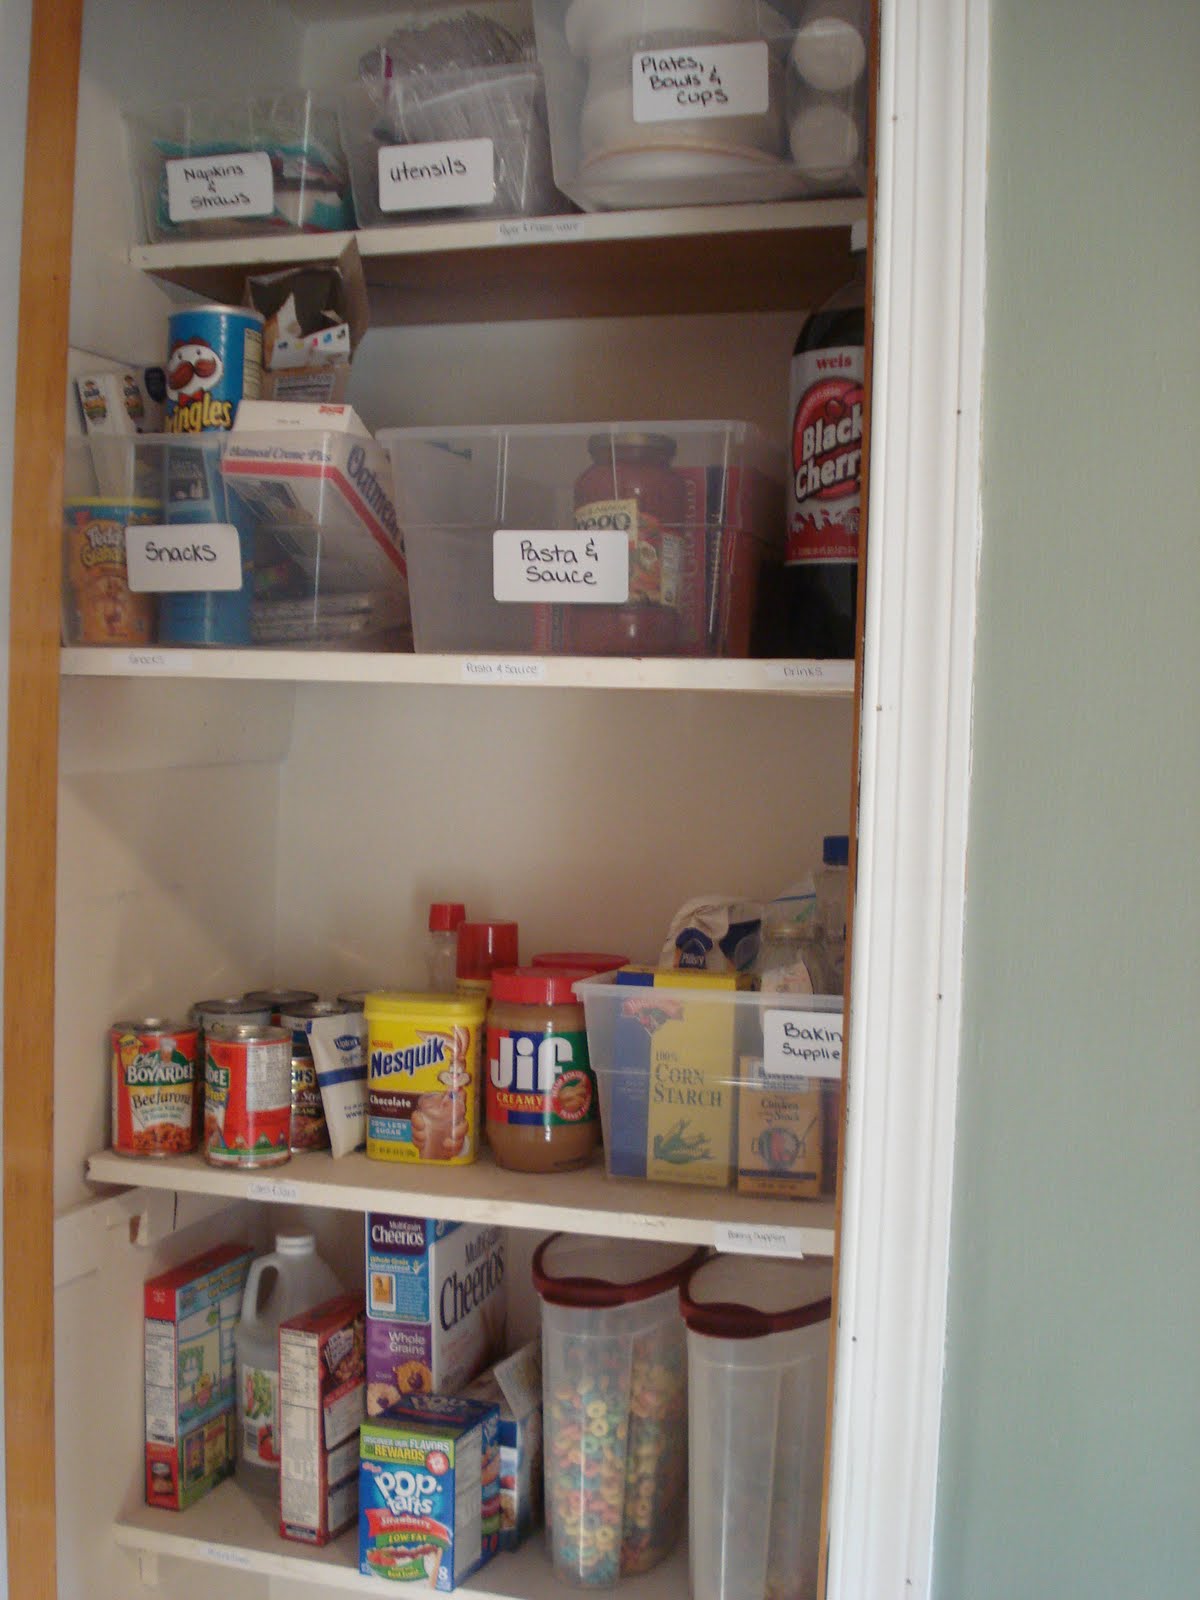
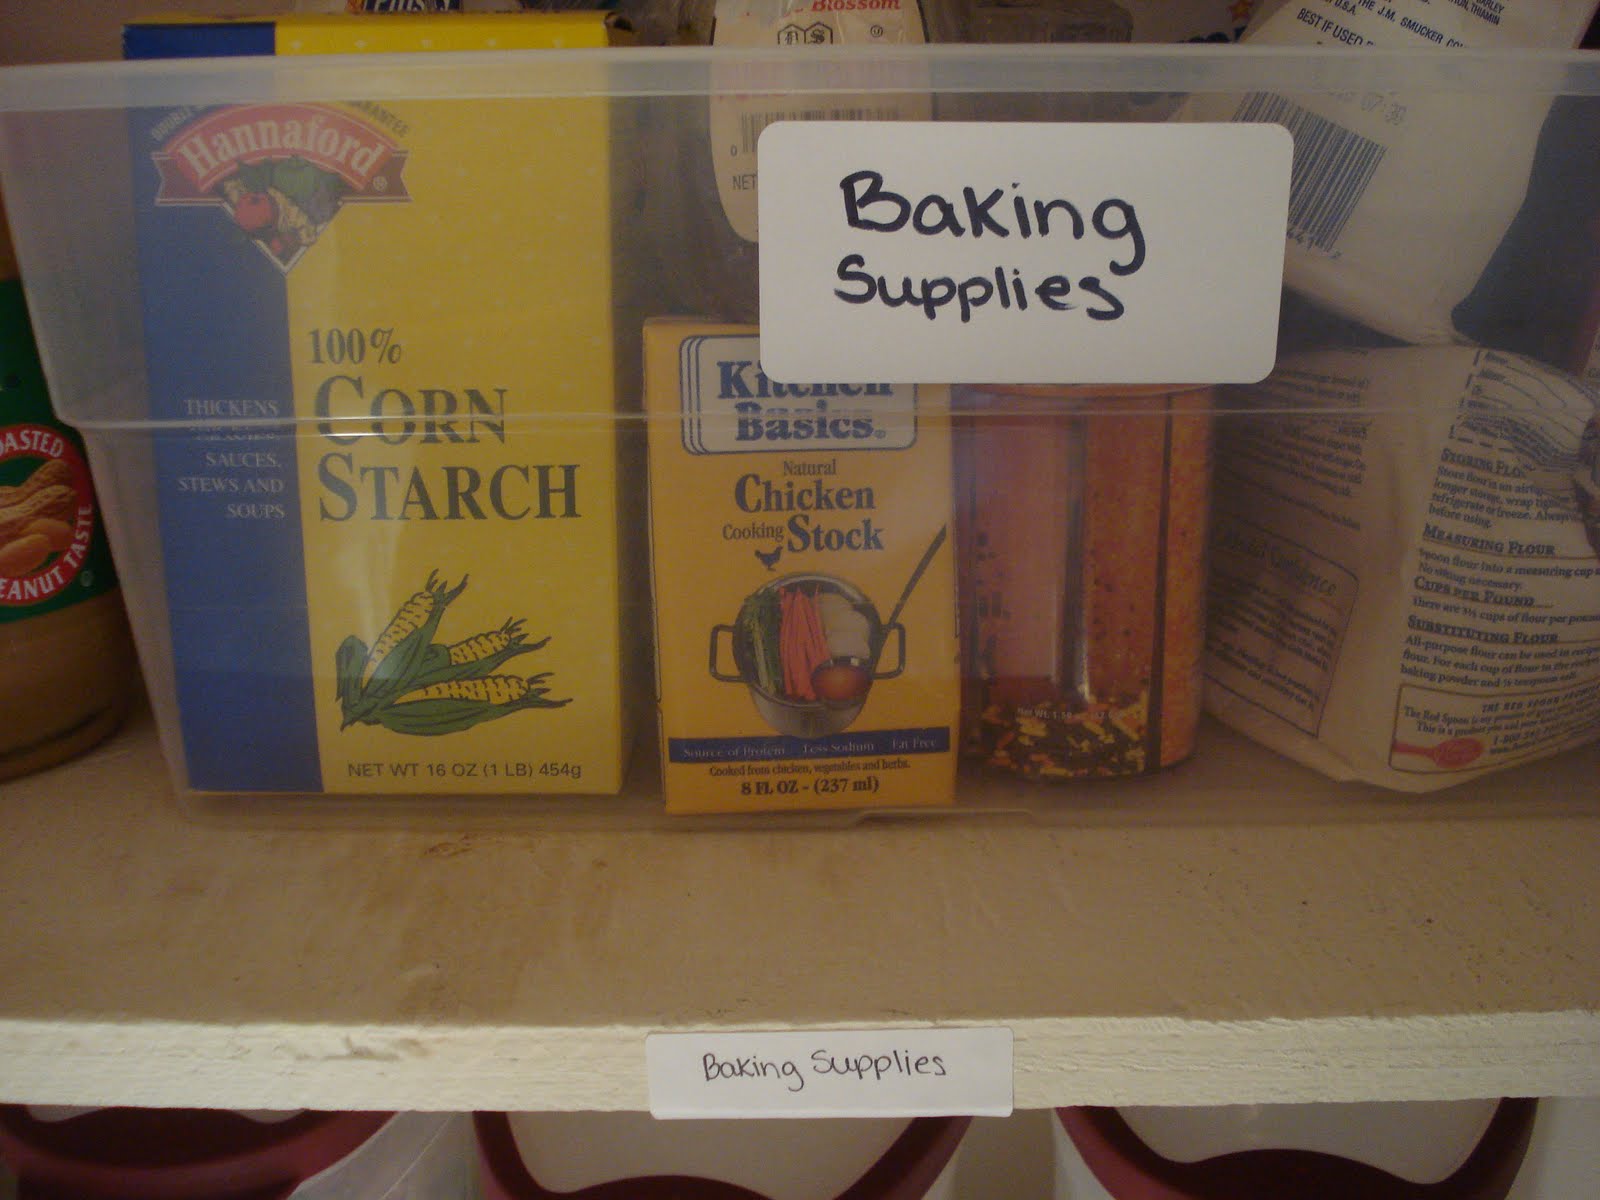
  • put chalkboard labels on some of my apothecary jars
  • made a new header for my blog (How obvious is it that I don’t know what I’m doing?)

(I also fed and clothed my kids and got them to take naps. Just thought I’d clarify.)

And now I’m taking the kids to work with me this evening. If I can be this productive every day the remodel will be finished before Eddie gets back. Yeah right.

Share this:

  • Click to share on Facebook (Opens in new window)
  • Click to share on Pinterest (Opens in new window)
  • Click to share on Twitter (Opens in new window)
  • More
  • Click to share on Pocket (Opens in new window)
  • Click to share on Tumblr (Opens in new window)
  • Click to share on Reddit (Opens in new window)
  • Click to share on LinkedIn (Opens in new window)
  • Click to print (Opens in new window)

Seashell Keepsake Sign

August 14, 2010 By: Stephaniecomment

We grow great by our dreams sea shell keepsake sign. Perfect nursery decor. What a cute way to save the shells you collect at the beach!

This seashell keepsake sign project cost me 50 cents. I bought an Oops paint sample at Home Depot earlier today.

Remember these 1×3 boards from the garage? Well, Eddie cut another one down for me. Then I painted it with the Oops paint, hot glued on some of the seashells from our beach trip in order from smallest to largest.

and Googled for quotes about growing/dreams/the beach until I found one I liked. The winner: “We grow great by [our] dreams”- President Woodrow Wilson. I just wrote the quote with a Sharpie because I’m impatient.

Voila. Cute little keepsake sign.


I think it has found a home on my kitchen windowsill. It will be much cuter when the beadboard back splash is finally up! (Don’t be surprised if it takes another year before this kitchen is finished.)

 
I think this sign would also be adorable in a nursery, or even a powder room. Let me know if you make one!

You may also like: 
So cute! How to make a miniature book wreath from upcycled materials from around the house
 

Share this:

  • Click to share on Facebook (Opens in new window)
  • Click to share on Pinterest (Opens in new window)
  • Click to share on Twitter (Opens in new window)
  • More
  • Click to share on Pocket (Opens in new window)
  • Click to share on Tumblr (Opens in new window)
  • Click to share on Reddit (Opens in new window)
  • Click to share on LinkedIn (Opens in new window)
  • Click to print (Opens in new window)

Last Hurrah

August 14, 2010 By: Stephaniecomment

In a few days my husband is leaving on a very long business trip.(This is the kind of business trip where you need to buy bear spray and convince federal personnel that 3am is the time of day that your team is least likely to be hit by oncoming traffic.) He’ll be gone a total of about 3 months, although thankfully he’ll be able to come home on and off for a few days throughout. He wanted to go on a family vacation before he left, so we spent the past few days in Ocean City. MD on the same beaches where our families vacationed when we were children.

We are lucky that my parents both own beachfront condos (the view above is from one of the balconies) and Eddie’s parents were able to stay with us and help with the kids. Sometimes we take the beach for granted because we grew up with it, but going with our own children makes us appreciate the traditions much more.

I’m glad Nick & Abby will grow up with memories of the beach

and the boardwalk
(I lovelovelove the antique rides & hand painted walls in the kid’s area!)

and especially fun times with their daddy

We’ll miss you! Stay safe.


Beach Party at Someday Crafts

Share this:

  • Click to share on Facebook (Opens in new window)
  • Click to share on Pinterest (Opens in new window)
  • Click to share on Twitter (Opens in new window)
  • More
  • Click to share on Pocket (Opens in new window)
  • Click to share on Tumblr (Opens in new window)
  • Click to share on Reddit (Opens in new window)
  • Click to share on LinkedIn (Opens in new window)
  • Click to print (Opens in new window)

One of Those Days

August 10, 2010 By: Stephaniecomment

It’s just one of those “Mom I can’t believe you make us eat vegetables.” kind of days. (Actually, there have been no vegetables involved because lunch was from Chik-Fil-A) Hubby woke up with a terrible migraine, had to do some conference calls from home while I attempted (to no avail) to keep the kiddos quiet.

Bad parenting day

Abby was fussy for 4 hours straight and refused to nap although it was obvious that the reason she was fussy was because she woke up entirely too early-and woke everyone else up along with her. Eddie left around for work 10 and I’ve been staring at faces like these ever since.

Navigated through Target with a screaming 1-year-old and a 3-year-old who insisted on walking like a big boy, which apparently also includes hiding in the empty space on the bottom shelf behind several boxes of diapers while mom is loading the cart. (Good thing I saw his little sandal poking out, I can just see myself frantically telling the sales associate that my son has been kidnapped.)

Came home to realize that a certain little monkey had put a pair of shorts in the cart that are 3 sizes too big for his sister and cost way more than I would have spent on them. Didn’t realize I had paid for them because I was busy dealing with the fact that he was literally rolling on the floor in temper tantrum mode while we were checking out.

Yup, that’s my son. The same one who gave me the lovely scab I am now sporting on my right breast because he decided the other day that he was going to hug me and then changed his mind mid-hug and tried to bite my nipple off. Literally. Yes, that was me in Target with one screaming child in the cart, one rolling on the floor yelling and trying to kick me, sporting bite marks, sweatpants, and unbrushed hair while carrying a badge in my purse that qualifies me as a “parenting specialist.”

Later, during lunch little man painted his brand new sunglasses with ketchup and then informed me, while I was washing his glasses and obviously exasperated, “Mom, ketchup is a food for painting things. I painted my sunglasses. Now can I paint my french fries?” at least I could laugh at that one.

Sigh. I am so NOT looking forward to next week when my husband leaves for three straight weeks on a business trip. It’s a good darn thing we are leaving tonight for a mini vacation. I’ll be the one sitting on the beach in a straight jacket.


Update: Less than 5 minutes after posting this my bare-bottomed son was chasing his sister around the kitchen screaming “Give me back my pants!” Welcome to the bell jar.

Share this:

  • Click to share on Facebook (Opens in new window)
  • Click to share on Pinterest (Opens in new window)
  • Click to share on Twitter (Opens in new window)
  • More
  • Click to share on Pocket (Opens in new window)
  • Click to share on Tumblr (Opens in new window)
  • Click to share on Reddit (Opens in new window)
  • Click to share on LinkedIn (Opens in new window)
  • Click to print (Opens in new window)

How to Organize a Kid-Friendly Pantry

August 9, 2010 By: Stephanie1 Comment

How to organize your small pantry with a kid-friendly system. I never thought about baskets being hard to clean!

My 3-year-old recently figured out how to open our pantry door, which led to a scary incident where I found him carrying a bottle of maple syrup around the living room and a bunch of plastic grocery store bags on the kitchen floor where my 1-year-old could get them. That could have been a disaster! Also, now that I am starting to work a few more hours there are other family members here with the kiddos more often and I wanted to make it easier for them to find what they needed for snacks & dinner time.

how to organize a kid-friendly pantry

I search blogland for some ideas for getting the pantry organized, but most of them involved glass jars, baskets that couldn’t easily been seen into or sanitized, and other ideas that just didn’t seem all that practical for my everyday life with two toddlers, so I fell back on the way that I used to organize areas in my elementary school classroom.

And now our pantry looks like this (Sorry, I forgot to take a before picture, but it was a big ol’ mess)

Organizing your pantry

I already had these plastic bins because I just about bought out Target when they had them on sale for $2 each.

I took inventory of what we had in the pantry, threw out anything that was expired, and divided everything into these groups:

  • Paper & Plastic Ware
  • Snacks
  • Pasta & Sauces
  • Drinks
  • Cans & Jars
  • Baking Supplies
  • Breakfast Foods
  • Miscellaneous

I put the paper & plastic ware on the top shelf because we don’t use it that often. I divided it into three separate bins: Napkins & Straws, Utensils (which I grouped into plastic bags according to type & the mount I would need for a small party), and Plates, Bowls, & Cups (which have a large bin)

I chose to put the snacks out of reach so that my little ones can’t reach in and grab a cookie whenever they want one, but for older children I would put it on the bottom shelf for easier access.

You could also add pictures to the bins to make it easier for kids to find what they need.

Boxes of pasta & jars of sauce have their own bin and next to that I left an open space for drink mixes or bottles of unopened soda or juice.

There is an area for cans & jars-syrup in the back!- and a large plastic bin for my baking supplies. I like the idea of the plastic bins to deter little critters (we sometimes have ant issues) from climbing into open packages of flour, etc.

The bottom shelf is for Breakfast foods so that my kids can see their choices in the morning and I left a space for miscellaneous items that didn’t seem to fit in my other categories or were too tall for the shelf where they would otherwise belong.

There are labels on the bins and also on the shelf itself to identify each section. My husband was thrilled that he could find what he wanted and even commented that it would be so much easier to put away groceries. I think it’s important to label both the bin and the shelf so that if someone takes a few bins out to make dinner then they can be sure to put them back in the correct spot.

I also have a plastic bag holder that I picked up at a little country store, but you can make one out of an old dish towel using this tutorial.

I plan to use chalkboard paint to create a chalkboard on the back of my pantry door (which is one of the cool ideas I found on blogland) but if you are renting or if you are more practical then you can just mount a clipboard on a nail inside the pantry with some paper for jotting down your store list. (That way you don’t have to re-write your list from the chalkboard.) Personally, I think the chalkboard will be a fun way to teach the kids how to write their letters and a cute and unexpected surprise for people who open the pantry.

Happy organizing!

You might also like:
10 Reasons to consider keeping your land line

Share this:

  • Click to share on Facebook (Opens in new window)
  • Click to share on Pinterest (Opens in new window)
  • Click to share on Twitter (Opens in new window)
  • More
  • Click to share on Pocket (Opens in new window)
  • Click to share on Tumblr (Opens in new window)
  • Click to share on Reddit (Opens in new window)
  • Click to share on LinkedIn (Opens in new window)
  • Click to print (Opens in new window)

Double Sided Dominoes

August 6, 2010 By: Stephanie2 Comments

How to make double-sided dominoes out of just one board from the home improvement store. Love that these can be adjusted and used by kids of multiple age groups!

This post contains an Amazon affiliate link. 

Drum roll please……

Ta-da:

Introducing Double-Sided Dominoes, the 4th Christmas gift made entirely out of stuff we already had laying around.

We turned this (focus on the board, not the messy garage)

into these

And it was easy! Plus it gets better, just be patient.

I asked hubby to do me a favor and cut the board into 28 pieces for me because I learned from this website how many pieces are in your run of the mill dominoes set (which I learned is called a Double Six set) and what each piece should look like. We happened to have a 1×3 board and we decided that cutting it into 1.5 inch pieces would work, you can do whatever size you want.

That’s Eddie. Isn’t he awesome to be doing this for me at 9pm? Check out the muscles in his arms. He’s so yummy.

Ok, enough of that.

I sanded each piece until it was as smooth as I could possibly get it. Don’t want any splinters in little fingers.

Then I just painted each piece to look like the ones I found on Domino-Games.com. I chose a pale yellow background and blue writing because those were colors I already had.

I had a hard time deciding if I wanted to do a classic dominoes game that the kids could grow into or a picture set that would be more age-appropriate for my toddlers. So I did both!

One side looks like this

And the other side looks like this


The colors I was using reminded me of the beach, plus I had the Ocean City trip we are taking next week on the brain, so this is a picture matching game with sailboats, star fish, seashells, etc. I wanted a simple game that the kids could play by themselves, independently. 

I’m making a drawstring linen bag with a blue crab applique to store them in, but that’s not finished yet. I will try to remember to post a picture when it’s done.

I am in love with the idea of making your own wooden blocks, like my friend Satoko did for her boys. Wooden toys are so expensive and you can make them yourself so cheaply! Plus when you make things yourself you get exactly what you want, like a double-sided set.

These are the blocks that my friend Satoko made:

Aren’t they adorable? And her photography skills are amazing. 

If your children are still young enough to be putting blocks in their mouths, you should use a non-toxic paint, like the ones you can find through my affiliate link here: Acrylic Paint Set of 12 Colors for use on Paper, Wood, Glass & Canvas.  

You may also like:

Great ideas for games and activities you can do with kids!

This post contains an Amazon affiliate link. 


Share this:

  • Click to share on Facebook (Opens in new window)
  • Click to share on Pinterest (Opens in new window)
  • Click to share on Twitter (Opens in new window)
  • More
  • Click to share on Pocket (Opens in new window)
  • Click to share on Tumblr (Opens in new window)
  • Click to share on Reddit (Opens in new window)
  • Click to share on LinkedIn (Opens in new window)
  • Click to print (Opens in new window)

Sadness

August 6, 2010 By: Stephaniecomment

Today I am sad and completely in shock. Yesterday a child who attended the elementary school where I taught for several years died suddenly. He was going to be starting high school this year, which makes him the same age as my little brother. I never met Damon except maybe once in passing, but I knew his little sister well. Devin was in my classes for two years in a row.

The death of a child is always sad, but the very sudden death of an otherwise healthy, active boy is even more difficult to understand. From what I have heard so far, they believe his death was caused by a blood clot. The fact that it happened to such a wonderful family makes it just unbearable.

During the time that Devin was in my classes it left an impression on me that she almost always had such pride and respect in her voice when she talked about Damon. I was honestly surprised when I learned he was only a year older than she was, the way this 4th grader talked about her big brother made you think he was a big shot on a college campus or a military hero. I remember hoping that one day my children would have that kind of respect for their siblings.

Devin was always a special student. As teachers we try hard not to have favorites, but there are some students who just have a special connection with you and Devin was one of them for me. It was impossible not to love her, she had such joy and exuberance and truly applied every ounce of effort that she had to any task you asked her to do. I am deeply saddened that Damon’s death might rob her of those qualities.

I also have a deep respect for Devin & Damon’s parents, especially their mother because she is the person I had the most contact with as Devin’s teacher. Mrs. M is the only parent I’ve worked with over the course of my career thus far who came back to me after a confrontation to apologize. She lost her temper over something so small I don’t even remember it (this happens often when you work with parents of gifted children), but the next day she sent me a written letter of apology. I have worked with hundreds of children and parents, but she was the only one who ever did that and it meant a lot to me coming at a very stressful time for me professionally. She carries herself with strength and dignity and has a strong passion and dedication for her children. Devin and Damon (as I’ve heard from stories other teachers have told) were both such kind children from a wonderful family.

This is truly a tragedy. All I can take from it is the knowledge that each day with our children is a gift that we must make the most of. I hope the M. family can take comfort in the fact that they used their time the best that they could have which is evidenced by the way that people who knew Damon are remembering him.

Share this:

  • Click to share on Facebook (Opens in new window)
  • Click to share on Pinterest (Opens in new window)
  • Click to share on Twitter (Opens in new window)
  • More
  • Click to share on Pocket (Opens in new window)
  • Click to share on Tumblr (Opens in new window)
  • Click to share on Reddit (Opens in new window)
  • Click to share on LinkedIn (Opens in new window)
  • Click to print (Opens in new window)

Ruffle Pants

August 2, 2010 By: Stephanie1 Comment

If you were looking for a pair of pants appropriate for lounging with a furry friend or navigating an obstacle course of dining room chairs, these are for you…

I am in love with a new blog, Brown Paper Packages. It’s written by a mom who sews really cute & easy-to-make clothes for her girls.

I saw that she had a tutorial for turning a mom-sized long sleeve t-shirt into daughter-sized leggings. I happened to have a brown shirt that I didn’t wear anymore because it had a bleach stain on the neckline that worked perfectly. (There is also a tutorial on how to use the same shirt to make a matching tank top for your daughter, but I don’t have enough fabric left after doing the ruffles.) I also totally think you could use this technique to make boy’s pajama pants.

I haven’t sewn any clothing since I was 8-years-old taking sewing lessons at the craft store, so they are far from perfect, but I think they’re adorable. I kept accidentally cutting holes in the thin, stretchy fabric so I added ruffles on the seat and a little bow on the front leg to cover my mistakes.

It took about 2 hours because I had to teach myself how to do the ruffles with baste stitching by watching a few Youtube videos. It. probably would take less than 20 minutes for a better seamstress if you left off the ruffles. (and didn’t keep poking holes in your fabric)

I am loving the idea of re-purposing clothes because a lot of the seams are already done and it is cheaper to buy clothes on clearance (or take them out of your closet) than it is to buy fabric.

Can you see the little bow on the left?

ruffled rear end

My reluctant model

Share this:

  • Click to share on Facebook (Opens in new window)
  • Click to share on Pinterest (Opens in new window)
  • Click to share on Twitter (Opens in new window)
  • More
  • Click to share on Pocket (Opens in new window)
  • Click to share on Tumblr (Opens in new window)
  • Click to share on Reddit (Opens in new window)
  • Click to share on LinkedIn (Opens in new window)
  • Click to print (Opens in new window)

Dollhouse Diorama

July 29, 2010 By: Stephanie5 Comments

Bear with me, both the second grade teacher and little girl in me are about to come out simultaneously in a an explosion of handcrafted cuteness otherwise known as my third no-spend Christmas gift: the dollhouse diorama.

I am especially proud of this one because I stuck with it and finished it (Ok, I’m not totally finished, I still have some embellishment left to do) even though it took a looooong time by my standards, 3+ hours (Normally I have a 1 hour patience threshold.) and also because after I finished it I searched my friend the internet to see if anyone else had made one the same way. I couldn’t find one. Maybe it’s out there, but since I couldn’t find it I’m going to bask in the moment and assume this is an original idea.

My inspiration was this adorable puffy dollhouse over at Little Page Turners.

Seriously, how stinkin’ cute is that? I wanted to make one, but I had taken a solemn vow to make my dollhouse strictly with stuff I already had. Sadly, I did not have any of the plastic sheeting used for the structure. What I did have was an abundant supply of cardboard and a love of shoebox dioramas dating back almost 20 years to when I was a little girl making them for book reports.

My mission was to take this shoe box and transform it into a puffy dollhouse.

I started by cutting along the edges to get 5 pieces: the bottom (which became the back), 2 long sides, and 2 short sides.

I traced each side twice. Once onto the purple fabric and once onto the white fabric. (and by fabric I mean two old spit up rags that had been thoroughly washed)

Then I cut out all of the pieces and sewed the matching ones, right sides together, together on three sides. Turn them back right-side-out and you have basically made a slip cover for each piece.

Then, with my little helper (big brother was napping), I also traced each piece onto quilt batting. (Which I bought 4 years ago with the bright idea that I was going to make a friend a quilt as a wedding gift. Said “quilt”-all two rows of it- is still in my craft basket. They got a nice store-bought embroidered blanket from Things Remembered instead.)

Then I used a can of spray adhesive that I must have had sitting in my craft basket unused for at least 5 years to stick the batting to each piece.

Each piece needed to be trimmed in order to fit inside my slip covers. I just made sure to keep the scale of the overall box the same. (The edges that are going to wind up touching each other need to match.) Then slip each piece into its corresponding cover, with the padded side towards the fabric that you are using for the outside of the dollhouse.

Hand stitch the last side of each piece closed.

Ok, here comes the hard part….Use embroidery thread to hand-stitch the outside edges and put the box back together. I am NOT skilled with embroidery thread. (In fact the only reason I even have embroidery thread is because I went through a “I think I’ll learn how to cross-stitch” phase, but then I realized it was hard and I quit.) This part took the longest. It’s not perfect by any means, but I wanted the overall look to be whimsical and homemade, so I’m ok with that.

Each edge should look like this:

I chose to leave the top and bottom of one of my sides un-stitched so that I could have a real swinging door. I did reinforce the door by stitching on the inside edge as well.

Once the box was padded and back together I was really sick of hand-stitching and fighting with embroidery thread-that stuff is so annoying! So I decided to make the people who would live in my dollhouse. I was so excited when I remembered I had these doll pins! I bought them at the dollar store by accident a few years ago. I thought I was buying clothes pins to use in my classroom. I couldn’t use these for what I had intended, so they have been sitting with my craft stuff for at least three years.

I just modge-podged on some fabric scraps for clothes, yarn for the girls’ hair, and used a black sharpie for the faces.

See: before… during… after

I managed to get that all done yesterday and then this morning I couldn’t sleep very well so I went back and added some embellishment to the inside before the kids woke up.

It’s done! Well, it could theoretically be done, but I still have some stuff I want to add. I just hand-stitched fabric scraps to the inside to look like windows and furniture. I wasn’t even that careful about it because I wanted it to look like it came straight out of a child’s imagination.

Here’s a picture with the door open:

And one with it shut:

There you go. Free puffy dollhouse with dolls, courtesy of mommy.

UPDATE:

Ok, that’s better. I wasn’t satisfied with this one yet. It was looking a little too “I made this out of a shoe box” for my taste. I needed it to live up to the inspiration piece. So I took the lid frm the shoebox, gave it the same treatment with fabric and batting, and added a hinged front, just like the one from Little Page turners. I personalized the front with a monogram of my daughter’s initials. It closes around a fabric-covered button on the top.

Closed:

I could totally see making one of these into a mailbox. Maybe that will be my next project for Nicholas.

And open:

I also like that this gives more surface area to play with the dolls.

I feel better now.

And I didn’t need to spend $49 on this Pottery Barn puffy dollhouse


Or the $89 Amazon.com wanted for this one from Disney

I might still make some puffy furniture to go with mine. Either way, I saved at least $49, bringing my 3 day total to $127 in savings.

giveaways

Share this:

  • Click to share on Facebook (Opens in new window)
  • Click to share on Pinterest (Opens in new window)
  • Click to share on Twitter (Opens in new window)
  • More
  • Click to share on Pocket (Opens in new window)
  • Click to share on Tumblr (Opens in new window)
  • Click to share on Reddit (Opens in new window)
  • Click to share on LinkedIn (Opens in new window)
  • Click to print (Opens in new window)

How to Make Puppets for Kids from An Old Sweater

July 28, 2010 By: Stephanie15 Comments

How to make puppets for kids out of the sleeves from your old sweaters.

Meet sweater puppets. They’re like a chic, stylish cousin to the sock puppet and pretty much just as easy. Plus, once again, I got a no-spend Christmas present for the kids out of this project. I am tempted to go all out and do a completely no-spend Christmas, but that would mean putting some of the things I am most excited to try (felt steamed crabs!) on the back burner….we shall see.

Anyway, I got this idea from this tutorial and I just had to try it since I already had the stuff to make it around my house.

Once you start making these you will be addicted! Each one only took about 20 minutes.

How to Make Puppets for Kids from an Old Sweater: 

I started with an old sweater dress that had a hole in it and one of Abby’s baby blankets (ok, it’s actually a spit-up rag) My sweater was more than 60% cotton, so I skipped the felting step and just left it as-is. (Only 100% wool will felt)

Cut off the sleeves (You only need one sleeve for each puppet)

Turn it inside out, straight stitch over the hole you just made by cutting the sleeve off, and leave the other end open. Turn it back right side out.

Cut two little round pieces from another part of the sweater. These will be the ears. The only difference between my puppet and the tutorial is that because I didn’t felt the sweater I had to stitch around the edge of the ears so they wouldn’t unravel.

Sew the ears to the top of the head. Make sure to use a matching thread because this seam is visible.

Finally, cut some circles out of contrasting fabric. This is where the baby blanket came in. I cut out the polka dots. You will need one circle for the nose and two for the eyes.

Hand stitch the circles in place. After this step, I also took a Sharpie and added pupils. It was so cute and easy I had to make two!

They started out intended to be mice, but I think they look more like wolves. I think I might just need to get my hands on some pink sweaters and make each big bad wolf a set of three little pigs to go with it.

They’ve even made the November TOP 10 in Iron Crafter! Click here to vote for them:

And, as always, I like to see how much money I saved by making them myself out of stuff I already had.

Rosie Hippo charges $49 for their set of 3, and Land of Nod charges almost $22 each for theirs. I think I’ll keep my free ones, thanks.

That means thus far I have saved $78 in two days since I didn’t pay $34 for a Pottery Barn rag doll or $44 for two Land of Nod puppets. Not too shabby.


Share this:

  • Click to share on Facebook (Opens in new window)
  • Click to share on Pinterest (Opens in new window)
  • Click to share on Twitter (Opens in new window)
  • More
  • Click to share on Pocket (Opens in new window)
  • Click to share on Tumblr (Opens in new window)
  • Click to share on Reddit (Opens in new window)
  • Click to share on LinkedIn (Opens in new window)
  • Click to print (Opens in new window)
  • « Previous Page
  • 1
  • …
  • 47
  • 48
  • 49
  • 50
  • 51
  • …
  • 53
  • Next Page »
  • Facebook
  • Instagram
  • Pinterest
  • RSS
  • Twitter

Welcome! I’m Steph.

This is a little corner of the internet we like to fill with honesty, heart, and humor. Read More…

Cover for Binkies and Briefcases with Stephanie Giese
19,205
Binkies and Briefcases with Stephanie Giese

Binkies and Briefcases with Stephanie Giese

Stephanie Giese is an indie author based in Florida. She writes stories about realistic problems with humor, heart, and sass. Her work has a strong focus on mental health and consent. Her North Bay small-town romance series is set for release in 2025.

Binkies and Briefcases with Stephanie Giese

4 months ago

Binkies and Briefcases with Stephanie Giese
I know it’s a small thing, but I believe small things can add up to big changes. my entire North Bay series, including Out of Left Field, Right as Rain, and Way Off Base, is free on Kindle from Jan. 30-Feb. 3. Please take the funds you might have spent on my books this week and reallocate them toward the areas in our country that need them the most. Follow creators like Dad Chats who can direct you toward practical needs local to them. I hope my quirky romcoms can bring you some comfort and joy during difficult times, and I hope together we can take small, practical steps toward big changes. ... See MoreSee Less

Photo

View on Facebook
· Share

Share on Facebook Share on Twitter Share on Linked In Share by Email

Binkies and Briefcases with Stephanie Giese

4 months ago

Binkies and Briefcases with Stephanie Giese
I know there is an overall feeling of helplessness in our country right now. So many of us are at a loss for what to do beyond making phone calls and social media posts (which are still important, but can feel like not enough). I believe strongly in the power of small things adding up to big ones. As one person, I might not be able to do much, but what I CAN do is use my voice and my books to work toward the change I’d like to see. That’s why, for the next five days, from Jan. 30-Feb 3, I’m making the Kindle versions of my entire North Bay series (Out of Left Field, Right as Rain, and Way Off Base) completely free. Art has power, and I do hope these comedies can bring you some comfort and joy in difficult times, but most importantly, I also hope you’ll consider redirecting the funds you might’ve spent on my books and donating instead to one of the many charities working tirelessly in our cities right now. If you are located in an area like Minnesota or Portland, please use the space below to make people aware of the organizations in your area that need help. ... See MoreSee Less
View on Facebook
· Share

Share on Facebook Share on Twitter Share on Linked In Share by Email

Reader’s Choice

Image HTML map generator

Follow Me on Pinterest

featured-on

What You’re Saying

  • 28 Best Stone Fireplace Ideas And Designs - Perfect Decor Place on DIY Stone Fireplace with AirStone
  • Kevin Hicks on How to Budget for Building Your Own Home
  • Amy on DIY Stone Fireplace with AirStone
  • Gendered clothing - GenderEd on A Target Intervention on Behalf of My Daughters
  • Wellshop Store on Dressing Our Daughters: How Target Responded to My Last Blog Post

Latest Posts

ALL I Never Knowed: The Book Is Here!

If you’re new here, you may want to subscribe to my Email Newsletter. Thanks for visiting!Welcome back! Be sure to check out my Email Newsletter. Thanks for visiting!It’s finally here, in my hands. It has been a loooong time in the making, but our book, All I Never Knowed: Mental Illness, a Mother’s Love, and […]

Share this:

  • Click to share on Facebook (Opens in new window)
  • Click to share on Pinterest (Opens in new window)
  • Click to share on Twitter (Opens in new window)
  • More
  • Click to share on Pocket (Opens in new window)
  • Click to share on Tumblr (Opens in new window)
  • Click to share on Reddit (Opens in new window)
  • Click to share on LinkedIn (Opens in new window)
  • Click to print (Opens in new window)

Save Money with Fetch

Hey everyone! This is Chelsea, Steph’s asistant, back with the simplest app for getting cash back on things you’re already buying! We’ve covered Ibotta, Shopkick, Coupons.com, Swagbucks and we’re all saving hundreds of dollars by now, right? RIGHT!? I’m really hoping you guys have jumped on the rebate app savings train because it’s just so […]

Share this:

  • Click to share on Facebook (Opens in new window)
  • Click to share on Pinterest (Opens in new window)
  • Click to share on Twitter (Opens in new window)
  • More
  • Click to share on Pocket (Opens in new window)
  • Click to share on Tumblr (Opens in new window)
  • Click to share on Reddit (Opens in new window)
  • Click to share on LinkedIn (Opens in new window)
  • Click to print (Opens in new window)

Splendid Spoon Review

I was excited to receive a box of products to try from Splendid Spoon this summer! They invited me to try their line of plant-based, ready-to-eat foods and delivered them right to my door. Check one in the pro column for convenience. I did receive these products free of charge in order to rate them […]

Share this:

  • Click to share on Facebook (Opens in new window)
  • Click to share on Pinterest (Opens in new window)
  • Click to share on Twitter (Opens in new window)
  • More
  • Click to share on Pocket (Opens in new window)
  • Click to share on Tumblr (Opens in new window)
  • Click to share on Reddit (Opens in new window)
  • Click to share on LinkedIn (Opens in new window)
  • Click to print (Opens in new window)

My Networks

#BlogHer15: Experts Among Us Voices of the Year Honoree